crwdns2933423:0crwdne2933423:0

Zenbre SoundBank Z3 Control Interface Circuit Board Replacement

crwdns2942213:0crwdne2942213:0

  1. Zenbre SoundBank Z3 Control Interface Circuit Board Replacement, Bottom Cover: crwdns2935265:01crwdnd2935265:01crwdnd2935265:02crwdne2935265:0 Zenbre SoundBank Z3 Control Interface Circuit Board Replacement, Bottom Cover: crwdns2935265:01crwdnd2935265:02crwdnd2935265:02crwdne2935265:0
    • Power off the SoundBank Z3.

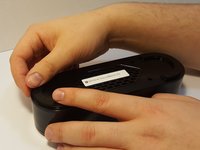
    • Turn over the device.

    • Peel the silicone feet up to remove.

    • No extra adhesive is needed to reapply the feet as long as the sticky side is not touched.

  2. Zenbre SoundBank Z3 Control Interface Circuit Board Replacement: crwdns2935265:02crwdnd2935265:01crwdnd2935265:01crwdne2935265:0
    • Remove all eight of the 11 mm Phillips screws from the bottom of the device.

  3. Zenbre SoundBank Z3 Control Interface Circuit Board Replacement: crwdns2935265:03crwdnd2935265:01crwdnd2935265:02crwdne2935265:0 Zenbre SoundBank Z3 Control Interface Circuit Board Replacement: crwdns2935265:03crwdnd2935265:02crwdnd2935265:02crwdne2935265:0
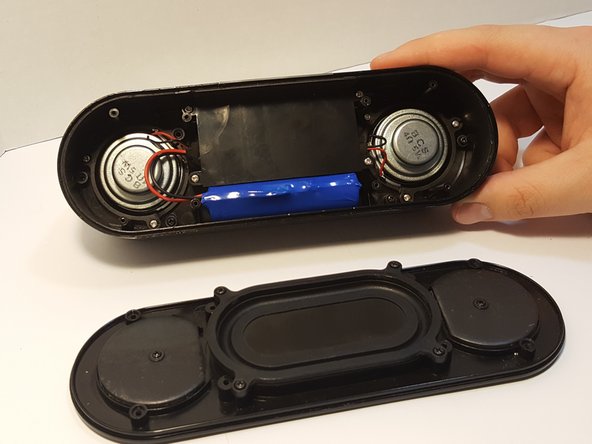
    • Remove the bottom panel speaker using an iFixit opening tool.

  4. Zenbre SoundBank Z3 Control Interface Circuit Board Replacement, Motherboard Cover: crwdns2935265:04crwdnd2935265:01crwdnd2935265:03crwdne2935265:0 Zenbre SoundBank Z3 Control Interface Circuit Board Replacement, Motherboard Cover: crwdns2935265:04crwdnd2935265:02crwdnd2935265:03crwdne2935265:0 Zenbre SoundBank Z3 Control Interface Circuit Board Replacement, Motherboard Cover: crwdns2935265:04crwdnd2935265:03crwdnd2935265:03crwdne2935265:0
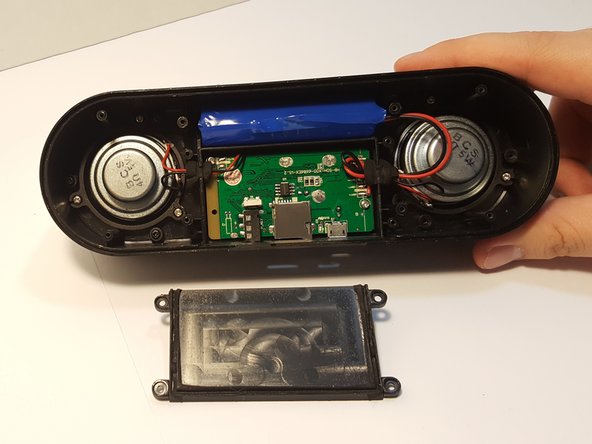
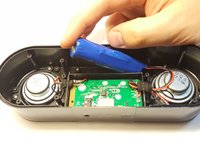
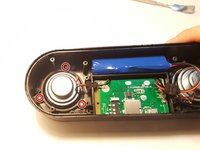
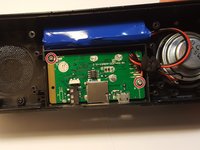
    • Remove the four 4.5 mm silver Phillips screws that secure the plastic panel covering the motherboard.

    • Remove the plastic panel.

  5. Zenbre SoundBank Z3 Control Interface Circuit Board Replacement, Battery: crwdns2935265:05crwdnd2935265:01crwdnd2935265:02crwdne2935265:0 Zenbre SoundBank Z3 Control Interface Circuit Board Replacement, Battery: crwdns2935265:05crwdnd2935265:02crwdnd2935265:02crwdne2935265:0
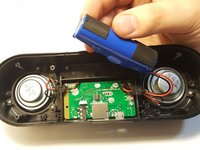
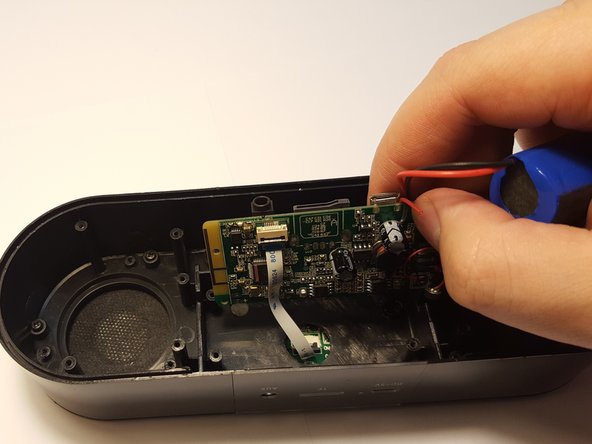
    • Remove the battery from the holder. It may be difficult the first time.

    • Use a spudger between the battery and speaker wall to loosen it from its surroundings.

    • If the battery is punctured, leaking, or bloated/puffy, it may be hazardous and should be properly disposed of.

  6. Zenbre SoundBank Z3 Control Interface Circuit Board Replacement: crwdns2935265:06crwdnd2935265:01crwdnd2935265:02crwdne2935265:0 Zenbre SoundBank Z3 Control Interface Circuit Board Replacement: crwdns2935265:06crwdnd2935265:02crwdnd2935265:02crwdne2935265:0
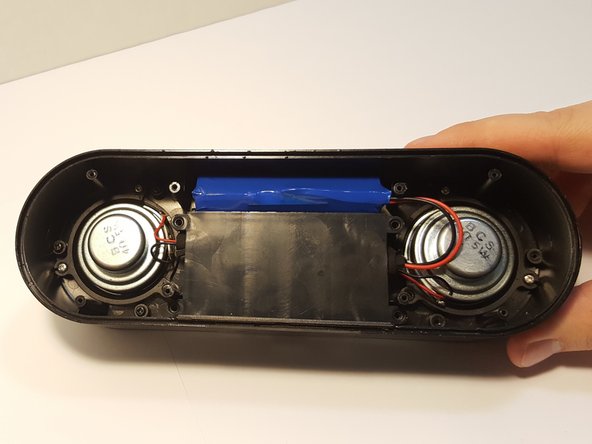
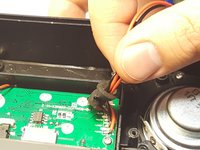
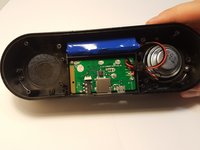
    • Remove the pressure-fitted foam from the slot by hand.

    • Unravel and remove foam from the wires.

    • When reassembling, the foam can be re-wrapped if care is taken when handling it.

  7. Zenbre SoundBank Z3 Control Interface Circuit Board Replacement: crwdns2935265:07crwdnd2935265:01crwdnd2935265:01crwdne2935265:0
    • Using a soldering iron, remove the leads, separating the battery from motherboard.

    • Follow this guide to help you remove the wires from the motherboard if you are unfamiliar with soldering.

  8. Zenbre SoundBank Z3 Control Interface Circuit Board Replacement, Speakers: crwdns2935265:08crwdnd2935265:01crwdnd2935265:02crwdne2935265:0 Zenbre SoundBank Z3 Control Interface Circuit Board Replacement, Speakers: crwdns2935265:08crwdnd2935265:02crwdnd2935265:02crwdne2935265:0
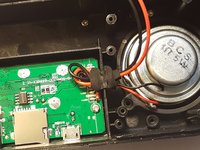
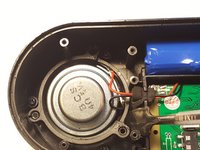
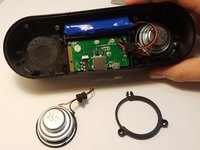
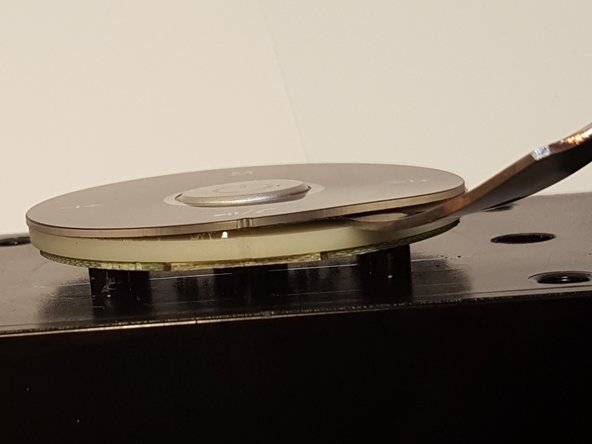
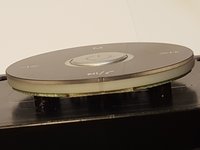
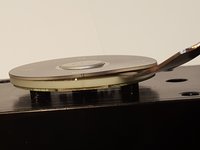
    • Remove the three screws that are holding the speaker down.

    • Be careful not to rip out the speaker while taking out the screws.

  9. Zenbre SoundBank Z3 Control Interface Circuit Board Replacement: crwdns2935265:09crwdnd2935265:01crwdnd2935265:02crwdne2935265:0 Zenbre SoundBank Z3 Control Interface Circuit Board Replacement: crwdns2935265:09crwdnd2935265:02crwdnd2935265:02crwdne2935265:0
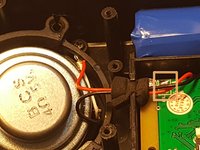
    • Desolder the speaker joints from the motherboard. Follow this How To Solder guide for help with desoldering.

  10. Zenbre SoundBank Z3 Control Interface Circuit Board Replacement: crwdns2935265:010crwdnd2935265:01crwdnd2935265:02crwdne2935265:0 Zenbre SoundBank Z3 Control Interface Circuit Board Replacement: crwdns2935265:010crwdnd2935265:02crwdnd2935265:02crwdne2935265:0
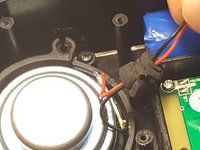
    • Remove the speaker from the motherboard.

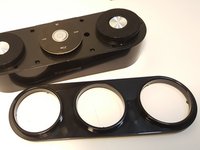
    • Remove the speaker ring.

    • Be careful not to remove other components in the speaker.

    • Repeat Steps 5-7 with the other speaker.

  11. Zenbre SoundBank Z3 Control Interface Circuit Board Replacement, Control Interface Circuit Board: crwdns2935265:011crwdnd2935265:01crwdnd2935265:02crwdne2935265:0 Zenbre SoundBank Z3 Control Interface Circuit Board Replacement, Control Interface Circuit Board: crwdns2935265:011crwdnd2935265:02crwdnd2935265:02crwdne2935265:0
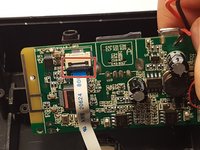
    • Remove the two 4.5 mm Phillips silver screws holding down the motherboard.

    • Note the ribbon that connects the motherboard to the control interface. Be careful with this while removing the motherboard, as it can tear easily.

    • Lift the motherboard out of its housing.

  12. Zenbre SoundBank Z3 Control Interface Circuit Board Replacement: crwdns2935265:012crwdnd2935265:01crwdnd2935265:02crwdne2935265:0 Zenbre SoundBank Z3 Control Interface Circuit Board Replacement: crwdns2935265:012crwdnd2935265:02crwdnd2935265:02crwdne2935265:0
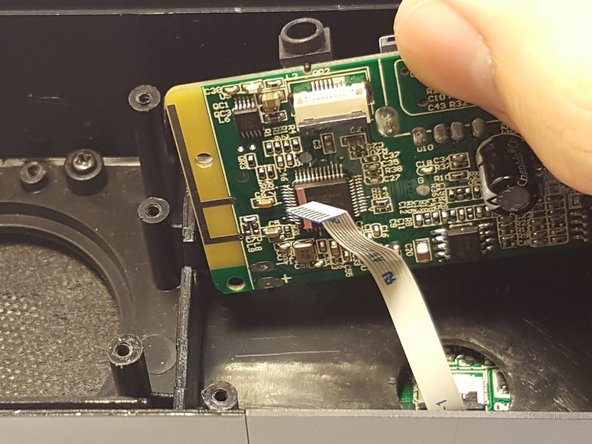
    • Use an iFixit opening tool to lift up the ribbon connector.

    • Slide the ribbon cable out of its connector.

  13. Zenbre SoundBank Z3 Control Interface Circuit Board Replacement: crwdns2935265:013crwdnd2935265:01crwdnd2935265:01crwdne2935265:0
    • Remove the four 4.5 mm Phillips silver screws.

    • Remove the six 7 mm Phillips black screws.

  14. Zenbre SoundBank Z3 Control Interface Circuit Board Replacement: crwdns2935265:014crwdnd2935265:01crwdnd2935265:03crwdne2935265:0 Zenbre SoundBank Z3 Control Interface Circuit Board Replacement: crwdns2935265:014crwdnd2935265:02crwdnd2935265:03crwdne2935265:0 Zenbre SoundBank Z3 Control Interface Circuit Board Replacement: crwdns2935265:014crwdnd2935265:03crwdnd2935265:03crwdne2935265:0
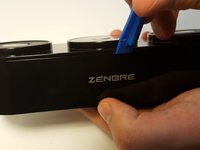
    • Remove the top plastic cover by prying around the edges with an iFixit opening tool.

  15. Zenbre SoundBank Z3 Control Interface Circuit Board Replacement: crwdns2935265:015crwdnd2935265:01crwdnd2935265:03crwdne2935265:0 Zenbre SoundBank Z3 Control Interface Circuit Board Replacement: crwdns2935265:015crwdnd2935265:02crwdnd2935265:03crwdne2935265:0 Zenbre SoundBank Z3 Control Interface Circuit Board Replacement: crwdns2935265:015crwdnd2935265:03crwdnd2935265:03crwdne2935265:0
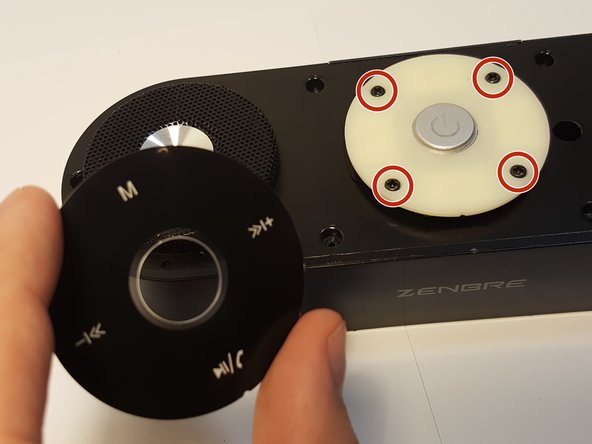
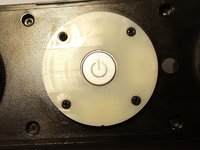
    • Carefully remove the round black cover of the circuit board by using a spudger to pry it upward.

    • When working with electronics, it's important to choose a tool that is electrostatic discharge (ESD) safe in order to avoid accidental damage to the device. A metal spudger is great when you need serious prying power, but a regular black nylon spudger or a plastic tool should be used whenever possible.

    • Handle the cover plate carefully. Just like with the feet from before, it can be replaced if care is used when handling it.

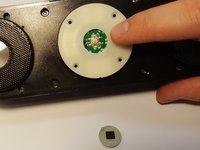
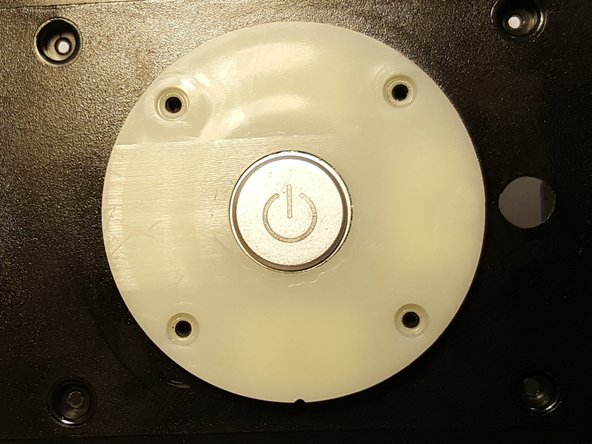
    • Remove the four screws.

  16. Zenbre SoundBank Z3 Control Interface Circuit Board Replacement: crwdns2935265:016crwdnd2935265:01crwdnd2935265:02crwdne2935265:0 Zenbre SoundBank Z3 Control Interface Circuit Board Replacement: crwdns2935265:016crwdnd2935265:02crwdnd2935265:02crwdne2935265:0
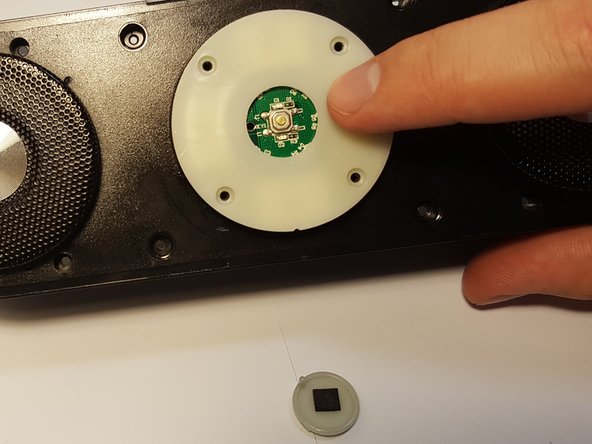
    • Pick up the center power button and remove it. Place it in a safe location.

    • When you pick up the power button, the board will come right off. Be sure not to lose it.

  17. Zenbre SoundBank Z3 Control Interface Circuit Board Replacement: crwdns2935265:017crwdnd2935265:01crwdnd2935265:03crwdne2935265:0 Zenbre SoundBank Z3 Control Interface Circuit Board Replacement: crwdns2935265:017crwdnd2935265:02crwdnd2935265:03crwdne2935265:0 Zenbre SoundBank Z3 Control Interface Circuit Board Replacement: crwdns2935265:017crwdnd2935265:03crwdnd2935265:03crwdne2935265:0
    • Remove these four 7 mm black screws.

    • This will free the circuit board, which can now be lifted away from the housing.

    • If you wish to remove the ribbon here, use the same method used to remove the ribbon from the motherboard earlier in this guide.

crwdns2915888:0crwdne2915888:0

To reassemble your device, follow these instructions in reverse order.

crwdns2935227:0crwdne2935227:0

Cherian Thomas

crwdns2935283:003/25/16crwdne2935283:0

334 crwdns2915208:0crwdne2915208:0

crwdns2935297:05crwdne2935297:0

crwdns2915084:0crwdne2915084:0

UMass Dartmouth, Team 3-2, Bhusal Spring 2016 crwdns2935289:0UMass Dartmouth, Team 3-2, Bhusal Spring 2016crwdne2935289:0

UMASSD-BHUSAL-S16S3G2

crwdns2931471:05crwdne2931471:0

crwdns2935297:08crwdne2935297:0

crwdns2944067:00crwdne2944067:0

crwdns2917038:0crwdne2917038:0

crwdns2936625:0crwdne2936625:0:

crwdns2936751:024crwdne2936751:0 1

crwdns2936753:07crwdne2936753:0 3

crwdns2936753:030crwdne2936753:0 7

crwdns2942667:0crwdne2942667:0 333