crwdns2915892:0crwdne2915892:0
Replacing the motherboard in a phone becomes necessary if it encounters severe damage from water exposure, electrical faults, or physical trauma, leading to critical malfunctions. A malfunctioning motherboard can disrupt various functionalities, such as the device's ability to power on, connect to networks, or process information.
Swapping the motherboard restores the phone's core functionality, ensuring stable performance and resolving issues stemming from internal hardware failures.
crwdns2942213:0crwdne2942213:0
-
-
Locate the small indent on the back right bottom corner of the phone.
-
Put the pry tool or your fingertip inside the small gap on the bottom right of the back of the phone and pop up the cover.
-
Continue to go around the phone until the cover is completely off the back of the pull and put it aside.
-
-
-
Locate the battery in the middle of the back of the phone.
-
Push in and up on the battery to remove it from its slot.
-
Put the battery aside.
-
-
-
Use a Phillips #00 screwdriver to remove twelve 2 mm screws along the back outer edges of the phone.
-
-
-
There’s a 13th 2 mm screw with a lock sticker over it on the bottom right corner. Insert the #00 Phillips screwdriver in the middle, breaking the sticker, and take the screw out.
-
-
-
-
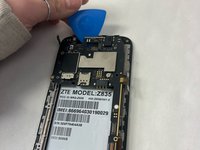
Slide the pry tool into the middle of the connection between the screen and the back of the phone.
-
Once in, slide the pry tool around the phone, separating the screen and the back of the phone.
-
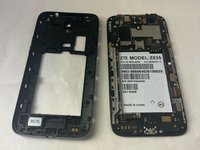
The detached piece is the midframe, and you can place it aside when detached.
-
-
-
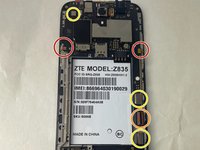
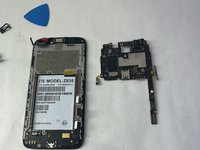
Use the Phillips #00 screwdriver and remove the four 2 mm screws that are located around the edges.
-
-
crwdns2935267:0crwdne2935267:0Tweezers$4.99
-
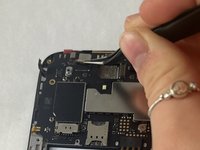
Please locate the black wire that’s attached to gold plates on the left side of the device.
-
Using a pair of tweezers, carefully grab the black wire and detach it, then remove it.
-
-
-
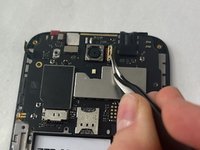
Using the tweezers, carefully detach the six ribbon cables also located along the edges.
-
2 adhesive ribbon cables (green circles).
-
One ribbon cable that slides out (orange circles).
-
Three ribbon cables that pop in and out (yellow circles).
-
-
-
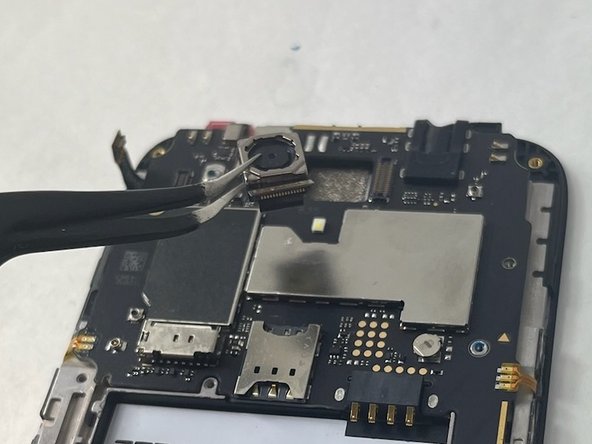
You will also have to detach the two cameras by detaching the ribbon cable using the tweezers as well. Put those off to the side.
-
-
-
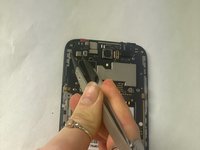
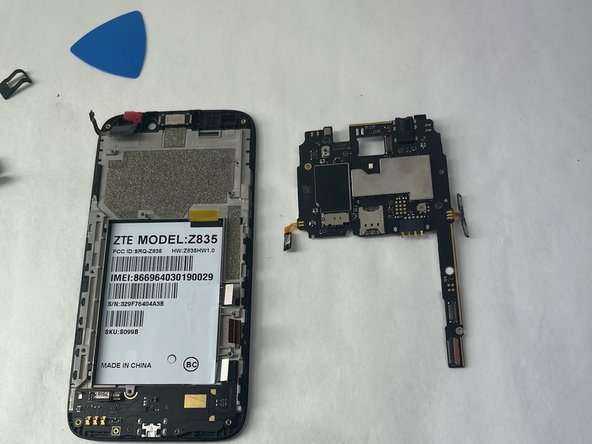
Grab the opening pick and work it into the edges of the motherboard.
-
Make sure you are firmly pushing the pick to loosen the motherboard since it is placed with adhesive.
-
Remove the motherboard and put it aside.
-


To reassemble your device, follow these instructions in reverse order.
To reassemble your device, follow these instructions in reverse order.

crwdns2915084:0crwdne2915084:0

UMass Dartmouth, Team 3-1, Konn Fall 2023 crwdns2935289:0UMass Dartmouth, Team 3-1, Konn Fall 2023crwdne2935289:0
UMASSD-KONN-F23S3G1
crwdns2931471:03crwdne2931471:0
crwdns2935297:010crwdne2935297:0