crwdns2933423:0crwdne2933423:0

ZTE Blade Z Max Side Mounted Buttons Replacement

crwdns2942213:0crwdne2942213:0

  1. ZTE Blade Z Max Side Mounted Buttons Replacement, SIM Card: crwdns2935265:01crwdnd2935265:01crwdnd2935265:03crwdne2935265:0 ZTE Blade Z Max Side Mounted Buttons Replacement, SIM Card: crwdns2935265:01crwdnd2935265:02crwdnd2935265:03crwdne2935265:0 ZTE Blade Z Max Side Mounted Buttons Replacement, SIM Card: crwdns2935265:01crwdnd2935265:03crwdnd2935265:03crwdne2935265:0
    • Turn the device on it side with the buttons away from you.

    • Using the SIM Card Eject Tool, insert the narrow end into the ejection hole.

    • Press firmly into the hole until the SIM card tray pops out far enough to grab with your fingers.

  2. ZTE Blade Z Max Side Mounted Buttons Replacement: crwdns2935265:02crwdnd2935265:01crwdnd2935265:03crwdne2935265:0 ZTE Blade Z Max Side Mounted Buttons Replacement: crwdns2935265:02crwdnd2935265:02crwdnd2935265:03crwdne2935265:0 ZTE Blade Z Max Side Mounted Buttons Replacement: crwdns2935265:02crwdnd2935265:03crwdnd2935265:03crwdne2935265:0
    • Pull the tray out with your fingers .

    • Remove the SIM card.

  3. ZTE Blade Z Max Side Mounted Buttons Replacement, Fingerprint Sensor: crwdns2935265:03crwdnd2935265:01crwdnd2935265:01crwdne2935265:0
    • Remove the one T2 screw from the side of the phone near where the SIM card tray was.

  4. ZTE Blade Z Max Side Mounted Buttons Replacement: crwdns2935265:04crwdnd2935265:01crwdnd2935265:02crwdne2935265:0 ZTE Blade Z Max Side Mounted Buttons Replacement: crwdns2935265:04crwdnd2935265:02crwdnd2935265:02crwdne2935265:0
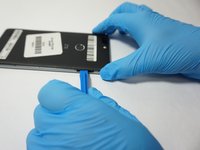
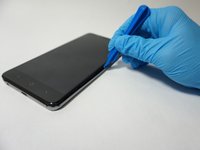
    • Insert a plastic opening tool into the space where the SIM card tray used to be.

    • Gently pry the back away form the phone frame until you hear and audible click of the back separating.

  5. ZTE Blade Z Max Side Mounted Buttons Replacement: crwdns2935265:05crwdnd2935265:01crwdnd2935265:02crwdne2935265:0 ZTE Blade Z Max Side Mounted Buttons Replacement: crwdns2935265:05crwdnd2935265:02crwdnd2935265:02crwdne2935265:0
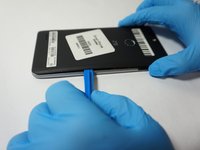
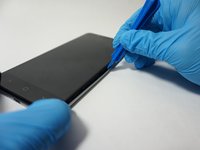
    • Insert the plastic opening tool into the space you created between the phone back and frame.

    • Slide the plastic opening tool along the outside of the phone, underneath the back, to separate the rest of the clips holding the back onto the frame.

  6. ZTE Blade Z Max Side Mounted Buttons Replacement: crwdns2935265:06crwdnd2935265:01crwdnd2935265:02crwdne2935265:0 ZTE Blade Z Max Side Mounted Buttons Replacement: crwdns2935265:06crwdnd2935265:02crwdnd2935265:02crwdne2935265:0
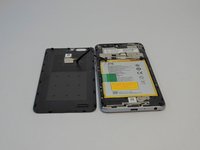
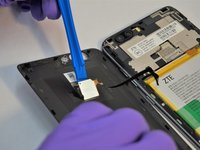
    • Rotate the back over to the side, being careful not to damage the fingerprint sensor ribbon cable.

    • Use a plastic opening tool to separate the fingerprint sensor from the back of the phone.

    • On reassembly, add a piece of simple scotch tape to hold the fingerprint sensor to the phone back.

    • Set the phone back aside.

  7. ZTE Blade Z Max Side Mounted Buttons Replacement: crwdns2935265:07crwdnd2935265:01crwdnd2935265:01crwdne2935265:0
    • Remove the 6 silver 2.9mm screws from the back of the phone with a JIS #000 bit.

    • Remove the 11 black 3.5mm screws with the same JIS #000 bit.

  8. ZTE Blade Z Max Side Mounted Buttons Replacement: crwdns2935265:08crwdnd2935265:01crwdnd2935265:02crwdne2935265:0 ZTE Blade Z Max Side Mounted Buttons Replacement: crwdns2935265:08crwdnd2935265:02crwdnd2935265:02crwdne2935265:0
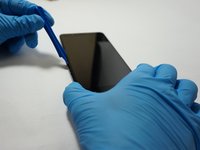
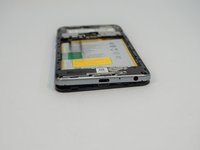
    • Turn the phone over, with the screen up.

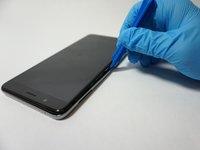
    • Insert the opening tool between the screen and the silver trim that surrounds it.

    • Run the plastic opening tool around the circumference of the phone to separate the clips of that hold the trim to the frame.

  9. ZTE Blade Z Max Side Mounted Buttons Replacement: crwdns2935265:09crwdnd2935265:01crwdnd2935265:02crwdne2935265:0 ZTE Blade Z Max Side Mounted Buttons Replacement: crwdns2935265:09crwdnd2935265:02crwdnd2935265:02crwdne2935265:0
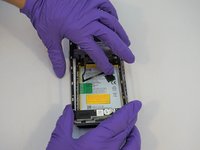
    • Turn the phone back over, with the screen down.

    • Lift the trim piece off of the phone and set aside.

  10. ZTE Blade Z Max Side Mounted Buttons Replacement: crwdns2935265:010crwdnd2935265:01crwdnd2935265:02crwdne2935265:0 ZTE Blade Z Max Side Mounted Buttons Replacement: crwdns2935265:010crwdnd2935265:02crwdnd2935265:02crwdne2935265:0
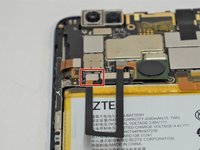
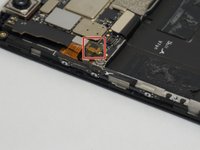
    • Using a plastic opening tool, separate the fingerprint ribbon connector from the motherboard.

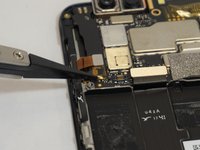
  11. ZTE Blade Z Max Side Mounted Buttons Replacement, Side Mounted Buttons: crwdns2935265:011crwdnd2935265:01crwdnd2935265:02crwdne2935265:0 ZTE Blade Z Max Side Mounted Buttons Replacement, Side Mounted Buttons: crwdns2935265:011crwdnd2935265:02crwdnd2935265:02crwdne2935265:0
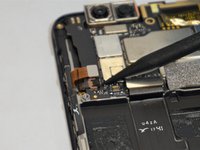
    • Using a set of tweezers, pull off the small piece of tape on top of the ribbon cable connector on the left side of the motherboard.

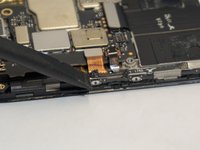
  12. ZTE Blade Z Max Side Mounted Buttons Replacement: crwdns2935265:012crwdnd2935265:01crwdnd2935265:02crwdne2935265:0 ZTE Blade Z Max Side Mounted Buttons Replacement: crwdns2935265:012crwdnd2935265:02crwdnd2935265:02crwdne2935265:0
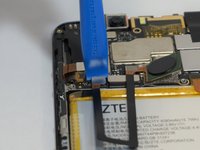
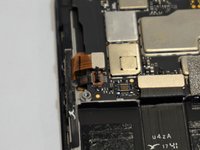
    • Use a plastic opening tool or spudger to scrape the glue away from the ribbon cable.

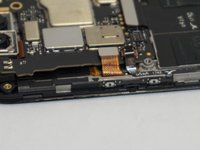
  13. ZTE Blade Z Max Side Mounted Buttons Replacement: crwdns2935265:013crwdnd2935265:01crwdnd2935265:03crwdne2935265:0 ZTE Blade Z Max Side Mounted Buttons Replacement: crwdns2935265:013crwdnd2935265:02crwdnd2935265:03crwdne2935265:0 ZTE Blade Z Max Side Mounted Buttons Replacement: crwdns2935265:013crwdnd2935265:03crwdnd2935265:03crwdne2935265:0
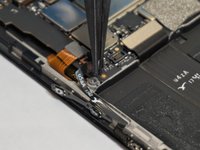
    • Using a plastic opening tool or spudger, open the zip connection by prying up on the right (black) side of the connector.

    • Using the tweezers, carefully pull the the ribbon cable out of the connector.

  14. ZTE Blade Z Max Side Mounted Buttons Replacement: crwdns2935265:014crwdnd2935265:01crwdnd2935265:02crwdne2935265:0 ZTE Blade Z Max Side Mounted Buttons Replacement: crwdns2935265:014crwdnd2935265:02crwdnd2935265:02crwdne2935265:0
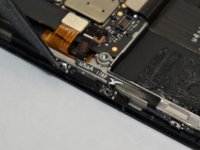
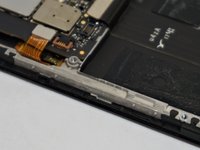
    • The button ribbon cable is very fragile, especially near the down volume button. If you intend on reinstalling this piece later, be careful not to rip it.

    • Using a plastic opening tool or tweezers, pry the edge of the button strip away from the phone.

    • Once all of the buttons are free, the whole assembly should simply lift out.

    • Glue may be required to hold the new buttons to the phone.

crwdns2915888:0crwdne2915888:0

To reassemble your device, follow these instructions in reverse order.

crwdns2935229:05crwdne2935229:0

Ronald Weimar

crwdns2935283:009/24/18crwdne2935283:0

1,438 crwdns2915208:0crwdne2915208:0

crwdns2935297:06crwdne2935297:0

crwdns2915084:0crwdne2915084:0

The Citadel Military College of South Carolina, Team S3-G7, Eggleston Fall 2018 crwdns2935289:0The Citadel Military College of South Carolina, Team S3-G7, Eggleston Fall 2018crwdne2935289:0

CMCSC-EGGLESTON-F18S3G7

crwdns2931471:04crwdne2931471:0

crwdns2935297:012crwdne2935297:0

crwdns2944067:03crwdne2944067:0

I need help. When I plug the charger in it would turn on but since the power button was broken I had to buy a new one and today I had received it. Now I did everything correctly however, on step 14 I didn't use tweezers since I didn't have any to remove the ribbon and the ribbon didn't get affected but on top where the ribbon goes in at broke. It should still turn on. So I put everything back and put the charger in and it charges but it doesn't show that it's charging now. And whenever I hold the power button the light twitches but the phone doesn't turn on or even show the percent of the battery which never did that until now. Did I do something wrong? Current trying to redo everything.

Tylor Everett - crwdns2934203:0crwdne2934203:0

I can’t believe I was able to fix this thing! Amazing. Ordered the button, took it apart with my kit and rebuilt it. Not to mention I took apart my Mac ProBook and fixed that too!! Apple Store - It’s hopeless, your data is gone forever. Get a new machine. Best Buy - It’s hopeless, your data is gone forever. Get a new machine.

Nope!

Matt Cave - crwdns2934203:0crwdne2934203:0

crwdns2917038:0crwdne2917038:0

crwdns2936625:0crwdne2936625:0:

crwdns2936751:024crwdne2936751:0 0

crwdns2936753:07crwdne2936753:0 1

crwdns2936753:030crwdne2936753:0 4

crwdns2942667:0crwdne2942667:0 1,531