crwdns2915892:0crwdne2915892:0
If the front camera of your ZTE Blade X Max is not functioning—blurry image, scratched lens—and you have already been through our troubleshooting guide, you will have to replace it.
This guide requires removing the back of the phone. You will have to use heating products to complete this guide. If you are using the iFixit iOpener, or a heating pad, be sure to follow the instructions for that particular product.
crwdns2942213:0crwdne2942213:0
-
-
Use the iOpener or heating pad to heat around the edges of the phone to melt the adhesive.
-
-
-
Slide the Jimmy along the under backing and lightly push the plastic up.
-
-
-
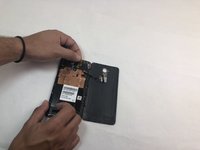
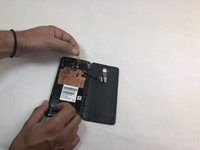
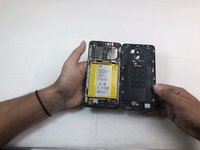
Carefully remove the backing from the phone once the closures are released.
-
-
-
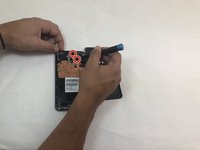
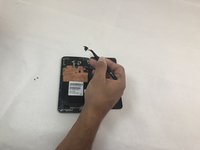
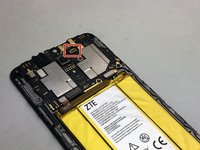
Remove the opaque yellow sticker that indicates where the fingerprint scanner is connected to the back of the device.
-
-
-
crwdns2935267:0crwdne2935267:0Tweezers$4.99
-
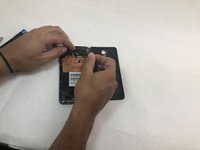
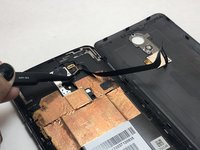
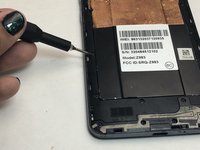
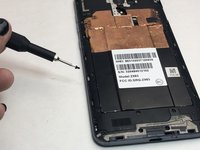
Remove the two 1mm Phillips #000 screws on the small panel that was underneath the sticker.
-
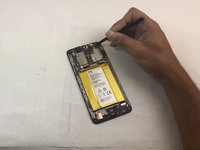
Use the tweezers to remove the panel.
-
-
-
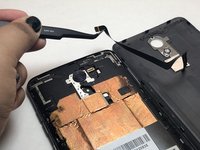
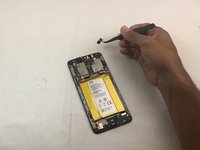
Use the tweezers to pull at the base of the film to remove the fingerprint scanner.
-
-
-
Remove the SD and SIM cards by pulling out the card tray from the slot on the right side of the device.
-
-
-
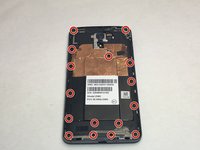
Remove the sixteen 1mm Phillips #000 screws from the midframe of the phone.
-
-
-
Use the Jimmy to remove the midframe from the device.
-
-
crwdns2935267:0crwdne2935267:0Tweezers$4.99
-
Once the motherboard is exposed, locate the front camera connection in the top right corner of the motherboard.
-
Use the tweezers to remove the front camera.
-


To reassemble your device, follow these instructions in reverse order.
To reassemble your device, follow these instructions in reverse order.

crwdns2915084:0crwdne2915084:0

Embry-Riddle Aeronautical University, Team S22-G1, Branham Fall 2019 crwdns2935289:0Embry-Riddle Aeronautical University, Team S22-G1, Branham Fall 2019crwdne2935289:0
ERAU-BRANHAM-F19S22G1
crwdns2931471:03crwdne2931471:0
crwdns2935297:012crwdne2935297:0