crwdns2933423:0crwdne2933423:0

ZTE Awe Camera Replacement

crwdns2942213:0crwdne2942213:0

  1. ZTE Awe Camera Replacement, Remove the back cover: crwdns2935265:01crwdnd2935265:01crwdnd2935265:01crwdne2935265:0
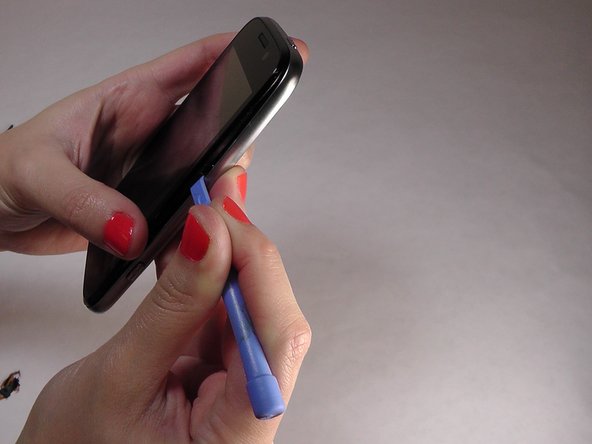
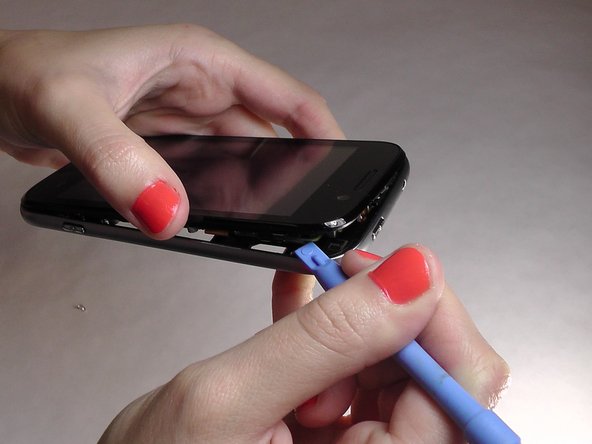
    • Remove the back cover of the phone to expose the phone's mid-frame.

  2. ZTE Awe Camera Replacement, Remove battery: crwdns2935265:02crwdnd2935265:01crwdnd2935265:01crwdne2935265:0
    • Pry the battery up and out of the phone.

  3. ZTE Awe Camera Replacement, Remove the battery: crwdns2935265:03crwdnd2935265:01crwdnd2935265:01crwdne2935265:0
    • Lift the battery out of the phone.

  4. ZTE Awe Camera Replacement, Unscrew the mid frame: crwdns2935265:04crwdnd2935265:01crwdnd2935265:01crwdne2935265:0
    • Use the Phillips Head 00 screw driver to unscrew the seven 0.1mm screws along the perimeter of the phone's mid frame.

  5. ZTE Awe Camera Replacement, Separate the mid frame and the digitizer: crwdns2935265:05crwdnd2935265:01crwdnd2935265:03crwdne2935265:0 ZTE Awe Camera Replacement, Separate the mid frame and the digitizer: crwdns2935265:05crwdnd2935265:02crwdnd2935265:03crwdne2935265:0 ZTE Awe Camera Replacement, Separate the mid frame and the digitizer: crwdns2935265:05crwdnd2935265:03crwdnd2935265:03crwdne2935265:0
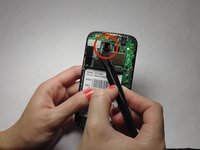
    • Wedge the flat end of the spudger between the mid frame and the digitizer.

  6. ZTE Awe Camera Replacement, Expose the motherboard: crwdns2935265:06crwdnd2935265:01crwdnd2935265:03crwdne2935265:0 ZTE Awe Camera Replacement, Expose the motherboard: crwdns2935265:06crwdnd2935265:02crwdnd2935265:03crwdne2935265:0 ZTE Awe Camera Replacement, Expose the motherboard: crwdns2935265:06crwdnd2935265:03crwdnd2935265:03crwdne2935265:0
    • Gently pry the mid frame away from the rest of the phone to expose the motherboard.

  7. ZTE Awe Camera Replacement, Remove the camera: crwdns2935265:07crwdnd2935265:01crwdnd2935265:03crwdne2935265:0 ZTE Awe Camera Replacement, Remove the camera: crwdns2935265:07crwdnd2935265:02crwdnd2935265:03crwdne2935265:0 ZTE Awe Camera Replacement, Remove the camera: crwdns2935265:07crwdnd2935265:03crwdnd2935265:03crwdne2935265:0
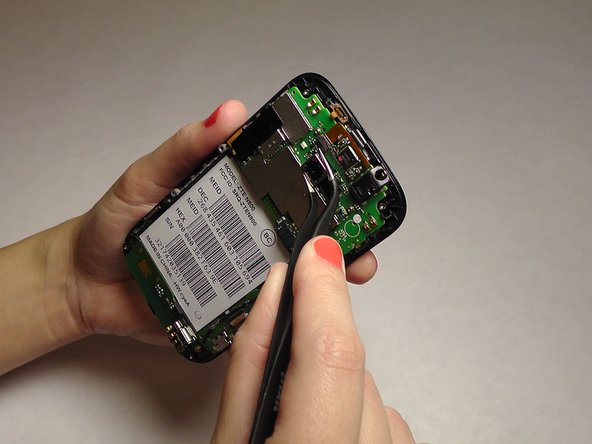
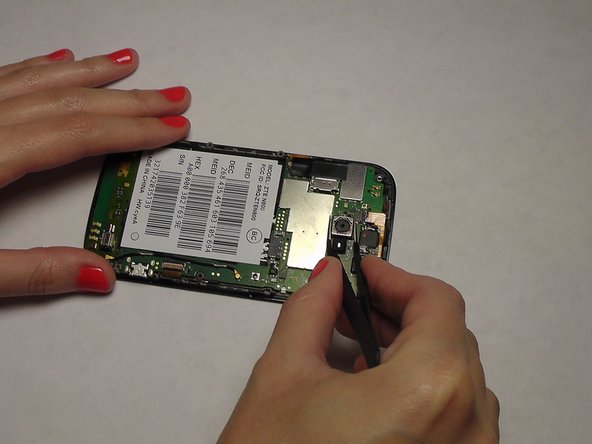
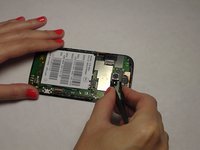
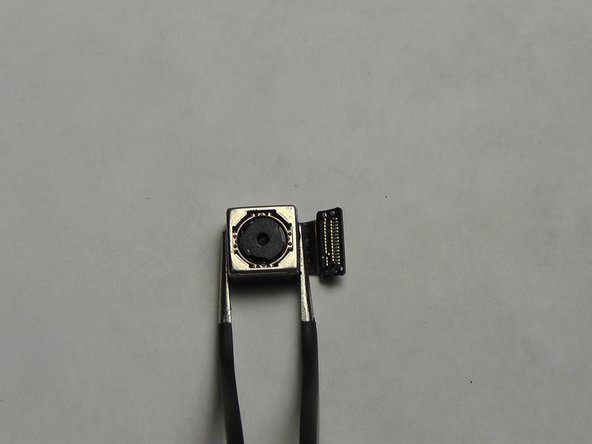
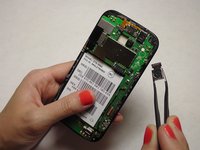
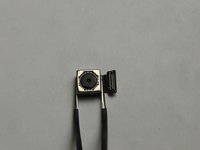
    • Use the tweezers to grip the back facing camera. Gently pull until the camera is completely removed from the motherboard.

crwdns2915888:0crwdne2915888:0

To reassemble your device, follow these instructions in reverse order.

crwdns2935227:0crwdne2935227:0

Jennifer DeMeo

crwdns2935283:010/07/14crwdne2935283:0

1,035 crwdns2915208:0crwdne2915208:0

crwdns2935297:05crwdne2935297:0

crwdns2915084:0crwdne2915084:0

USF Tampa, Team 1-2, Leahy Fall 2014 crwdns2935289:0USF Tampa, Team 1-2, Leahy Fall 2014crwdne2935289:0

USFT-LEAHY-F14S1G2

crwdns2931471:04crwdne2931471:0

crwdns2935297:010crwdne2935297:0

crwdns2944067:00crwdne2944067:0

crwdns2917038:0crwdne2917038:0

crwdns2936625:0crwdne2936625:0:

crwdns2936751:024crwdne2936751:0 2

crwdns2936753:07crwdne2936753:0 9

crwdns2936753:030crwdne2936753:0 10

crwdns2942667:0crwdne2942667:0 678