crwdns2933423:0crwdne2933423:0

Yamaha NS‑AW190BL Damaged Wires Replacement

crwdns2942213:0crwdne2942213:0

  1. Yamaha NS‑AW190BL Damaged Wires Replacement, Rear Casing: crwdns2935265:01crwdnd2935265:01crwdnd2935265:02crwdne2935265:0 Yamaha NS‑AW190BL Damaged Wires Replacement, Rear Casing: crwdns2935265:01crwdnd2935265:02crwdnd2935265:02crwdne2935265:0
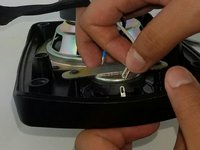
    • Remove the six Phillips Head 1.2mm screws on the front side of the speaker.

  2. Yamaha NS‑AW190BL Damaged Wires Replacement: crwdns2935265:02crwdnd2935265:01crwdnd2935265:03crwdne2935265:0 Yamaha NS‑AW190BL Damaged Wires Replacement: crwdns2935265:02crwdnd2935265:02crwdnd2935265:03crwdne2935265:0 Yamaha NS‑AW190BL Damaged Wires Replacement: crwdns2935265:02crwdnd2935265:03crwdnd2935265:03crwdne2935265:0
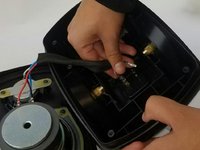
    • Crack open both parts of the casing carefully.

    • Using a plastic opening tool, wedge open the bottom of the speaker to separate the two parts of the speaker.

  3. Yamaha NS‑AW190BL Damaged Wires Replacement: crwdns2935265:03crwdnd2935265:01crwdnd2935265:03crwdne2935265:0 Yamaha NS‑AW190BL Damaged Wires Replacement: crwdns2935265:03crwdnd2935265:02crwdnd2935265:03crwdne2935265:0 Yamaha NS‑AW190BL Damaged Wires Replacement: crwdns2935265:03crwdnd2935265:03crwdnd2935265:03crwdne2935265:0
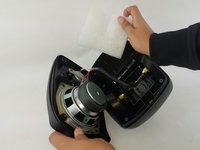
    • Remove the cooling foam.

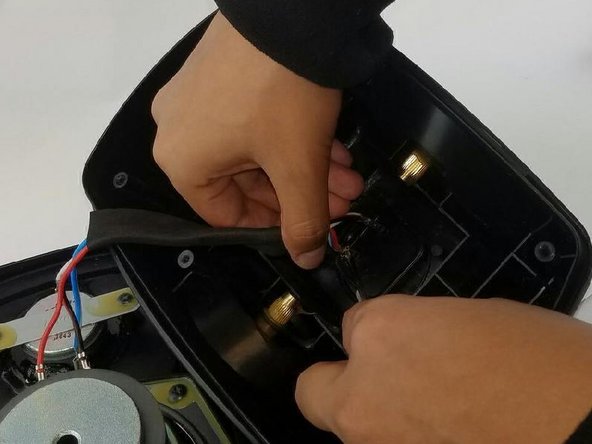
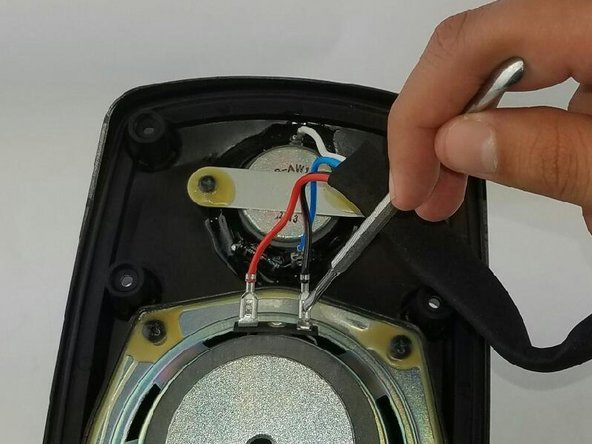
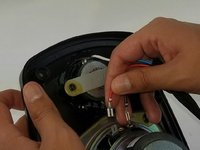
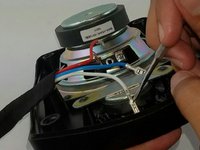
    • Use a metal spudger to push the tab in on the red wire.

    • Repeat the process for the blue wire.

  4. Yamaha NS‑AW190BL Damaged Wires Replacement: crwdns2935265:04crwdnd2935265:01crwdnd2935265:02crwdne2935265:0 Yamaha NS‑AW190BL Damaged Wires Replacement: crwdns2935265:04crwdnd2935265:02crwdnd2935265:02crwdne2935265:0
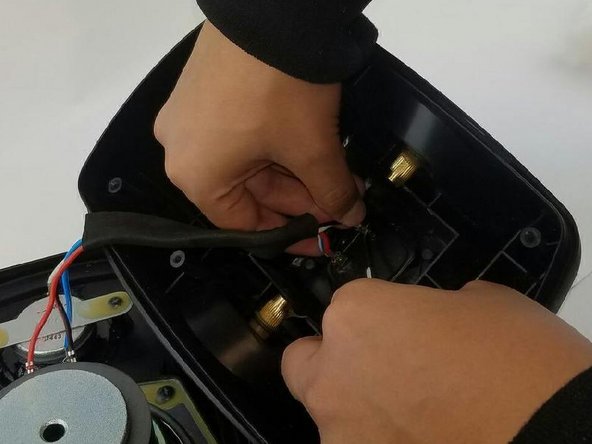
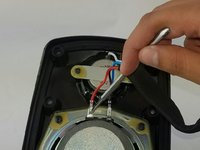
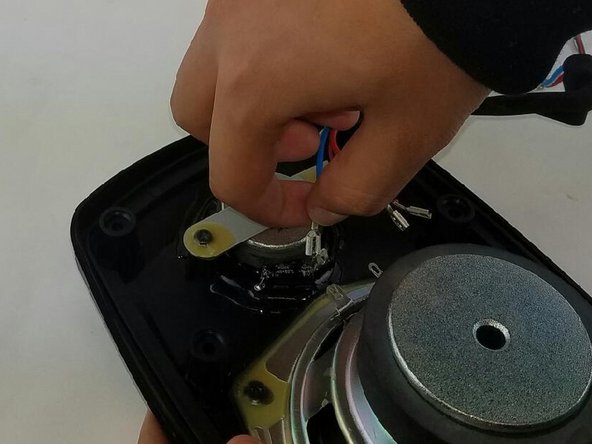
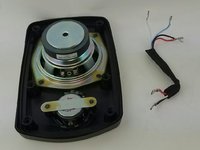
    • The blue wire can now be removed from its connector.

    • Remove the red wire to free the rear casing.

  5. Yamaha NS‑AW190BL Damaged Wires Replacement, Wiring: crwdns2935265:05crwdnd2935265:01crwdnd2935265:02crwdne2935265:0 Yamaha NS‑AW190BL Damaged Wires Replacement, Wiring: crwdns2935265:05crwdnd2935265:02crwdnd2935265:02crwdne2935265:0
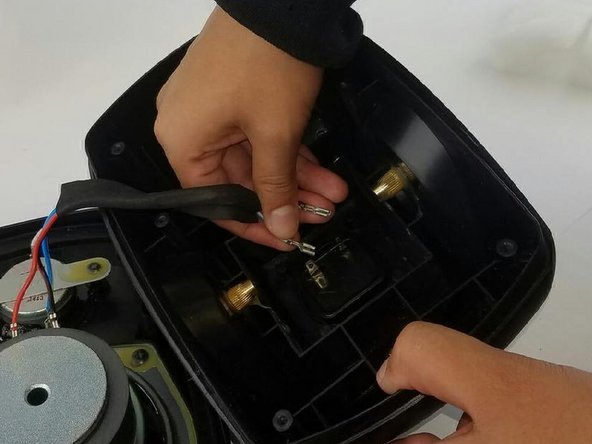
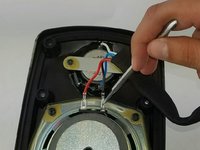
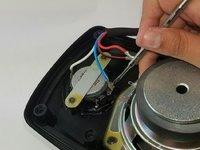
    • Use the metal spudger to bend down the metal tabs that hold the wires to the terminals. The tabs are small and in between the grooves of the terminal.

  6. Yamaha NS‑AW190BL Damaged Wires Replacement: crwdns2935265:06crwdnd2935265:01crwdnd2935265:02crwdne2935265:0 Yamaha NS‑AW190BL Damaged Wires Replacement: crwdns2935265:06crwdnd2935265:02crwdnd2935265:02crwdne2935265:0
    • Remove the wires from the terminals.

  7. Yamaha NS‑AW190BL Damaged Wires Replacement: crwdns2935265:07crwdnd2935265:01crwdnd2935265:02crwdne2935265:0 Yamaha NS‑AW190BL Damaged Wires Replacement: crwdns2935265:07crwdnd2935265:02crwdnd2935265:02crwdne2935265:0
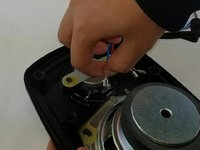
    • Use the metal spudger to bend the metal tabs that hold the connectors to the terminals.

  8. Yamaha NS‑AW190BL Damaged Wires Replacement: crwdns2935265:08crwdnd2935265:01crwdnd2935265:03crwdne2935265:0 Yamaha NS‑AW190BL Damaged Wires Replacement: crwdns2935265:08crwdnd2935265:02crwdnd2935265:03crwdne2935265:0 Yamaha NS‑AW190BL Damaged Wires Replacement: crwdns2935265:08crwdnd2935265:03crwdnd2935265:03crwdne2935265:0
    • Remove the wires from the terminals. Then remove the entire wire assembly.

crwdns2915888:0crwdne2915888:0

To reassemble your device, follow these instructions in reverse order.

Roshal Robince

crwdns2935283:002/07/17crwdne2935283:0

101 crwdns2915208:0crwdne2915208:0

crwdns2935295:0crwdne2935295:0

crwdns2915084:0crwdne2915084:0

USF Tampa, Team 17-3, Blackwell Spring 2017 crwdns2935289:0USF Tampa, Team 17-3, Blackwell Spring 2017crwdne2935289:0

USFT-BLACKWELL-S17S17G3

crwdns2931471:04crwdne2931471:0

crwdns2935297:05crwdne2935297:0

crwdns2944067:00crwdne2944067:0

crwdns2917038:0crwdne2917038:0

crwdns2936625:0crwdne2936625:0:

crwdns2936751:024crwdne2936751:0 0

crwdns2936753:07crwdne2936753:0 1

crwdns2936753:030crwdne2936753:0 5

crwdns2942667:0crwdne2942667:0 734