crwdns2915892:0crwdne2915892:0
Use this guide to replace a faulty motherboard in your Xiaomi Mi 3 smartphone.
The motherboard is a piece of hardware that allows for components of a phone – such as RAM, CPU, memory, and other components – to communicate with each other. A faulty motherboard will make your phone unable to boot up or cause it to frequently crash. It can be damaged by an overheating battery, dropping the phone, or using incompatible chargers.
Be aware that an improperly installed battery can lead to overheating and swelling of the battery, which can further damage the motherboard and potentially cause a fire.
Before beginning, make sure to power off your phone completely and disconnect from any external power source.
crwdns2942213:0crwdne2942213:0
-
-
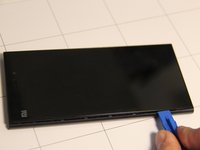
Firmly press the SIM card removal tool into the hole located at the top of the phone to eject the SIM card tray from the slot.
-
-
-
Remove the two Phillips head screws located at the top of the phone on either side where the SIM card was ejected.
-
-
-
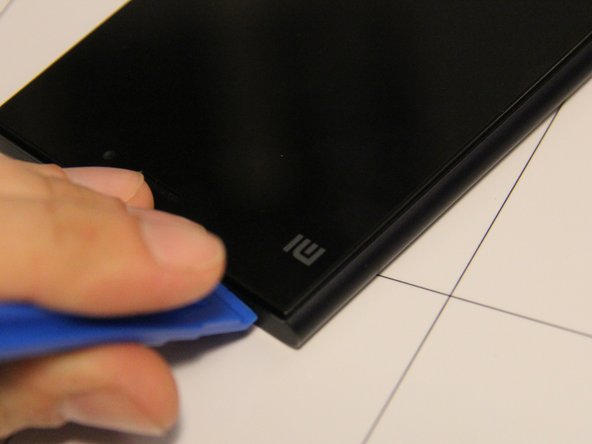
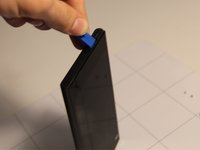
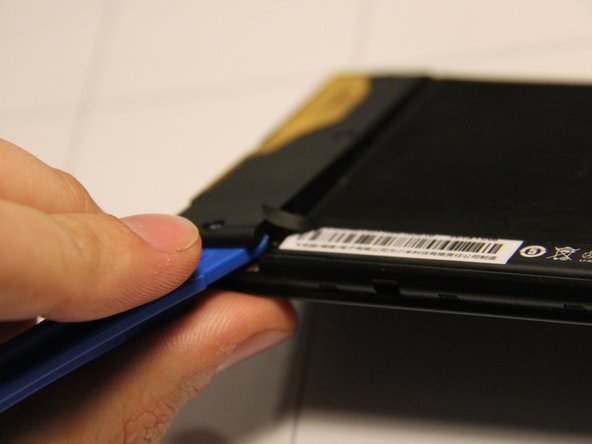
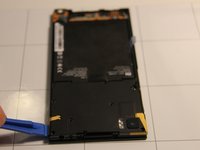
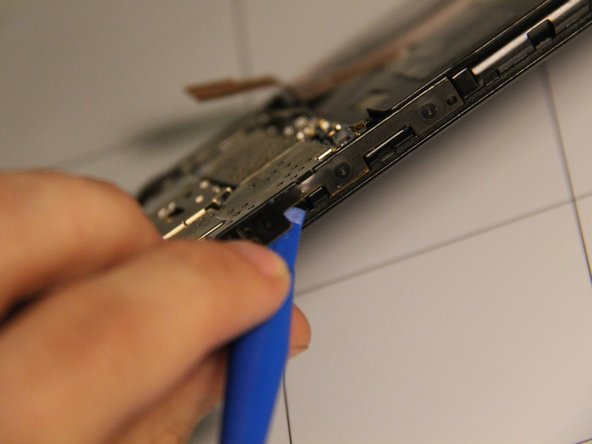
Insert a pry tool into the upper edge of the phone, where there is a small gap between screen and frame of the phone to begin separating the screen from the rest of the phone.
-
-
-
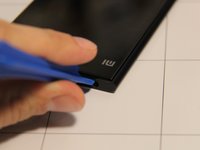
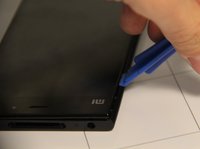
Once the pry tool has been inserted into the phone, slide it around the perimeter of the phone while gently lifting until the screen panel and back panel of the phone separate.
-
-
-
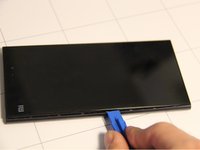
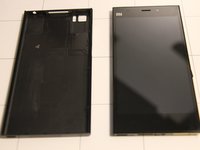
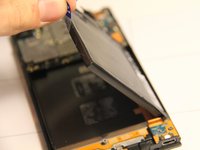
The back of the phone should now be separated from the screen.
-
-
crwdns2935267:0crwdne2935267:0Tweezers$4.99
-
Place the front panel screen side down with the camera at the top.
-
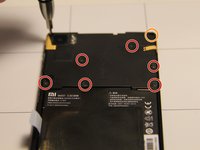
Remove these six Phillips head screws located at the upper half of the phone.
-
This screw is located under an orange sticker at the top right corner of the panel. The sticker can be removed with a pair of tweezers, then remove that Phillips head screw.
You miss circle mark that bolt top left you are loosening. total 8 bolt.
-
-
-
Next, remove these three screws located at the bottom of the back panel.
-
-
-
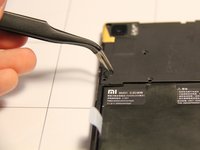
Using tweezers, remove the rubber dust cover on the back panel of the phone.
Why do you need to remove that ?
This step is 100% unnecessary.
-
-
-
-
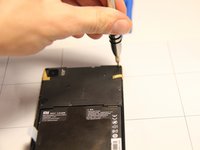
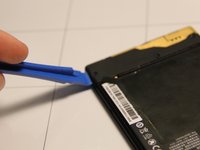
Remove the plastic cover on the bottom of the back panel by inserting the pry tool at the edge and gently lifting.
Really needed ?
This step and step 9 are totally not needed
-
-
-
Remove the upper plastic cover from the back panel by inserting the pry tool into the upper edge and gently lifting.
-
-
-
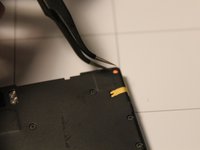
Using a spudger, remove the small ribbon cable that is connected to the battery.
Thank you, i changed the battery mi3 easily. I dont need steep 9,10,11. I removed nfc stickers that stick to battery and attached to top cover carefully, make it top cover and antenna nfc still integrated. Mi3 Battery is removed Due problem "Bootloop mi logo without android, and you can enter fastboot only, no matter it sucessfully flashed via fastboot room it will stay bootloop". So, yes, if the battery not good, it will goes to bootloop automatically.
I have the same problem. I think my battery also dead! Good information!
-
-
-
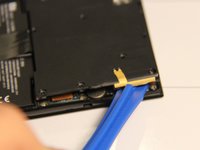
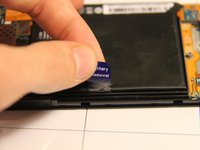
Remove the battery by gripping and pull up on the "Battery Removal" tab attached to the left side of the battery on the back panel.
Use of an old credit card to help lift the battery Is much easier.
I use iSesamo from the edge same as battery removal sticker. its safe from here, where other edge is have flexible cable near.
-
-
-
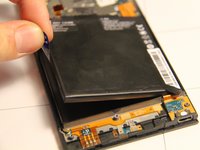
The battery is now removed from the panel.
-
-
-
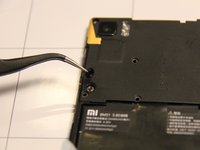
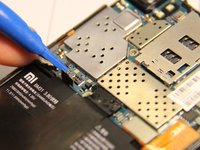
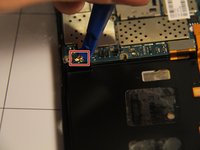
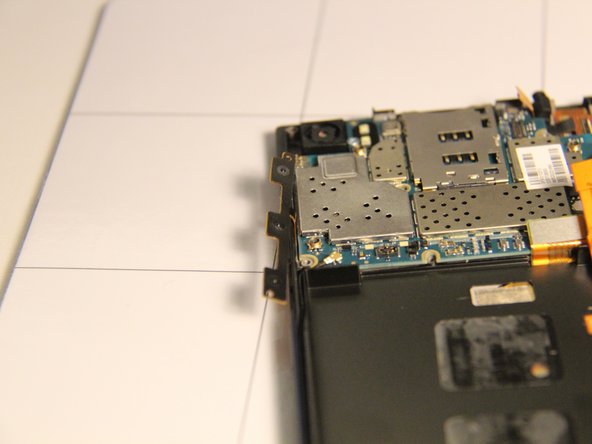
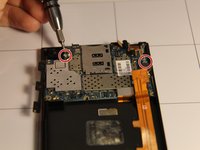
Disconnect the antenna wire that is attached to the lower left side of the motherboard using the pry tool.
-
-
-
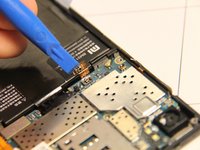
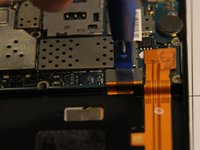
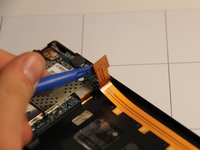
Use a pry tool to separate the LCD display cable from the motherboard. The cable connects to the motherboard as a rectangular metallic piece at the bottom right of the motherboard.
-
-
-
Disconnect the gold ribbon cable for the LCD display by gently inserting the pry tool under the wide end and lifting up.
-
-
-
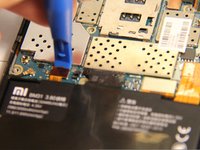
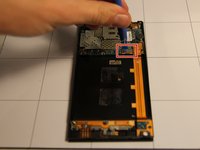
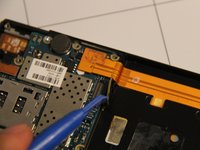
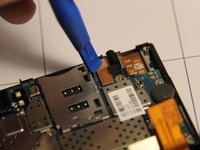
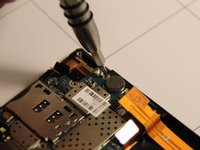
Separate a cable ribbon from the top right of the motherboard by gently inserting the pry tool under the rectangular metallic piece and lifting.
-
-
-
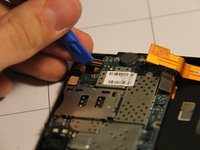
Separate a cable ribbon from the top right of the motherboard - near the cable from the previous step - by gently inserting the pry tool under the rectangular metallic piece and lifting.
-
-
-
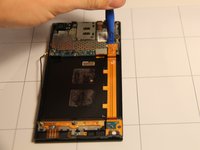
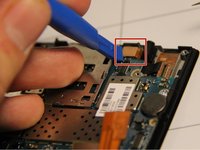
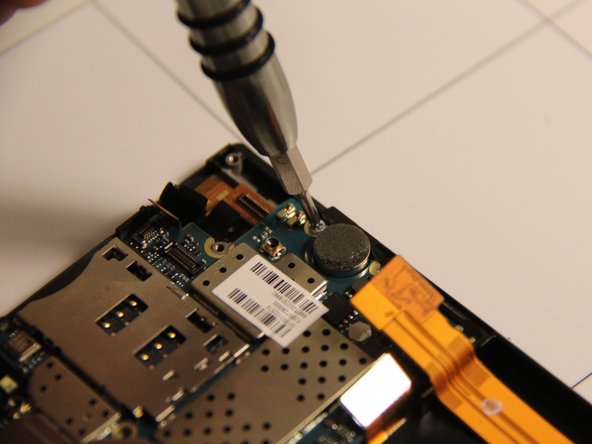
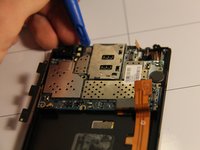
Using a pry tool, gently lift the side control buttons assembly away from the case. They should be loosely connected to the motherboard.
This step Is absolutly NOT needed for motherboard removal.
You will people brake flex doing so. Limit your guide to necessary step only!
-
-
-
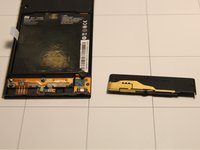
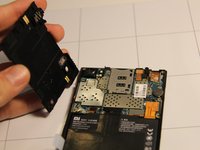
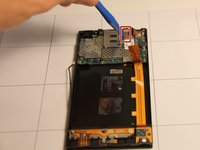
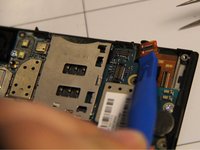
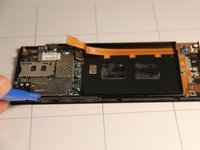
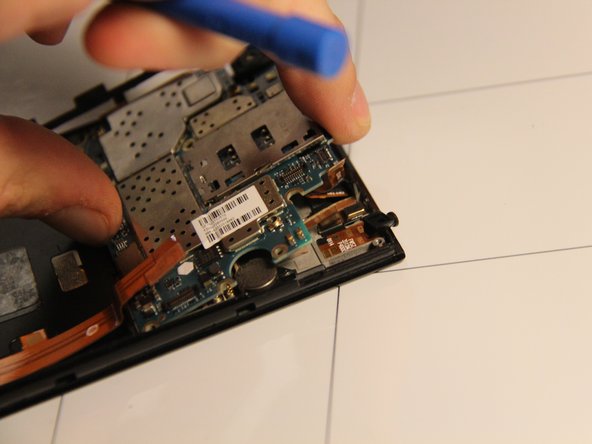
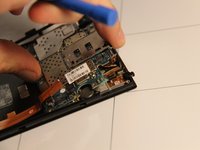
Remove the motherboard from the panel carefully. Use the pry tool as a lever from the top of the panel and lift if from that side.
-
-
-
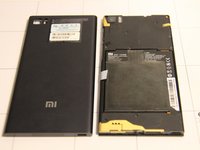
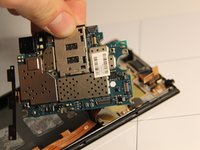
The motherboard has now been successfully removed.
-


To reassemble your device, follow these instructions in reverse order.
To reassemble your device, follow these instructions in reverse order.
crwdns2935221:0crwdne2935221:0
crwdns2935229:08crwdne2935229:0
crwdns2915084:0crwdne2915084:0

USF Tampa, Team 1-5, Remmell Fall 2015 crwdns2935289:0USF Tampa, Team 1-5, Remmell Fall 2015crwdne2935289:0
USFT-REMMELL-F15S1G5
crwdns2931471:04crwdne2931471:0
crwdns2935297:06crwdne2935297:0
crwdns2947412:07crwdne2947412:0
Mi have problems with my mother board i am nt getting it anywhere in the servce center sggst me where i can get it.
I know one in the Moscow)
my motherboard was shot plz replaced my motherboard
I can send to you bricked mainboard. Unsucsessful flashing, but you can rise up it in 9008 mode. If interesting - write to me.
My sound is little bit cracking, what to do..plz help me.
Redmi note 3...and my back panel little bit holed...i want remove my panel....
i required mi 3 motherboard,…i want motherboard, plz help me…