crwdns2915892:0crwdne2915892:0
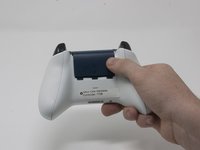
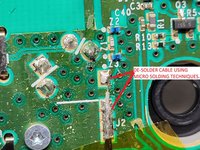
This guide will show you how to access and replace the top motherboard. Soldering is required, so the link to the soldering guide is included to help you.
crwdns2942213:0crwdne2942213:0
-
-
Slide the battery cover toward the top of the controller to remove it.
-
Lift up the batteries or the battery pack from the battery compartment.
-
-
-
Insert a plastic opening tool into the top seam, and gently work the opening tool to the bottom of the controller.
-
Continue using the opening tool to gently pry the side plate off of the controller.
-
Repeat this process for the second side plate.
-
-
-
Gently peel the battery label or punch a hole in the center of the sticker in the battery compartment to reveal the hidden screw.
-
Remove the five 9mm torx-9 security screws from the back of the controller.
-
-
-
Orient the controller so the front plate is facing up.
-
Lift the front cover off of the controller.
-
-
-
-
Turn the controller face down and gently lift the rear plate.
-
-
-
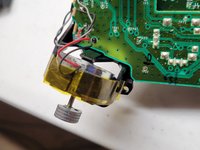
Tape the Rumbler/shock motors in place.
-
This will prevent the motors from falling out.
-
-
-
Turn the device over and remove the directional pad by gently pulling it away from the controller.
-
-
-
Pull the joysticks off of the controller.
-
-
-
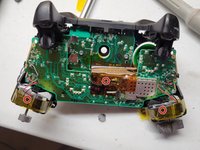
Turn the device over and remove the two 7mm torx-6 screws in the bottom left and right corners.
-
-
-
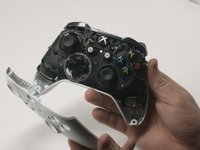
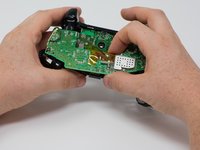
Firmly grasp the top and bottom motherboards in opposite hands, then gently pull them apart.
-


To reassemble your device, follow these instructions in reverse order.
crwdns2935221:0crwdne2935221:0
crwdns2935229:025crwdne2935229:0
crwdns2935287:0crwdne2935287:0

Cal Poly, Team S18-G3, Forte Fall 2017 crwdns2935289:0Cal Poly, Team S18-G3, Forte Fall 2017crwdne2935289:0
CPSU-FORTE-F17S18G3
crwdns2931471:04crwdne2931471:0
crwdns2935297:042crwdne2935297:0
crwdns2947410:01crwdne2947410:0
Necesito un diagrama donde pueda ver el esquemático de los vibradores del gatillo
Héctor Bohórquez - crwdns2934203:0crwdne2934203:0 crwdns2950251:0crwdne2950251:0