crwdns2915892:0crwdne2915892:0
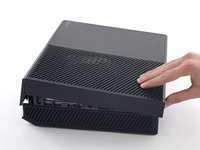
Stuck disk? Having trouble installing that new game, or loading up your Blu-ray copy of Con Air? Follow this guide to replace a broken optical drive in your Xbox One.
crwdns2942213:0crwdne2942213:0
crwdns2936621:0crwdne2936621:0
-
-
To open your Xbox, you're going to have to cut or peel up this tamper-evident tape. But don't worry—Microsoft can't legally void your warranty, as long as you don't damage anything. Have fun!
-
-
-
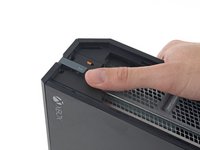
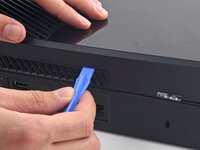
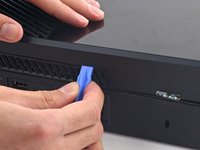
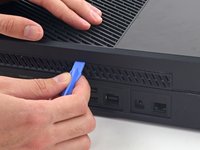
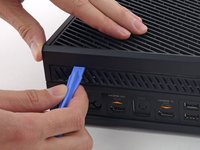
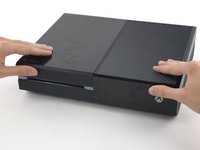
Use a plastic opening tool to pry up and remove the plastic vent that surrounds the side USB port.
-
The vent is fairly flexible, and held in place with weak plastic clips—start prying from the back and peel it out.
-
-
-
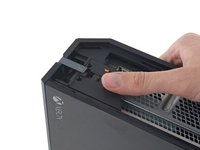
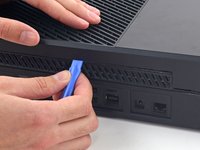
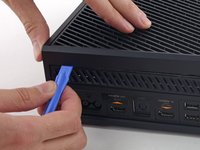
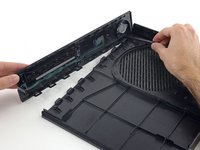
Slide the tab straight back and remove it.
-
-
-
Insert the flat end of a spudger between the upper and lower case where they meet at the rear of the side vent opening.
-
-
-
Insert a plastic opening tool between the upper and lower case to separate the clip over the rear vent.
-
-
-
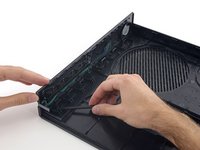
Keep moving along the rear of the Xbox, prying up clips.
-
-
-
Keep popping clips. It may help to slide the plastic opening tool across the clips.
-
-
-
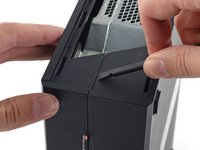
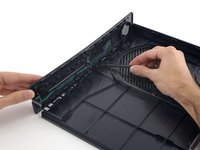
Starting with the spudger you left in the crack, pry the upper case up to free the last few clips.
-
Lift the upper case slightly and shift it to give access to the front panel board.
-
-
-
crwdns2935267:0crwdne2935267:0Tweezers$4.99
-
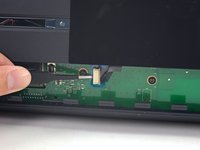
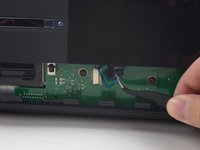
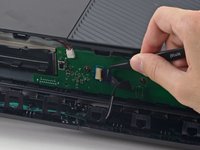
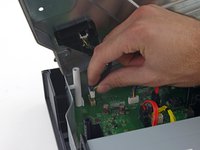
Use tweezers to lift the blue plastic retaining loop over the white connector on the board.
-
Use the tip of a spudger to push the connector's locking tab toward the cable to unlatch it.
-
-
-
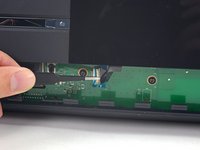
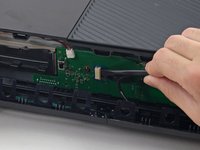
Use tweezers to pull the cable straight out of the connector on the board.
-
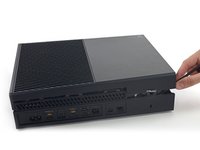
Remove the upper case.
-
-
-
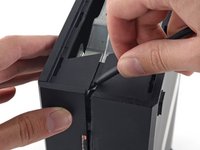
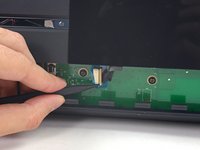
Use the flat end of a spudger to free the clips securing the front panel to the upper case.
-
Remove the front panel from the rest of the upper case.
-
-
-
Replace the top part of the upper case.
-
Line up the clips and press firmly to re-seat them around the perimeter.
-
-
-
Support the front panel near the front of the Xbox.
-
Use tweezers to replace the front button cable in its ZIF socket.
-
Use the flat end of a spudger to push the ZIF lock to the left to secure the cable.
-
-
-
With the front panel at a 45 degree angle, interlock its plastic hooks with those in the lower case.
-
Push the top of the front panel into the Xbox, like closing a mailbox. Press firmly so that the clips securing the front panel to the upper case lock securely.
-
-
-
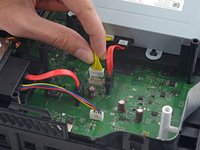
Gently pull up on the speaker cable connector to disconnect it from the front panel board.
-
Use the flat end of a spudger to disconnect the antenna cable from the front panel board.
-
-
-
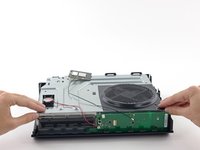
Remove the two 9.5 mm T8 Torx screws from the WI-Fi board.
-
Lift the Wi-Fi board straight up from its socket in the upper metal case.
-
Leaving the Wi-Fi board antenna cable in place, move the Wi-Fi board aside, exposing the screw labeled "C3" that was beneath it.
-
-
-
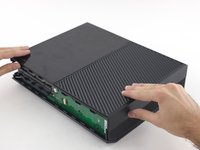
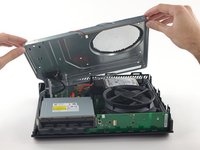
Remove the eight 65 mm Torx T10 screws from the top of the upper metal case.
-
-
-
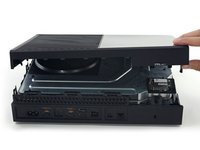
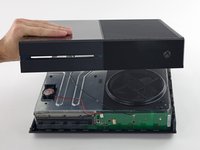
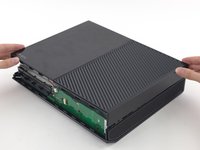
Lift—but do not remove—the upper metal case.
-
-
-
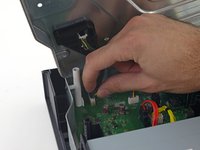
Disconnect the Wi-Fi board interconnect cable from the motherboard.
-
-
-
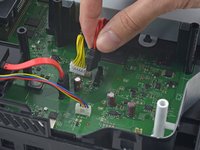
Disconnect the optical drive power and SATA data cables from the motherboard.
-
-
-
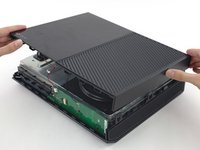
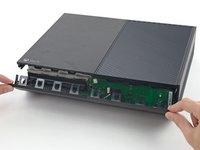
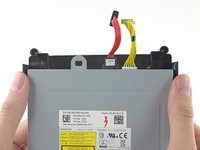
Remove the optical drive assembly from the Xbox.
-
-
-
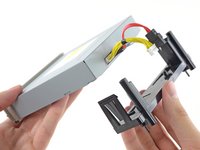
Push the clips outward and then slide the tray off the drive.
-
-
-
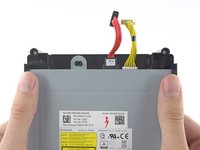
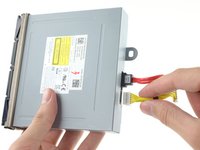
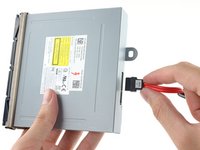
Remove the optical drive power and SATA data cables.
-


To reassemble your device, follow these instructions in reverse order.
crwdns2935221:0crwdne2935221:0
crwdns2935229:092crwdne2935229:0


crwdns2947412:045crwdne2947412:0
I torn down my one to attempt to see why it stopped reading disc, i discovered that it wasn't a spinning issue but that the disc popped back out just a bit leading to why it will not spin. Any way of fixing that?
Ryan Ninteau - crwdns2934203:0crwdne2934203:0 crwdns2950251:0crwdne2950251:0
there is a black bar that rolls the disc into the tray try cleaning that (you will have to fully open the disc drive)
What kind of optical drive should I use?
DZ - crwdns2934203:0crwdne2934203:0 crwdns2950251:0crwdne2950251:0
Once replacing the optical drive does one need to flashit/swap pcb boards. Has Microsoft stopped hard coding these.
Rick Mizell - crwdns2934203:0crwdne2934203:0 crwdns2950251:0crwdne2950251:0
I would like to know the answer to this as well. My xbox has a terrible time loading discs. If I use the hold method to install the disc it will eventually read it.