crwdns2942213:0crwdne2942213:0
-
-
You can remove the side panels with a pry tool.
 crwdns2952109:0crwdne2952109:0
-
-
-
Remove the 5 Torx Security Bit (TR9) screws.
-
-
-
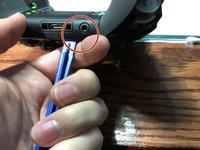
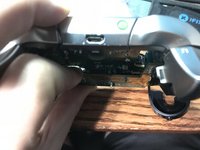
Pry the panel next to the 3.5mm port.
-
-
-
You can pop the connector up to remove the ribbon easily.
-
Ribbon Cable
-
-
-
-
Remove the 2 Torx (T6) screws.
-
-
-
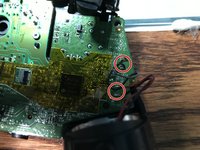
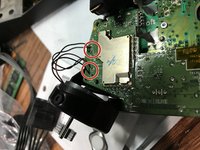
Desolder the 4 wires on each side, these control the vibrations and the RT LT.
-
-
-
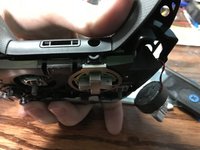
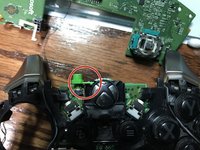
Pull up from the "top" side of the controller on the daughterboard.
-
-
-
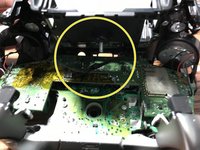
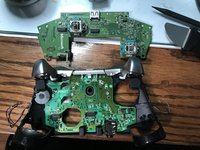
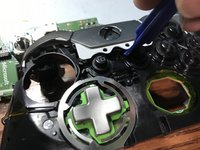
Pry the middle section up from the home button side.
-
-
-
Unscrew the 6 Torx (T6) screws.
-
-
-
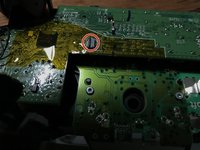
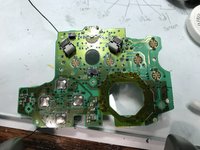
Desolder the original LED from the motherboard of the controller. Do this for both sides of the LED until all of the old solder is removed.
-
Solder on your new LED.
-


To reassemble your device, follow these instructions in reverse order.
crwdns2935221:0crwdne2935221:0
crwdns2935229:06crwdne2935229:0

crwdns2947412:07crwdne2947412:0
So question I’m having troubles with my elite controller every time I go to plug it in and the charging port in the back of the controller it starts to smoke what’s my problem
Dustin Dykstra - crwdns2934203:0crwdne2934203:0 crwdns2950251:0crwdne2950251:0
It sounds like it could be a lot of things…
smoke is obvious a dead stop (stop plugging it in until you repair it).
I would first check the charge port and make sure it is firmly attached if it isn’t you can easily replace the usb port. Next it could be the mainboard charging circuit. if it is this…replace the controller is likely the ideal solution.
EasyAsABC123 - crwdns2934203:0crwdne2934203:0 crwdns2950251:0crwdne2950251:0
I was looking to do this mod for fun. Do you have or know where I can get the led part number? A schematic or bom would be nice. Thanks
Clayton Armagost - crwdns2934203:0crwdne2934203:0 crwdns2950251:0crwdne2950251:0
0805 SMD LED Diode Lights
i bought these https://www.amazon.com/gp/product/B01CUG...
EasyAsABC123 - crwdns2934203:0crwdne2934203:0 crwdns2950251:0crwdne2950251:0
Thank you. I ordered them so we will see what happens.
Clayton Armagost - crwdns2934203:0crwdne2934203:0 crwdns2950251:0crwdne2950251:0