crwdns2942213:0crwdne2942213:0
-
-
You can remove the side panels with a pry tool.
-
-
-
Remove the 5 Torx Security Bit (TR9) screws.
-
-
-
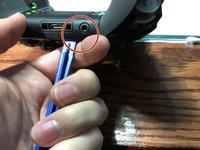
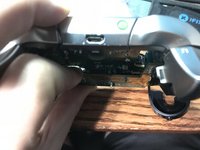
Pry the panel next to the 3.5mm port.
-
-
-
You can pop the connector up to remove the ribbon easily.
-
Ribbon Cable
-
-
-
-
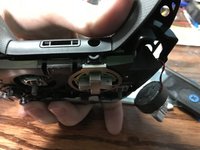
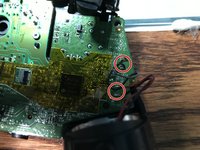
Remove the 2 Torx (T6) screws.
-
-
-
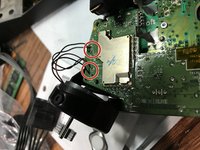
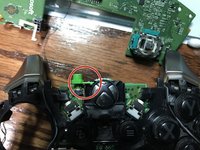
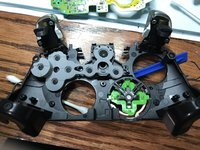
Desolder the 4 wires on each side, these control the vibrations and the RT LT.
-
-
-
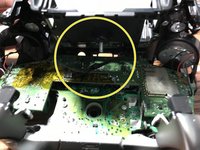
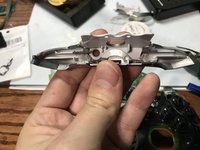
Pull up from the "top" side of the controller on the daughterboard.
-
-
-
Pry the middle section up from the home button side.
-
-
-
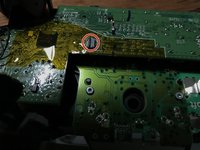
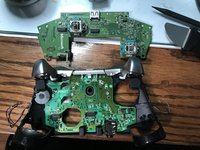
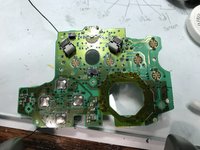
Unscrew the 6 Torx (T6) screws.
-
-
-
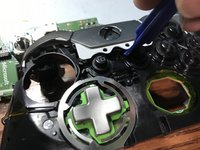
Now you can remove the buttons themselves.
-


To reassemble your device, follow these instructions in reverse order.
crwdns2935221:0crwdne2935221:0
crwdns2935229:045crwdne2935229:0

crwdns2947412:014crwdne2947412:0
Is there any way I could just do step 8, removing the Home cover? I simply need to fix my USB port so i dont really wanna take it completely apart just for that.
jones_8515 - crwdns2934203:0crwdne2934203:0 crwdns2950251:0crwdne2950251:0
Desoldering the rumble motors isn't necessary, nor is removing the first motherboard. Once you get that back panel off, you're golden.
J'Anthony Joseph - crwdns2934203:0crwdne2934203:0 crwdns2950251:0crwdne2950251:0
Ya hi i opened my controller and right away i don’t see ether bolt in both handles. 4 i believe to top two bottom.
Suggestions please.
Craig Amyotte - crwdns2934203:0crwdne2934203:0 crwdns2950251:0crwdne2950251:0
I found using a TQ5 for the 2 motherboard screws worked the best on my controller not a T6
Mat - crwdns2934203:0crwdne2934203:0 crwdns2950251:0crwdne2950251:0
Thanks for the info
EasyAsABC123 - crwdns2934203:0crwdne2934203:0 crwdns2950251:0crwdne2950251:0