crwdns2915892:0crwdne2915892:0
Following this guide involves opening the Xbox 360 E and is somewhat more involved than replacing other parts of the Xbox.
crwdns2942213:0crwdne2942213:0
-
-
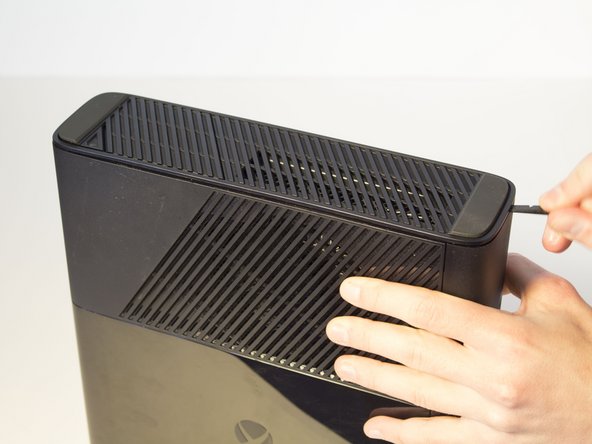
Push the Spudger into the crevice between the grated top panel of the Xbox and the bottom body with the rubber feet.
-
Pull back on the spudger like a lever, keeping it pressed firmly into the crevice.
-
-
-
Slide the spudger along the separation you have created between the grated panel and the bottom body of the Xbox.
-
Periodically pull back on the spudger like a lever, keeping it pressed firmly into the crevice.
-
-
-
Continue sliding the spudger along the perimeter of the left grated face of the Xbox.
-
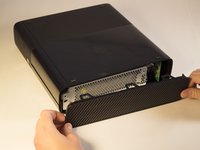
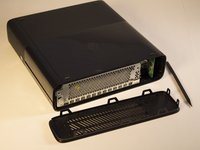
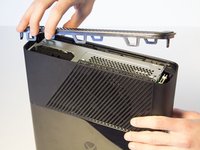
Pull the top panel off.
-
-
-
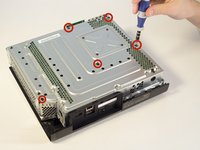
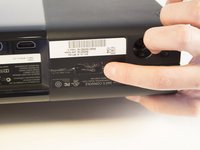
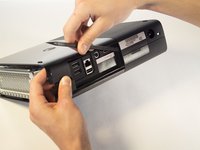
Remove the 11 mm screw left of the green wifi-card using the T9 Torx screw bit.
-
-
-
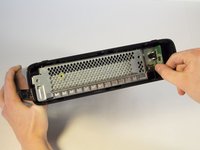
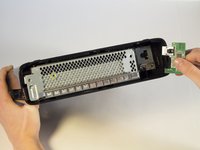
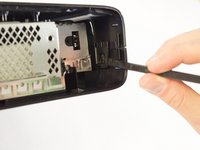
Firmly grip the green Wi-Fi card and pull it out of the Xbox.
-
-
-
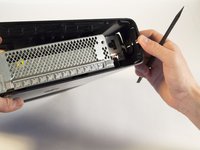
Push the spudger into the crevice between the right grated face and the top body of the Xbox. It's easier to begin away from the vent.
-
Pull up on the spudger like a lever, keeping it pressed firmly into the crevice.
-
-
-
-
Slide the spudger along the crevice to separate the grated face and the top body.
-
-
-
Wiggle the spudger in the crevice as you slide the spudger to loosen the bottom plate.
-
Slide the spudger along the crevice, going completely about the perimeter of the bottom panel.
-
Pull the bottom panel off.
-
-
-
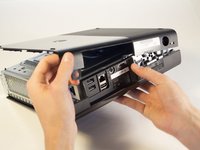
Remove the five long black 55 mm screws labeled C2-5 and C7 with a T9 Torx screwdriver.
-
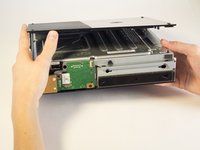
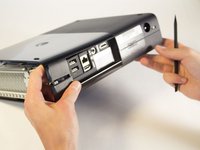
Carefully flip the device and pull off the body by lifting from the metal section that is attached to the plastic exterior.
-
-
-
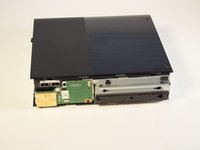
Orient the Xbox so the bottom body is facing upwards. Make sure you see the rubber feet to know you have the correct side of the device.
-
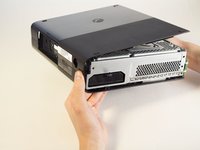
Lift the bottom body slightly away from the core at a 45 degree angle.
-
-
-
Rotate the Xbox so you are now looking at the back of the device.
-
Remove the sticker from the back of the Xbox.
-
-
-
Turn the Xbox to the left to locate the clip holding the body together.
-
With a spudger, press up on the clip like a latch. Move to the far end to undo the other clip the same way.
-
-
-
Push the spudger into the crevice. Slide the spudger along the vertical crevice to detach the last clip. The bottom body should slide off after this.
-
-
-
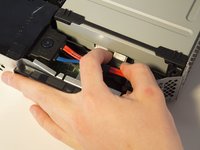
Use your fingers to unplug the blue ribbon cable from the CD drive.
-
-
crwdns2935267:0crwdne2935267:0Tweezers$4.99
-
Use tweezers to unplug the blue and pink wires.
-
-
-
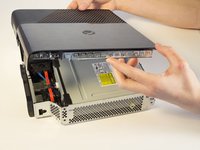
Lift the front end of the CD drive and take it out.
-


To reassemble your device, follow these instructions in reverse order.
To reassemble your device, follow these instructions in reverse order.
crwdns2935221:0crwdne2935221:0
crwdns2935229:025crwdne2935229:0
crwdns2915084:0crwdne2915084:0

Cal Poly, Team 2-11, Amido Winter 2014 crwdns2935289:0Cal Poly, Team 2-11, Amido Winter 2014crwdne2935289:0
CPSU-AMIDO-W14S2G11
crwdns2931471:04crwdne2931471:0
crwdns2935297:044crwdne2935297:0
crwdns2947412:012crwdne2947412:0
i wish the bottom cover magically came off like in step 9
screws are actually C1- C5 one is incorrectly labelled - C7 = C1 also in step 8.5 there are 3 clips holding back edge of bottom cover to top one. one on each end and one just to right of I/O area. can get 2 of them with a spudger (ends) and the middle one with a isesamo.
Several steps missing between 8 and 9
Like remove wifi adaptor.
There is some consistency errors in this guide. Step 9 seems to blast ahead beyond where we should be at this point of the guide.