crwdns2915892:0crwdne2915892:0
This is a simple guide that will open up the car's insides and allow more access to the other parts of the car.
crwdns2942213:0crwdne2942213:0
-
-
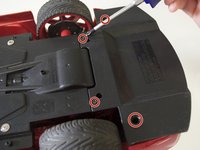
Remove the four 3 mm screws from the bottom panel using a 3 mm Philips #1 screwdriver.
-
-
-
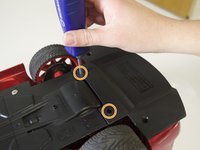
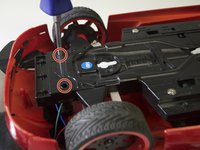
Use the 3 mm Philips #1 screwdriver to remove the three 3 mm screws that connect the front panel with the main underside panel. Also remove the 6 mm front panel screw.
-
Remove the bottom panel by pulling the plastic tabs from either side of the car.
-
-
-
-
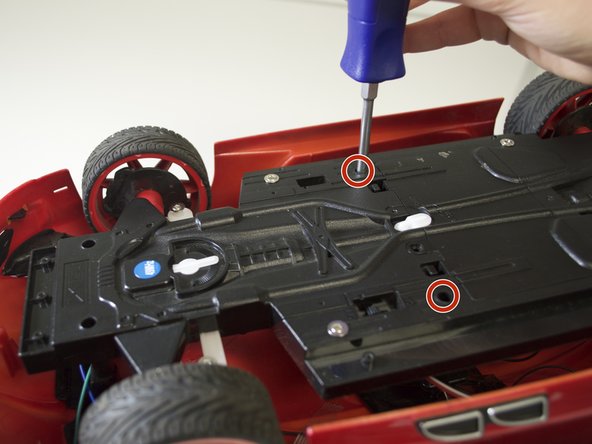
Remove the two 6 mm screws and the two 3 mm screws that connect the back panel to the main underside panel.
-
Remove the two 6 mm screws that connect the rear panel to the body of the car.
-
-
-
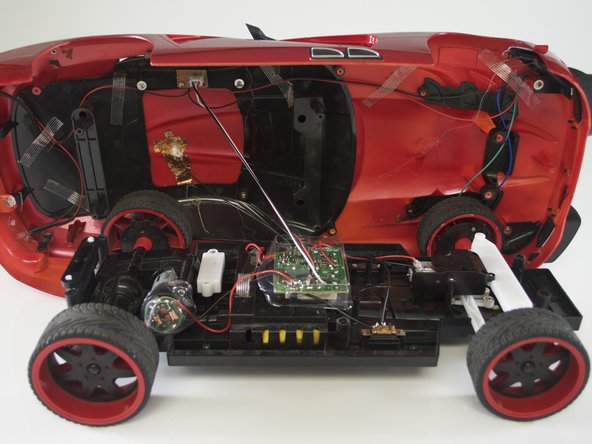
Remove the two front 6 mm screws and the two middle 6 mm screws.
-
Remove the car shell and place it on the left side of the car.
-


To reassemble your device, follow these instructions in reverse order.
To reassemble your device, follow these instructions in reverse order.
crwdns2935221:0crwdne2935221:0
crwdns2935227:0crwdne2935227:0
crwdns2915084:0crwdne2915084:0

Cal Poly, Team 12-6, Lancaster Spring 2015 crwdns2935289:0Cal Poly, Team 12-6, Lancaster Spring 2015crwdne2935289:0
CPSU-LANCASTER-S15S12G6
crwdns2931471:04crwdne2931471:0
crwdns2935297:06crwdne2935297:0