crwdns2915892:0crwdne2915892:0
The LED light on the MiP indicates what mode the robot is in. If this light is malfunctioning, using the MiP is difficult.
crwdns2942213:0crwdne2942213:0
-
-
Remove the three 12.0 mm Phillips # 2 screws from the battery cover.
-
-
-
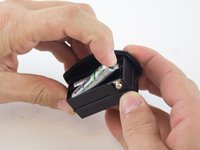
Carefully pull the battery pack from the robot.
-
Remove the batteries from the battery pack.
-
-
-
Use a metal spudger to carefully pry off the hubcap without marring the plastic wheel or hubcap.
-
-
-
Remove the 12.0 mm Phillips #2 screw.
-
-
-
Pull the wheel off of the square axle.
-
-
-
-
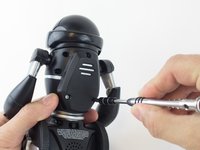
Remove the eight 9.3 mm Phillips #1 screws from the back of the robot.
-
-
-
Remove the arms from the body.
-
Carefully open the body compartment.
-
-
crwdns2935267:0crwdne2935267:0Tweezers$4.99
-
Using precision tweezers, disconnect the following three bundles of wires:
-
Connecting the battery pack to the motherboard.
-
Connecting the power switch to the motherboard.
-
Connecting the speaker to the motherboard.
-
-
-
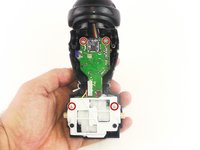
Remove the four 7.5mm Phillips #1 screws.
-
-
-
Carefully pull the motor and motherboard assembly straight out from the base.
-
-
crwdns2935267:0crwdne2935267:0Tweezers$4.99
-
Use the precision tweezers to unplug the bundle of wires.
-
-
-
Slide the head back to separate it from the body.
-
To reassemble your device, follow these instructions in reverse order.
To reassemble your device, follow these instructions in reverse order.
crwdns2935221:0crwdne2935221:0
crwdns2935227:0crwdne2935227:0


