crwdns2933423:0crwdne2933423:0

World Dryer Airforce J4-973A3 Server Board Replacement

crwdns2942213:0crwdne2942213:0

  1. World Dryer Airforce J4-973A3 Server Board Replacement, Server Board: crwdns2935265:01crwdnd2935265:01crwdnd2935265:03crwdne2935265:0 World Dryer Airforce J4-973A3 Server Board Replacement, Server Board: crwdns2935265:01crwdnd2935265:02crwdnd2935265:03crwdne2935265:0 World Dryer Airforce J4-973A3 Server Board Replacement, Server Board: crwdns2935265:01crwdnd2935265:03crwdnd2935265:03crwdne2935265:0
    • Begin by removing both screws and the brushed metal casing. Simply lift up at the indicated area with your hand.

    • The INSTALL and REMOVE indicators may be incorrect, so exercise caution when removing the screws.

  2. World Dryer Airforce J4-973A3 Server Board Replacement: crwdns2935265:02crwdnd2935265:01crwdnd2935265:02crwdne2935265:0 World Dryer Airforce J4-973A3 Server Board Replacement: crwdns2935265:02crwdnd2935265:02crwdnd2935265:02crwdne2935265:0
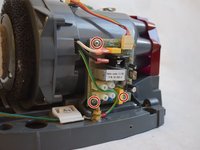
    • Remove both 3/8" Ph2 screws attached to the grey belt at the top and bottom.

    • Lift the grey belt away. This gives access to the server board.

  3. World Dryer Airforce J4-973A3 Server Board Replacement: crwdns2935265:03crwdnd2935265:01crwdnd2935265:03crwdne2935265:0 World Dryer Airforce J4-973A3 Server Board Replacement: crwdns2935265:03crwdnd2935265:02crwdnd2935265:03crwdne2935265:0 World Dryer Airforce J4-973A3 Server Board Replacement: crwdns2935265:03crwdnd2935265:03crwdnd2935265:03crwdne2935265:0
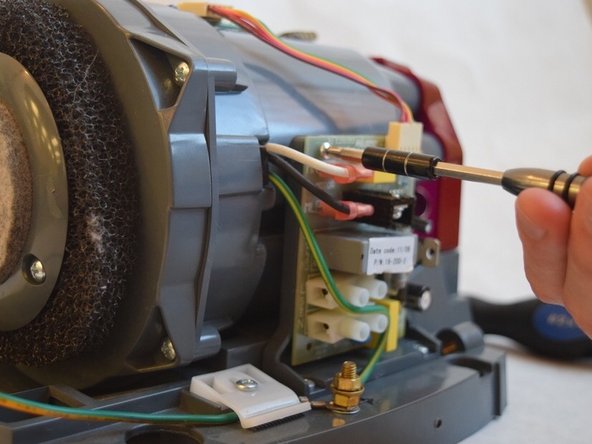
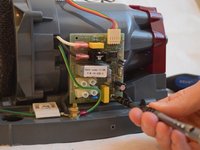
    • Remove all three 1/2" Ph1 screws connecting the server board to the device.

    • During reassembly, install the screws before reattaching the wires.

  4. World Dryer Airforce J4-973A3 Server Board Replacement: crwdns2935265:04crwdnd2935265:01crwdnd2935265:03crwdne2935265:0 World Dryer Airforce J4-973A3 Server Board Replacement: crwdns2935265:04crwdnd2935265:02crwdnd2935265:03crwdne2935265:0 World Dryer Airforce J4-973A3 Server Board Replacement: crwdns2935265:04crwdnd2935265:03crwdnd2935265:03crwdne2935265:0
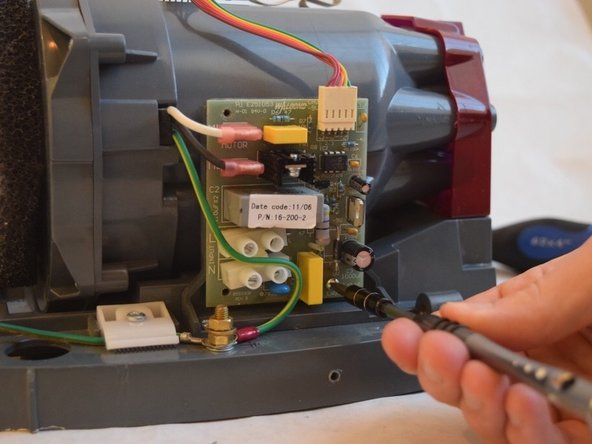
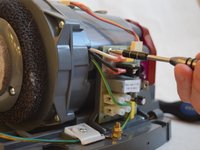
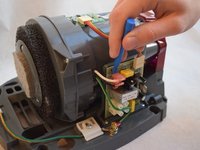
    • Use a plastic opening tool to remove the two pink capped wires in the upper left corner of the server board.

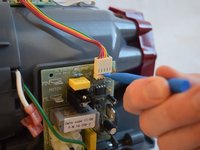
    • Use the same tool to dislodge the white capped ribbon bus with the multi-colored wires.

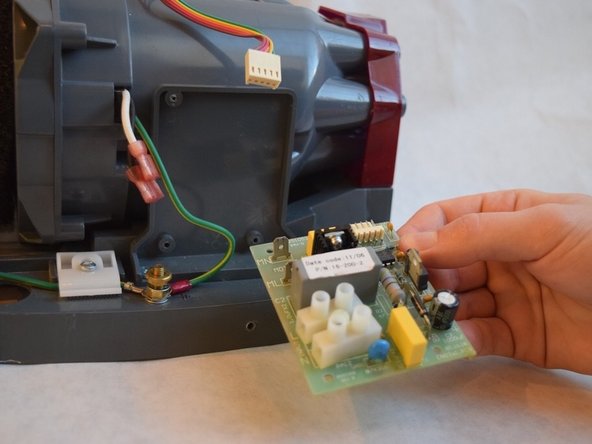
    • After these steps, the server board should easily come off the side of the device.

crwdns2915888:0crwdne2915888:0

To reassemble your device, follow these instructions in reverse order.

Blane Hirsh

crwdns2935283:009/17/18crwdne2935283:0

260 crwdns2915208:0crwdne2915208:0

crwdns2935297:02crwdne2935297:0

crwdns2915084:0crwdne2915084:0

Washington State, Team S1-G6, Hope Fall 2018 crwdns2935289:0Washington State, Team S1-G6, Hope Fall 2018crwdne2935289:0

WSU-HOPE-F18S1G6

crwdns2931471:04crwdne2931471:0

crwdns2935297:04crwdne2935297:0

crwdns2944067:00crwdne2944067:0

crwdns2917038:0crwdne2917038:0

crwdns2936625:0crwdne2936625:0:

crwdns2936751:024crwdne2936751:0 1

crwdns2936753:07crwdne2936753:0 3

crwdns2936753:030crwdne2936753:0 5

crwdns2942667:0crwdne2942667:0 250