crwdns2915892:0crwdne2915892:0
Desoldering technique with [gootwitck mesh], hot air station and yihua soldering iron. (hot air at 100 ° C helps to preheat the control logicboard.)
crwdns2942213:0crwdne2942213:0
crwdns2936621:0crwdne2936621:0
-
-
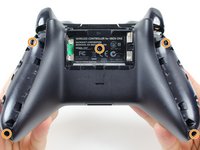
Remove the battery pack cover.
-
Remove batteries.
-
-
-
Grip the controller firmly to remove the side handles, wedging a spudger into the seam between the front and handle plates.
-
Pry the side plate away from the front plate by moving the spudger back and forth. You will need to do this all the way around the side plate's seam.
-
-
-
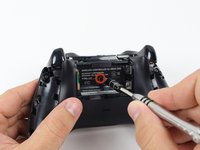
Use a screwdriver and punch a hole directly in the center of the label.
-
Remove the five 10mm screws located on the back of the controller using the TR8 Security Torx Screwdriver.
-
-
-
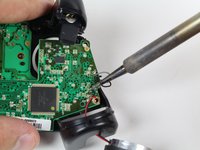
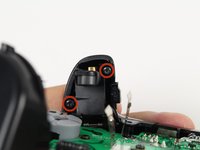
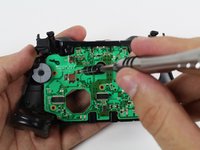
De-solder the soldered joints while holding the red and black wires down on the top motherboard.
-
De-solder the black and gray wires that are attached to the top motherboard.
-
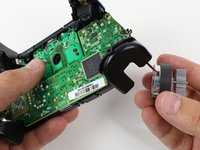
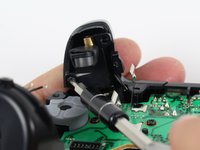
Remove the rumble motors and set them aside.
-
-
-
-
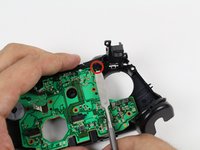
Unscrew the two 7mm T6 screws located near the rumble motor sockets.
-
-
-
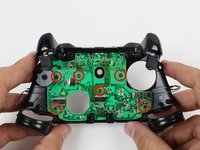
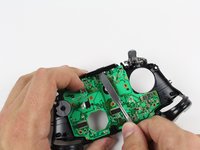
Firmly grip sides of motherboard near the middle.
-
Lift upwards while slightly wiggling the motherboard forward and backward.
-
-
-
Remove the yellow tape holding the wires in place on the front of the controller.
-
-
-
Unscrew the two 7mm T6 Hex screws located on underside the triggers.
-
-
-
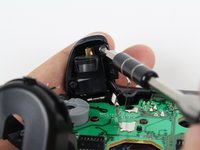
Remove the rumble motors from its socket and pull the wire with it.
-
-
-
Remove the six T6 Torx screws located on the bottom motherboard.
-
-
-
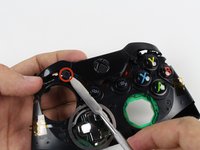
Remove the bumpers by prying them off of the pegs that secure them, using a spudger. They are located on the front and back of the controller.
-
-
-
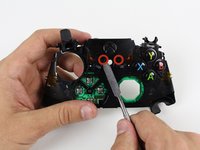
Lift the piece surrounding the Home button off of its pegs.
-
Pry it off of the other side, using a spudger on the pins.
-


To reassemble your device, follow these instructions in reverse order.
crwdns2935221:0crwdne2935221:0
crwdns2935229:04crwdne2935229:0

crwdns2947412:05crwdne2947412:0
Do you know where we can get the original analogue module for the joystick?
it does not exists, so you should buy generic replacement spare part
I love welding technics. This post has clear ideas on how to replace the joystick and shows in detail that’s I like it. I also try to fix many things, and it’s delightful. Thanks for sharing your ideas.
I just created welding related blog and you will find here more: bestmigwelders.org
To be “accurate” and not spread misleading or confusion to beginners or noobs..the correct term of operation performed is “SOLDERING” not welding. Perhaps visually similar in concept they are two totally different operations.