crwdns2915892:0crwdne2915892:0
Consumers love grooming electronics which help save them their time in their normal busy life. A electrical shaver by Wahl is widely used and accepted worldwide, so users sometimes throw out their electrical shaver just because of a malfunctioning blade. You would find this guide the best one to eliminate the need to shop for new trimmers over a period of time and also the cheapest way to take care of your hygiene. Be aware of the used blade and bacteria might be harmful. Always dispose off metal blades where they are out of reach of small kids as blades can be fatal. Hence this guide helps users to replace their current shaver blade with a new one.
crwdns2942213:0crwdne2942213:0
-
-
Take out the batteries by pulling off the cover from the back and once done put the cover back on.
-
-
-
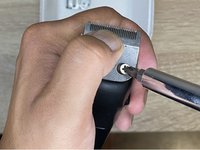
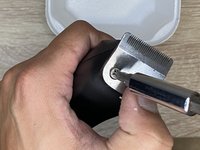
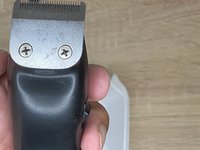
Using the Phillips #0 screwdriver, remove the two screws on the blade and place them in the container.
-
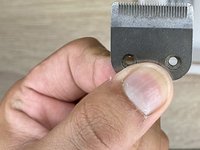
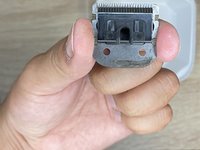
Detach the blade from the body of the shaver and also remove the blade supporting mounts.
-
-
-
-
Grab the replacement new blade and before mounting the support mount clean it with the cleaning brush to remove any dirt.
-
Place the supporting mount back to the new blade making sure it is properly attached.
-
-
-
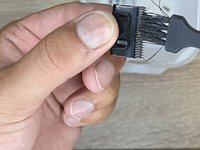
Place the blade with mount attached to the trimmer such that the screw holes are visible through
-
Grab on the blade hard and torque both screws one by one.
-
Check if the blade is attached tightly to the trimmer.
-
Insert the batteries inside the trimmer and start using!
-


To reassemble your device, follow these instructions in reverse order.
To reassemble your device, follow these instructions in reverse order.
crwdns2935221:0crwdne2935221:0
crwdns2935227:0crwdne2935227:0

crwdns2915084:0crwdne2915084:0

York University, Team S1-G9, Allen Summer 2021 crwdns2935289:0York University, Team S1-G9, Allen Summer 2021crwdne2935289:0
YORK-ALLEN-SU21S1G9
crwdns2934841:01crwdne2934841:0
crwdns2935297:02crwdne2935297:0