crwdns2933423:0crwdne2933423:0

Wahl Barracuda Lithium-ion Trimmer Battery Replacement

crwdns2942213:0crwdne2942213:0

  1. Wahl Barracuda Lithium-ion Trimmer Battery Replacement, Remove side grips: crwdns2935265:01crwdnd2935265:01crwdnd2935265:01crwdne2935265:0
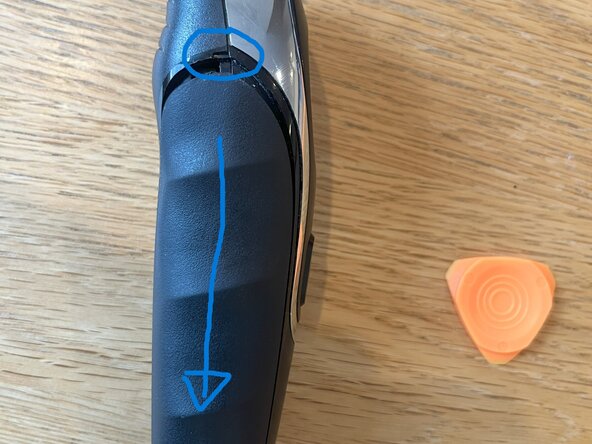
    • Remove the shaver blade and slide the grips off on each side. You can use a pry tool in the notch to assist.

  2. Wahl Barracuda Lithium-ion Trimmer Battery Replacement, Remove outer shell: crwdns2935265:02crwdnd2935265:01crwdnd2935265:02crwdne2935265:0 Wahl Barracuda Lithium-ion Trimmer Battery Replacement, Remove outer shell: crwdns2935265:02crwdnd2935265:02crwdnd2935265:02crwdne2935265:0
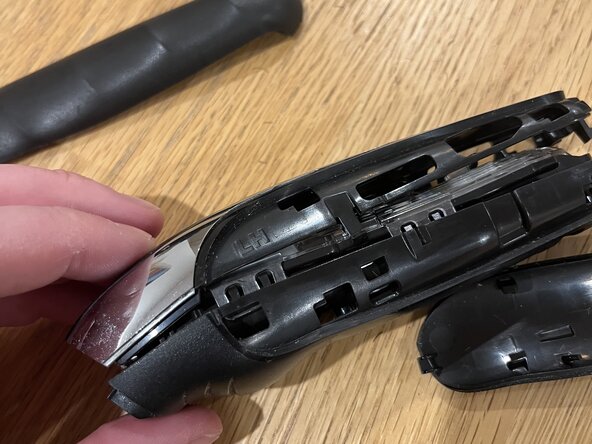
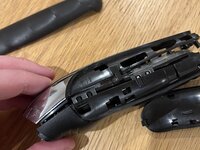
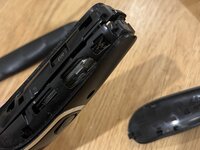
    • Remove the outer shell with pry tools.

  3. Wahl Barracuda Lithium-ion Trimmer Battery Replacement, Remove inner shell: crwdns2935265:03crwdnd2935265:01crwdnd2935265:01crwdne2935265:0
    • Remove the inner water poof shell and 3x screws. The seal may making it a little difficult to separate, but careful prying with the plastic pry tool should help.

  4. Wahl Barracuda Lithium-ion Trimmer Battery Replacement, Remove circuit board: crwdns2935265:04crwdnd2935265:01crwdnd2935265:01crwdne2935265:0
    • The connection between the circuit board and charging pins are friction fitted. Carefully lift the circuit board up, separating it from the pins.

  5. Wahl Barracuda Lithium-ion Trimmer Battery Replacement, Remove internal electronics: crwdns2935265:05crwdnd2935265:01crwdnd2935265:01crwdne2935265:0
    • Remove the battery, circuit board and motor all together.

  6. Wahl Barracuda Lithium-ion Trimmer Battery Replacement, Replace battery: crwdns2935265:06crwdnd2935265:01crwdnd2935265:01crwdne2935265:0
    • Remove the outer shrink wrap from the battery. There will be another circuit board under the wrap directly soldered to the battery, this is the charge controller for the battery. Remove de-solder the tabs and solder the new battery in place. Use Kapton tape to insulate exposed battery contacts and charge controller board.

crwdns2915888:0crwdne2915888:0

To reassemble your device, follow these instructions in reverse order.

Ryan

crwdns2935283:007/15/25crwdne2935283:0

133 crwdns2915208:0crwdne2915208:0

crwdns2935295:0crwdne2935295:0

crwdns2947412:00crwdne2947412:0

crwdns2917038:0crwdne2917038:0

crwdns2936625:0crwdne2936625:0:

crwdns2936751:024crwdne2936751:0 3

crwdns2936753:07crwdne2936753:0 6

crwdns2936753:030crwdne2936753:0 20

crwdns2942667:0crwdne2942667:0 20