crwdns2933423:0crwdne2933423:0

Wacker Compactor Plate VP1550AW 2014 Shockmount Replacement

crwdns2942213:0crwdne2942213:0

  1. Wacker Compactor Plate VP1550AW 2014 Shockmount Replacement, Safety precautions: crwdns2935265:01crwdnd2935265:01crwdnd2935265:02crwdne2935265:0 Wacker Compactor Plate VP1550AW 2014 Shockmount Replacement, Safety precautions: crwdns2935265:01crwdnd2935265:02crwdnd2935265:02crwdne2935265:0
    • Before you begin, be sure that the engine is powered off and is cool to the touch.

    • Grab the plastic housing at the end of the spark plug wire.

    • Pull firmly to disconnect the wire from the spark plug.

  2. Wacker Compactor Plate VP1550AW 2014 Shockmount Replacement, Loosen the handle: crwdns2935265:02crwdnd2935265:01crwdnd2935265:02crwdne2935265:0 Wacker Compactor Plate VP1550AW 2014 Shockmount Replacement, Loosen the handle: crwdns2935265:02crwdnd2935265:02crwdnd2935265:02crwdne2935265:0
    • For ease of access, swing the transport wheels underneath the plate compactor before you begin.

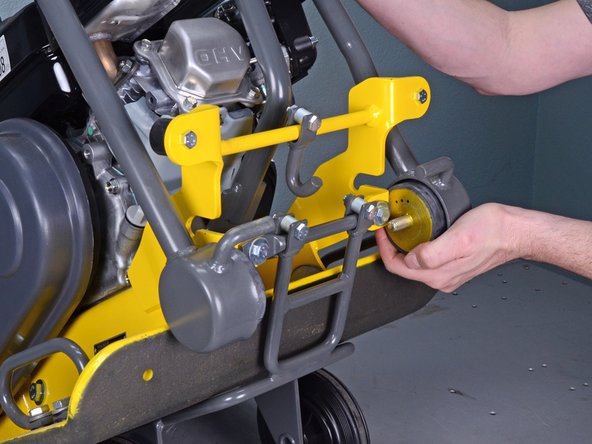
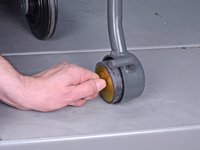
    • Use a 3/4" wrench to remove the two nuts securing the handle.

    • Use your palm to push against the shockmount to prevent it from slipping.

    • Remove the nuts and washers and retain them for reassembly.

  3. Wacker Compactor Plate VP1550AW 2014 Shockmount Replacement, Lower the handle: crwdns2935265:03crwdnd2935265:01crwdnd2935265:03crwdne2935265:0 Wacker Compactor Plate VP1550AW 2014 Shockmount Replacement, Lower the handle: crwdns2935265:03crwdnd2935265:02crwdnd2935265:03crwdne2935265:0 Wacker Compactor Plate VP1550AW 2014 Shockmount Replacement, Lower the handle: crwdns2935265:03crwdnd2935265:03crwdnd2935265:03crwdne2935265:0
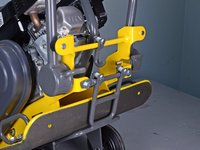
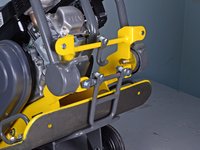
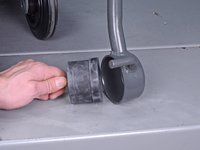
    • Tilt the guide handle forward to pivot the shockmount bolts out of the base grooves.

    • Slide the guide handle down enough to access the shockmounts.

  4. Wacker Compactor Plate VP1550AW 2014 Shockmount Replacement, Remove the shockmount: crwdns2935265:04crwdnd2935265:01crwdnd2935265:02crwdne2935265:0 Wacker Compactor Plate VP1550AW 2014 Shockmount Replacement, Remove the shockmount: crwdns2935265:04crwdnd2935265:02crwdnd2935265:02crwdne2935265:0
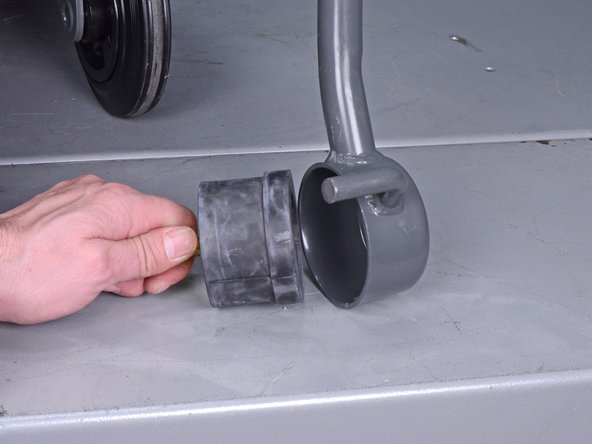
    • Pull the shockmount out of the guide handle.

crwdns2915888:0crwdne2915888:0

To reassemble your device, follow these instructions in reverse order.

Arthur Shi

crwdns2935283:001/03/18crwdne2935283:0

253,505 crwdns2915208:0crwdne2915208:0

crwdns2935297:0526crwdne2935297:0

crwdns2915084:0crwdne2915084:0

iFixit crwdns2935289:0iFixitcrwdne2935289:0

Staff

crwdns2931471:0135crwdne2931471:0

crwdns2935297:017,199crwdne2935297:0

crwdns2944067:00crwdne2944067:0

crwdns2917038:0crwdne2917038:0

crwdns2936625:0crwdne2936625:0:

crwdns2936751:024crwdne2936751:0 1

crwdns2936753:07crwdne2936753:0 4

crwdns2936753:030crwdne2936753:0 19

crwdns2942667:0crwdne2942667:0 482