crwdns2915892:0crwdne2915892:0
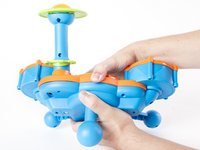
A broken or cracked cymbal can be very hazardous to small children. Additionally, a damaged cymbal could prevent the drum set from working properly. This guide is designed to show how to correctly replace the green cymbal in order restore your drum set to a safe and functioning condition.
crwdns2942213:0crwdne2942213:0
-
-
Locate the battery panel that is centered between the three leg supports at the bottom of the drum set.
-
-
-
To remove the battery panel, loosen the 10 mm panel screw using a flathead 4.0 screwdriver.
-
-
-
Using your fingers, pry open and remove the back battery panel.
-
-
-
Use your fingers to remove each battery from its housing.
-
-
-
Using a Phillips #2 screwdriver, loosen and remove the six 14 mm screws.
-
-
-
-
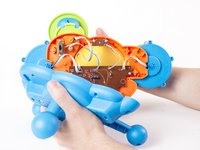
With your hands, separate the bottom panel from the drum set.
-
-
-
Use Phillips #2 screwdriver to loosen and remove the single 16 mm screw.
-
-
-
Using your hands, remove the blue cymbal stand from the orange base.
-
-
-
Loosen and remove the two 14 mm screws using a Phillips #2 screwdriver.
-
-
-
Using your hands, separate the two halves of the blue cymbal stand.
-
-
-
Using your hands, separate the green cymbal from the blue cymbal base.
-
-
-
Using a Phillips #00 screwdriver, loosen and remove the three 12 mm screws located on the bottom of the green cymbal.
-
-
-
Using your hands, separate the green cymbal from the green cymbal base.
-
-
-
Using your hands, pull apart the green cymbal from the yellow light casing.
-


To reassemble your device, follow these instructions in reverse order.
To reassemble your device, follow these instructions in reverse order.
crwdns2935221:0crwdne2935221:0
crwdns2935227:0crwdne2935227:0
crwdns2915084:0crwdne2915084:0

USF Tampa, Team 2-8, Cagle Spring 2016 crwdns2935289:0USF Tampa, Team 2-8, Cagle Spring 2016crwdne2935289:0
USFT-CAGLE-S16S2G8
crwdns2931471:02crwdne2931471:0
crwdns2935297:012crwdne2935297:0