crwdns2933423:0crwdne2933423:0

Voluas VL001 Screen/Motherboard Assembly Replacement

crwdns2942213:0crwdne2942213:0

  1. Voluas VL001 Screen/Motherboard Assembly Replacement, Storage Tank: crwdns2935265:01crwdnd2935265:01crwdnd2935265:03crwdne2935265:0 Voluas VL001 Screen/Motherboard Assembly Replacement, Storage Tank: crwdns2935265:01crwdnd2935265:02crwdnd2935265:03crwdne2935265:0 Voluas VL001 Screen/Motherboard Assembly Replacement, Storage Tank: crwdns2935265:01crwdnd2935265:03crwdnd2935265:03crwdne2935265:0
    • Remove the lid to the storage tank by using the latch and lifting off.

    • Grab the food storage tank on both sides. Depress the tabs that say "Push" on them and lift the tank off.

  2. Voluas VL001 Screen/Motherboard Assembly Replacement, Battery: crwdns2935265:02crwdnd2935265:01crwdnd2935265:03crwdne2935265:0 Voluas VL001 Screen/Motherboard Assembly Replacement, Battery: crwdns2935265:02crwdnd2935265:02crwdnd2935265:03crwdne2935265:0 Voluas VL001 Screen/Motherboard Assembly Replacement, Battery: crwdns2935265:02crwdnd2935265:03crwdnd2935265:03crwdne2935265:0
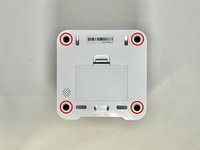
    • Place your pet feeder upside down.

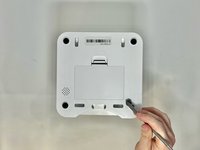
    • Squeeze the lock and remove the battery cover.

    • Remove the three 1.5V D alkaline batteries.

  3. Voluas VL001 Screen/Motherboard Assembly Replacement, Housing: crwdns2935265:03crwdnd2935265:01crwdnd2935265:03crwdne2935265:0 Voluas VL001 Screen/Motherboard Assembly Replacement, Housing: crwdns2935265:03crwdnd2935265:02crwdnd2935265:03crwdne2935265:0 Voluas VL001 Screen/Motherboard Assembly Replacement, Housing: crwdns2935265:03crwdnd2935265:03crwdnd2935265:03crwdne2935265:0
    • Insert a metal spudger under the adhesive part of each rubber foot.

    • Pry the foot off.

  4. Voluas VL001 Screen/Motherboard Assembly Replacement: crwdns2935265:04crwdnd2935265:01crwdnd2935265:02crwdne2935265:0 Voluas VL001 Screen/Motherboard Assembly Replacement: crwdns2935265:04crwdnd2935265:02crwdnd2935265:02crwdne2935265:0
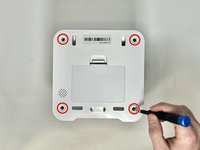
    • Remove four screws from the corners of the device using a Phillips #2 screwdriver.

    • These holes were previously covered by the rubber feet.

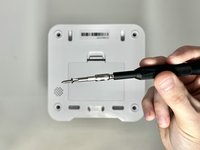
    • Using the magnetic tip of the screwdriver, carefully lift the screw out of the hole.

  5. Voluas VL001 Screen/Motherboard Assembly Replacement: crwdns2935265:05crwdnd2935265:01crwdnd2935265:01crwdne2935265:0
    • Turn the device over so it is oriented right-side up.

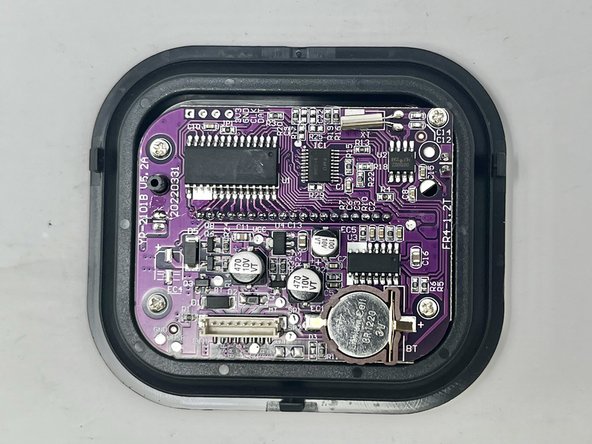
    • Lift the top part of the feeder off, exposing the mechanisms that run the feeder.

  6. Voluas VL001 Screen/Motherboard Assembly Replacement, Screen/Motherboard Assembly: crwdns2935265:06crwdnd2935265:01crwdnd2935265:02crwdne2935265:0 Voluas VL001 Screen/Motherboard Assembly Replacement, Screen/Motherboard Assembly: crwdns2935265:06crwdnd2935265:02crwdnd2935265:02crwdne2935265:0
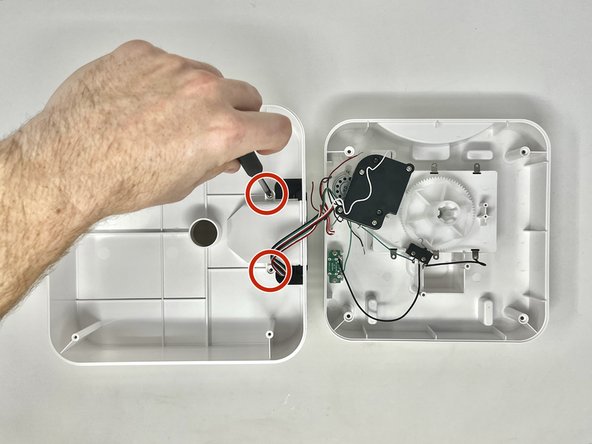
    • With the top part of the feeder sitting upside down, you can remove the chute.

    • Using a Phillips #2 screwdriver, remove the two 11.1 mm screws on either side of the chute.

  7. Voluas VL001 Screen/Motherboard Assembly Replacement: crwdns2935265:07crwdnd2935265:01crwdnd2935265:02crwdne2935265:0 Voluas VL001 Screen/Motherboard Assembly Replacement: crwdns2935265:07crwdnd2935265:02crwdnd2935265:02crwdne2935265:0
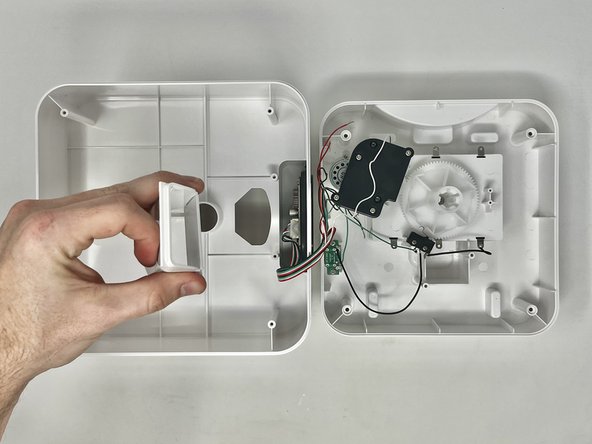
    • Grab the feeder chute on both sides and lift it off to remove it from the feeder.

  8. Voluas VL001 Screen/Motherboard Assembly Replacement: crwdns2935265:08crwdnd2935265:01crwdnd2935265:03crwdne2935265:0 Voluas VL001 Screen/Motherboard Assembly Replacement: crwdns2935265:08crwdnd2935265:02crwdnd2935265:03crwdne2935265:0 Voluas VL001 Screen/Motherboard Assembly Replacement: crwdns2935265:08crwdnd2935265:03crwdnd2935265:03crwdne2935265:0
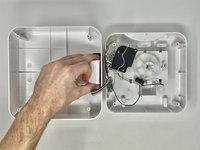
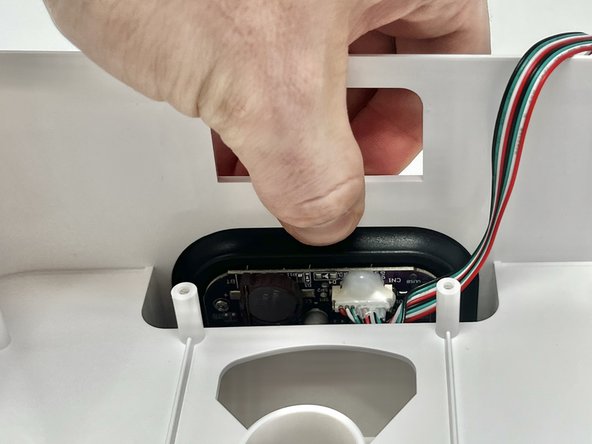
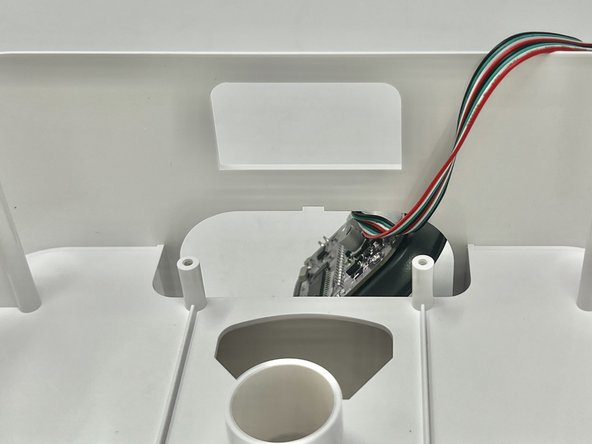
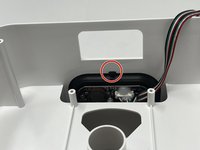
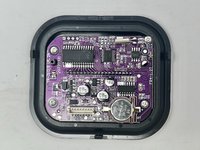
    • Using your finger, depress the tab that holds the assembly onto the device.

    • While pushing the tab down, push the screen out of the device.

  9. Voluas VL001 Screen/Motherboard Assembly Replacement: crwdns2935265:09crwdnd2935265:01crwdnd2935265:03crwdne2935265:0 Voluas VL001 Screen/Motherboard Assembly Replacement: crwdns2935265:09crwdnd2935265:02crwdnd2935265:03crwdne2935265:0 Voluas VL001 Screen/Motherboard Assembly Replacement: crwdns2935265:09crwdnd2935265:03crwdnd2935265:03crwdne2935265:0
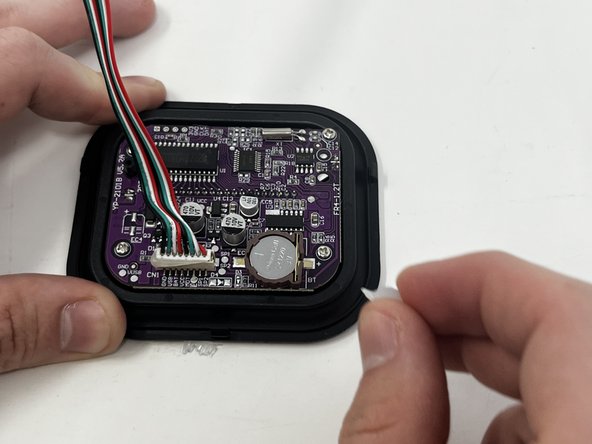
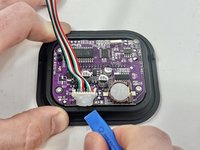
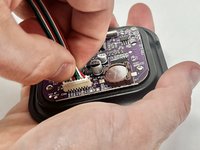
    • Using an opening tool, pry the dried silicone from around the connector.

    • Because you are working around the motherboard, try to limit how much you use its surface for leverage. It is a fragile part and can damage easily.

    • If needed, peel any remaining glue off with your fingers.

  10. Voluas VL001 Screen/Motherboard Assembly Replacement: crwdns2935265:010crwdnd2935265:01crwdnd2935265:03crwdne2935265:0 Voluas VL001 Screen/Motherboard Assembly Replacement: crwdns2935265:010crwdnd2935265:02crwdnd2935265:03crwdne2935265:0 Voluas VL001 Screen/Motherboard Assembly Replacement: crwdns2935265:010crwdnd2935265:03crwdnd2935265:03crwdne2935265:0
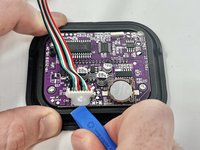
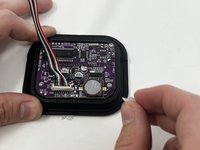
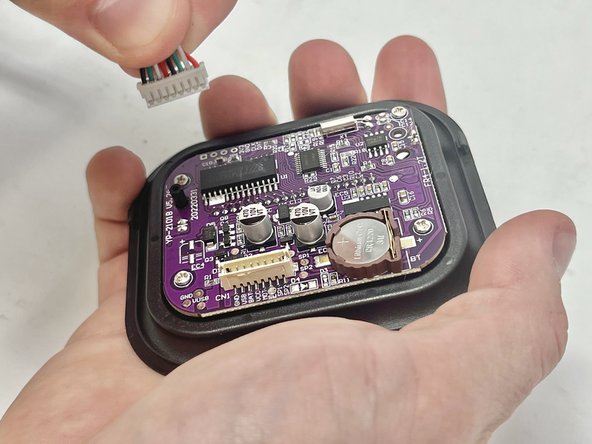
    • Firmly grab the connector, just above the plastic end, and pull firmly to remove.

crwdns2915888:0crwdne2915888:0

To reassemble your device, follow these instructions in reverse order.

Jade Thomson

crwdns2935283:001/30/24crwdne2935283:0

699 crwdns2915208:0crwdne2915208:0

crwdns2935297:06crwdne2935297:0

crwdns2915084:0crwdne2915084:0

Utah Tech University, Team 1-3, McMurrin Spring 2024 crwdns2935289:0Utah Tech University, Team 1-3, McMurrin Spring 2024crwdne2935289:0

UTAHTECH-MCMURRIN-S24S1G3

crwdns2931471:02crwdne2931471:0

crwdns2935297:010crwdne2935297:0

crwdns2947412:00crwdne2947412:0

crwdns2917038:0crwdne2917038:0

crwdns2936625:0crwdne2936625:0:

crwdns2936751:024crwdne2936751:0 0

crwdns2936753:07crwdne2936753:0 0

crwdns2936753:030crwdne2936753:0 8

crwdns2942667:0crwdne2942667:0 62