crwdns2915892:0crwdne2915892:0
I managed to get my hands on an Original Matchbox Talking Freddy doll from a relative & it is in great condition other than one thing, the pull string was stuck halfway out of the voice box inside of him
So, I like taking things apart, do it for fun sometimes & recently (Less than a year ago) got one of the (Amazing) screwdriver sets from this splendid website (Best set I've ever had 100%)
I've been wanting to make a guide for something on here & I felt like this would be a good one to start because there seems to be none up here & the videos I've seen don't show off everything super well + I've never really seen the inside of an old voice box & wanted to see how it all works myself so it's a win-win-win!
I will apologize for the bad photo quality ahead of time here, my phone is an old ZTE that kind of needs replacement & I was doing this at night
(funnily enough, while watching the 2nd & 3rd ANOES movies)
crwdns2942213:0crwdne2942213:0
-
-
Time To Start
-
First, undo the Velcro at the top of the sweater
-
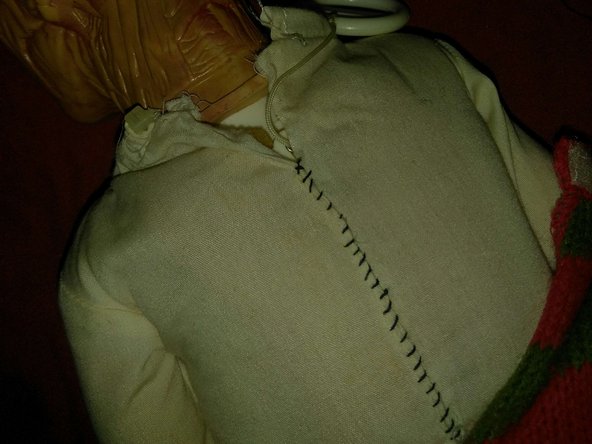
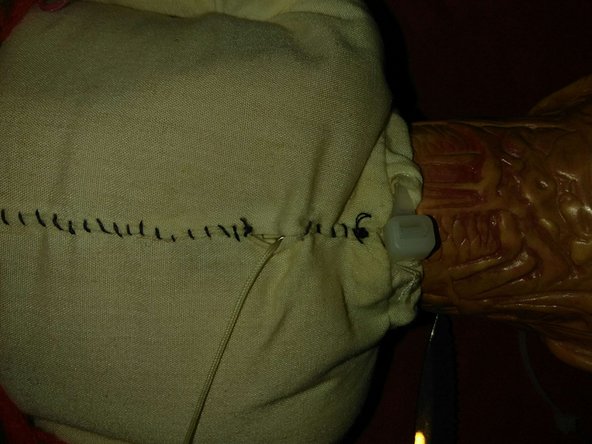
Then take your sharp object of choice & cut the zip tie from the gap in cloth behind his neck (Circled in picture)
-
Then start sliding down the sweater, make Sure you don't pull at it to harshly, just inch it down gently
-
-
-
Take Out The Seams
-
Use your seam ripper & take out the large stiches from top going down, you don't need to take them all out just the top 3/4-ish of his back
-
-
-
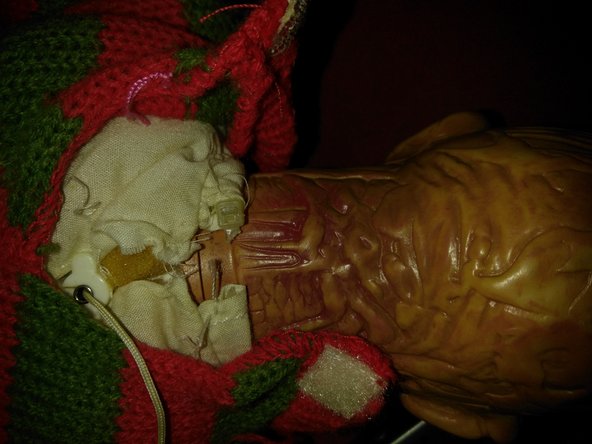
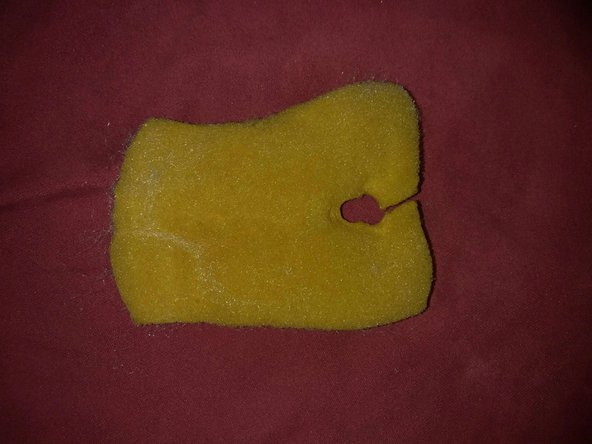
Peel Open The Back & Dig In!
-
First, gently pull out the foam covering, then you will see the voice box (Flesh colored plastic box) hidden behind the mounting plate (The white plate attached to the metal rods) in front of you
-
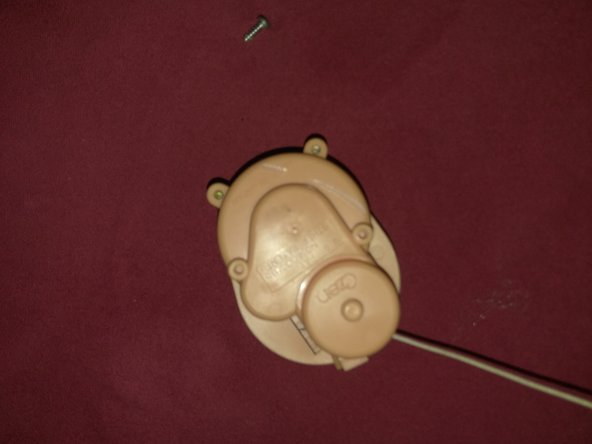
Take out the two screws highlighted in the image with your #1 Philips
-
-
-
Gently Pull The Unmounted Voice Box Out From The Side
-
This is why you have to undo the stitching, slide it out via the side between the open back & the metal & plastic frame
-
(Yes the string stays in place, yes that's fine)
-
-
-
Remove The Two Screws
-
Gently remove the two screws holding the outside of the voice box together
-
"Be Careful, there are small parts inside that can try to escape if you open it to rash"
-
-
-
As you open it up you can see the top layer of the voice box, I'll show you around with a few highlights
-
Red: This is an adjustment spring so you can fine tune the speed a little after you have it all wound up
-
Green: If you couldn't guess this is the speaker
-
Pink: Right past there is the little record that we will see a bit closer in just a second
-
Orange: Here we have the record needle arm
-
-
-
-
Now that it's carefully been opened you should see the next layer just pulls out
-
Make sure to be extra calm here, you only want that top layer of plastic off, nothing else yet
-
-
-
Here we are, now you can now see:
-
Red: The Spindle, this is where you will be rewinding the string onto (Along with the string!)
-
Green: Here we have... This thing! I do NOT know what the name of this part is (Please correct me if you do, love learning these things!) but all it's for is keeping pressure down on the spindle to keep it in place
-
Pink: The Record, this is how Freddy talks (sorry to disappoint if you thought it was some kind of dream demon, killer magic ☹️)
-
-
-
Next, we need to take off that small metal... bracket... thing...
-
If it's not already off (Mine was, part of why it was stuck) remove the metal part
-
Then take out the spindle
-
-
-
Great, now that the spindle is out you need to hook it around the slits in the plastic like in the pictures & then spool it up in the direction the arrow indicates on the top of the spool
-
Just in case you would like a written description as well, here goes nothing:
-
1: Take the end knot & slide it in the slit on the outer wall of the center of the spindle, so the knot is on the outer part of the spindle where you wind the thread
-
2: pull it up & through the inside of the spindle hole to the top of it & fold it over so it goes into the other slit
-
3: From here you can start winding it up, keeping a thumb or finger on the bottom to stop it from trying to slide off as you do
-
-
-
There we are, now comes the fiddliest parts (Fun word, people should use it more)
-
((I will apologize as this is such a specific & requires all your hands, I did not have the ability to take pictures so the ones here are of it back together))
-
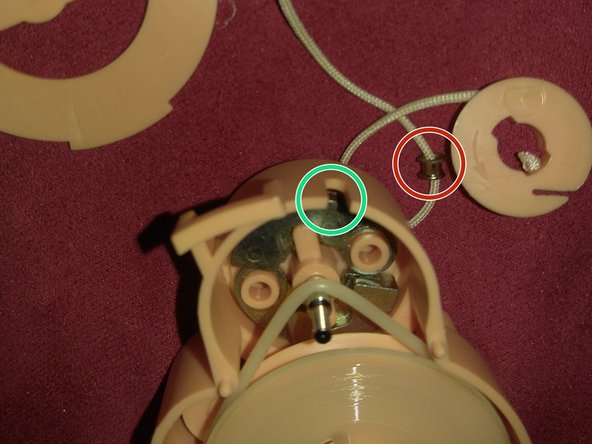
With one hand, hold the thread tight & with the other keep the base of it steady, you need to find the slot point in the center of the spindle (Picture one, red circle) & quickly let go of the thread on the bottom as you press it down onto that (making sure it does not unravel anywhere along the way)
-
Then, without removing the pressure from the top of the spindle you need to replace the metal thing (picture one, green circle), pressing it firmly down to make sure it stays tight in place
-
Lastly, make sure the little metal bit (picture two, red circle) is in place at the output slot (picture two, green circle)
-
-
-
There we are, getting there now!
-
Next, replace the middle part with the needle & adjustment spring (You can keep some pressure here if you want to be extra sure everything stays in place, just don't overdo it Lou Ferrigno)
-
Don't bother with the adjustment string yet, just put the top back on (without the screws, just using your hands to keep it steady) & Let It Rip!™
-
-
-
Well, did it sound good? (As good as it can at least...)
-
If it did, continue on to put this bad boy back together but if not...
-
If it's getting stuck or making noises then head Back to step 6 & try again, this might take a few tries because the spindle is finicky & likes to move out of place, the string can get caught on the parts by the outlet sometimes & there were a few times (at least for me) that the metal bracket thing just popped off so yeah... fun times...
-
Else, if it just sounds off speed wise, fear not! We have a fix for that too!
-
See the adjuster I mentioned earlier? (red circle in the first photo if your memory is bad) well as you can see in the close up shot, the arm of it rests on different pegs, right? Well, you need to move it up & down those pegs to change how fast & slow it sounds till you can get it just right!
-
Change the spring position, put the second layer back on, hold the top in place & give er another pull, rinse & repeat until you have it just as you want it!
-
-
-
Hooray!
-
If you are on this step, then you have successfully fixed his voice box, congrats! (Unless you skipped ahead, then go back why are you here?)
-
Now all that's left is to replace the two screws on the voice box & slide it back inside
-
Then replace the two screws that holds the voice box on the mounting plate
-
-
-
Almost Done
-
Make sure all his stuffing is in place before you take that needle & stich him back up, pretty much the same as it was before (Although I did tighter, more even stiches)
-
-
-
Time to finish up!
-
Add a new zip tie in the slot around his neck where the last one was & pull it tight
-
Cut the excess tie off & finish sewing up above the pull string hole
-
-
-
The dream demon lives!
-
Pull up his sweater & there we are, your personal dream demon is all fixed & ready to scare some teens like it's 1989!
-


Overall, not a horrible fix just a bit of a finicky one
If you have one & he just won't talk anymore I'd say it's well worth giving a swing!
Worst comes to worst & the fix is a bit too much for you or a part is broken or missing inside, you can always just put it back together, seal him up & you still have a pretty good Freddy Krueger doll!
