crwdns2915892:0crwdne2915892:0
Replace your Vivo x60 Pro Plus battery. The battery model is known as B-P8. Vivo x60 Pro (non-plus version) uses the B-P1 so don't confuse them.
crwdns2942213:0crwdne2942213:0
-
-
Remove backside as shown in this video https://www.youtube.com/watch?v=BvxKic5i.... It is important to pre-heat the backside, since the backside is mainly glued onto the device.
-
-
-
Remove these screws. The red ones are all equal length/size, where the blue ones are shorter ones. You need a PH000 screwdriver for these.
-
-
-
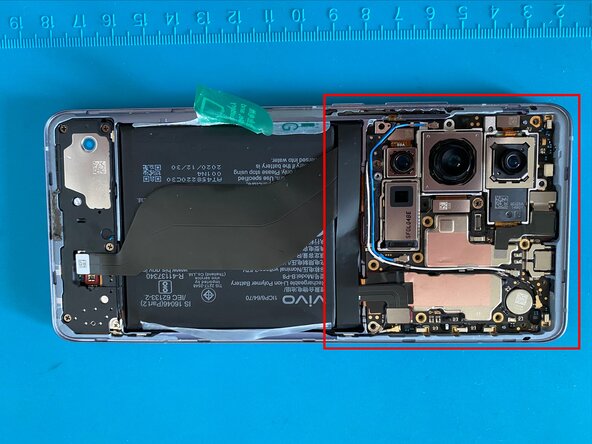
Remove this plate and disconnect this connector.
-
-
-
-
Now this black plate with the antenna is free and can be removed. This will uncover one of two battery connectors that we need to get access to. You can see this part in action here https://youtu.be/yAt_VJIhXXk?si=jZaeFsT2...
-
-
-
(Notice: Phone has been turned by 180 degrees)
-
Unscrew the right plate to uncover the second battery connector
-
Disconnect both battery connectors with a spudger (plastic)
-
-
-
Peel these transparent tapes off and move them towards the outside of the phone (you can't remove them entirely, as they are glued to the device). Do this for both upper and lower transparent tape like indicated by the arrows.
-
The green transparent tape should stay where it is for now
-
-
-
Now pull the green transparent tape with one hand, while holding the device with the other. The battery should slowly come free. You can see this in action here https://youtu.be/sHdZK1OQQMA?si=nDmAyK2U...
-
-
-
Done. Replace now your battery and perform the steps in reverse to assemble your device. The back cover is held onto the device with glue, so simply pushing it back in place should keep it there.
-
Here is a picture of the original battery
-


To reassemble your device, follow these instructions in reverse order.
To reassemble your device, follow these instructions in reverse order.