crwdns2933423:0crwdne2933423:0

Vivitar v3800n Camera Frame Counter Replacement

crwdns2942213:0crwdne2942213:0

  1. Vivitar v3800n Camera Frame Counter Replacement, Frame Counter: crwdns2935265:01crwdnd2935265:01crwdnd2935265:03crwdne2935265:0 Vivitar v3800n Camera Frame Counter Replacement, Frame Counter: crwdns2935265:01crwdnd2935265:02crwdnd2935265:03crwdne2935265:0 Vivitar v3800n Camera Frame Counter Replacement, Frame Counter: crwdns2935265:01crwdnd2935265:03crwdnd2935265:03crwdne2935265:0
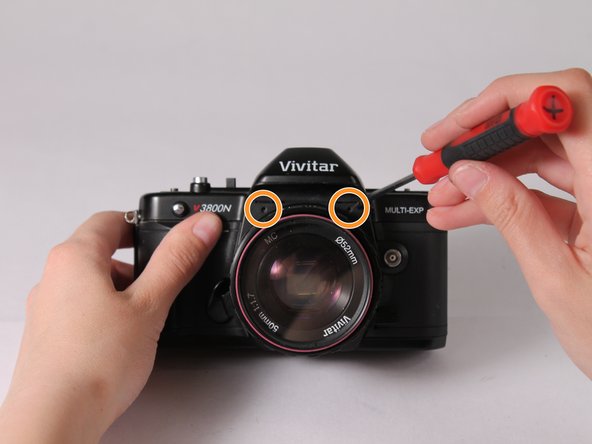
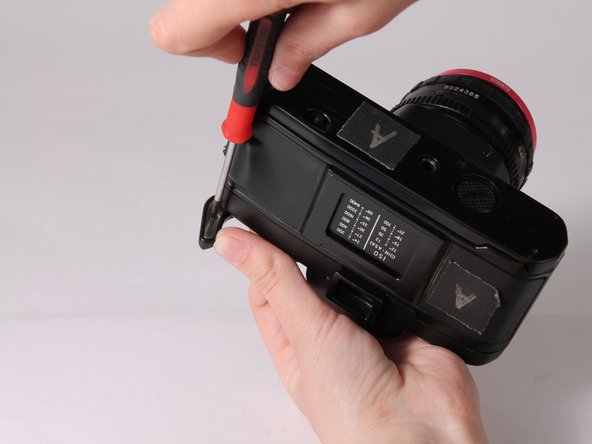
    • Unscrew the front screws on the camera with a Philips screwdriver.

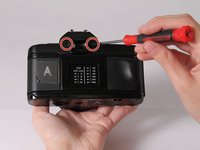
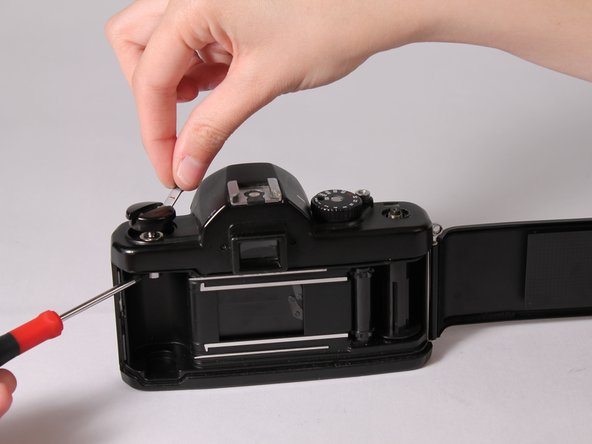
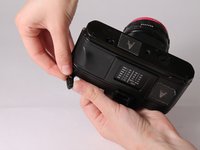
    • Unscrew the back screws on the camera with a Philips screwdriver.

  2. Vivitar v3800n Camera Frame Counter Replacement: crwdns2935265:02crwdnd2935265:01crwdnd2935265:03crwdne2935265:0 Vivitar v3800n Camera Frame Counter Replacement: crwdns2935265:02crwdnd2935265:02crwdnd2935265:03crwdne2935265:0 Vivitar v3800n Camera Frame Counter Replacement: crwdns2935265:02crwdnd2935265:03crwdnd2935265:03crwdne2935265:0
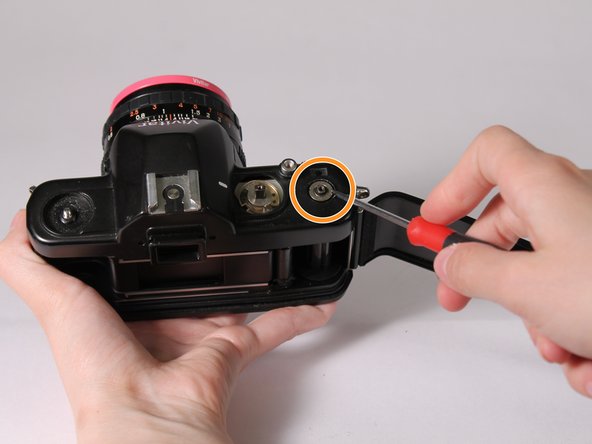
    • Remove the film advance lever by unscrewing the bottom screw with a Philips screwdriver.

    • Remove the plastic cover to uncover the metal lever.

  3. Vivitar v3800n Camera Frame Counter Replacement: crwdns2935265:03crwdnd2935265:01crwdnd2935265:01crwdne2935265:0
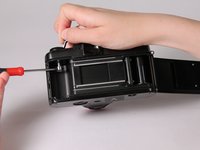
    • Remove the screw holding the metal component of the lever with a flathead screwdriver.

    • Once the screw has been taken off, remove the metal lever.

    • This is a reverse threaded screw. Twist clockwise to remove it.

  4. Vivitar v3800n Camera Frame Counter Replacement: crwdns2935265:04crwdnd2935265:01crwdnd2935265:02crwdne2935265:0 Vivitar v3800n Camera Frame Counter Replacement: crwdns2935265:04crwdnd2935265:02crwdnd2935265:02crwdne2935265:0
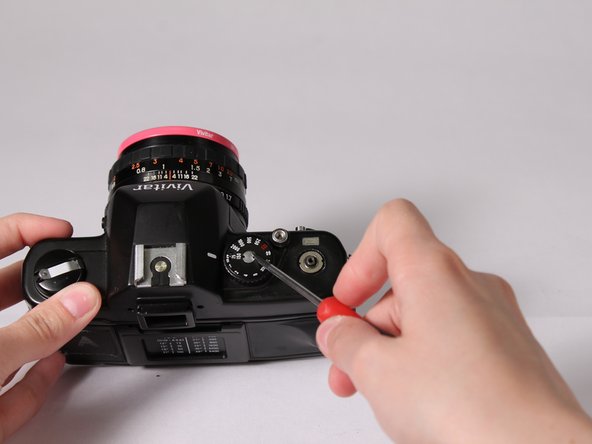
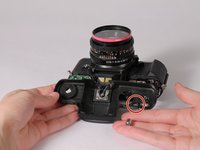
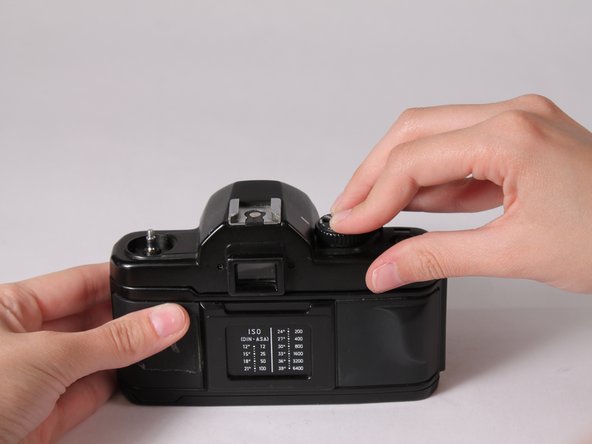
    • Set the speed dial to Bulb mode and the ISO to the lowest setting before taking it off. This makes sure you are at the correct settings when it is placed back together.

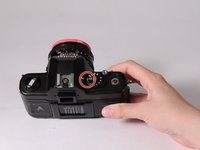
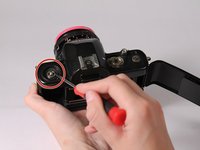
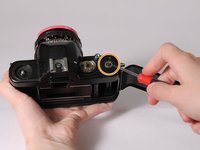
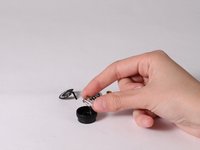
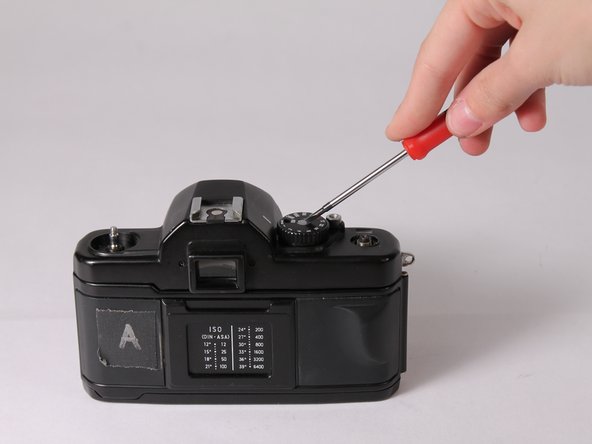
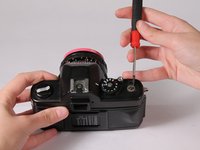
    • Carefully put a flathead screwdriver into a notch in the middle of the dial on the center piece and turn it counter-clockwise.

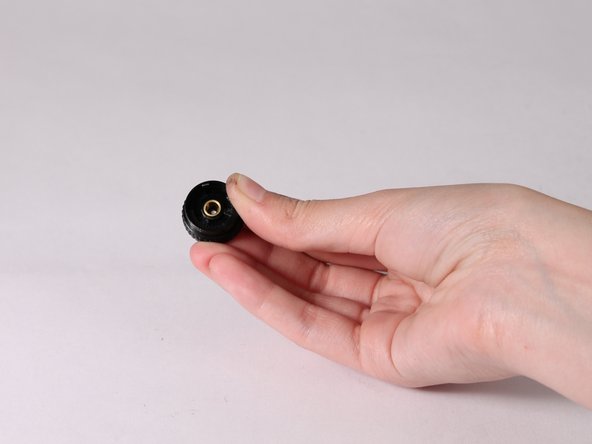
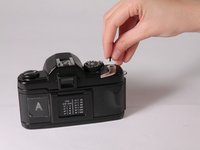
    • Once loosened, remove the speed dial with your hands.

    • Be careful when removing the speed dial! There are several small parts that may fall out.

  5. Vivitar v3800n Camera Frame Counter Replacement: crwdns2935265:05crwdnd2935265:01crwdnd2935265:03crwdne2935265:0 Vivitar v3800n Camera Frame Counter Replacement: crwdns2935265:05crwdnd2935265:02crwdnd2935265:03crwdne2935265:0 Vivitar v3800n Camera Frame Counter Replacement: crwdns2935265:05crwdnd2935265:03crwdnd2935265:03crwdne2935265:0
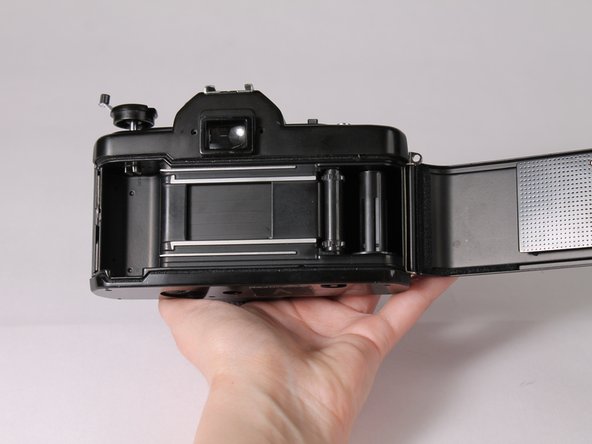
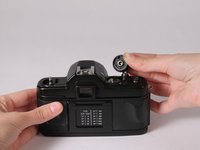
    • Open the camera back by pulling up on the film rewind crank.

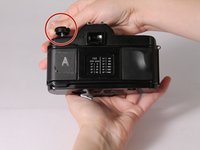
    • Once open, push the rewind crank back down and insert a screwdriver into the notch.

    • With one hand holding the screwdriver in the notch, wind the crank counter-clockwise to remove it.

  6. Vivitar v3800n Camera Frame Counter Replacement: crwdns2935265:06crwdnd2935265:01crwdnd2935265:02crwdne2935265:0 Vivitar v3800n Camera Frame Counter Replacement: crwdns2935265:06crwdnd2935265:02crwdnd2935265:02crwdne2935265:0
    • With a flathead screwdriver, twist the metal washer counter-clockwise to remove it.

    • Remove the washer underneath the advance lever in the same way.

    • Keep these pieces separate. They look similar but are not interchangeable.

  7. Vivitar v3800n Camera Frame Counter Replacement: crwdns2935265:07crwdnd2935265:01crwdnd2935265:03crwdne2935265:0 Vivitar v3800n Camera Frame Counter Replacement: crwdns2935265:07crwdnd2935265:02crwdnd2935265:03crwdne2935265:0 Vivitar v3800n Camera Frame Counter Replacement: crwdns2935265:07crwdnd2935265:03crwdnd2935265:03crwdne2935265:0
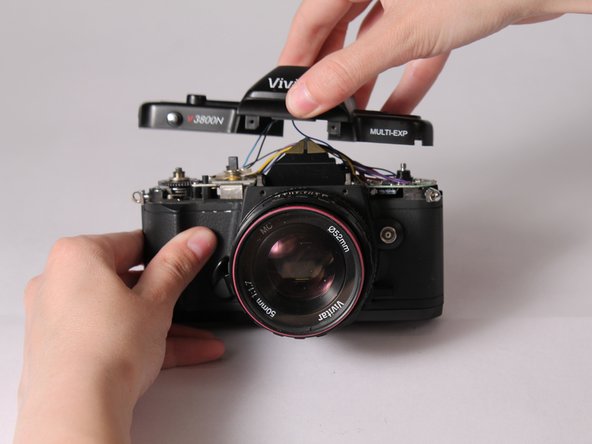
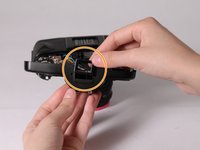
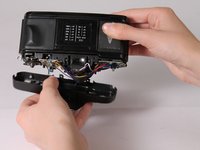
    • Remove top of camera.

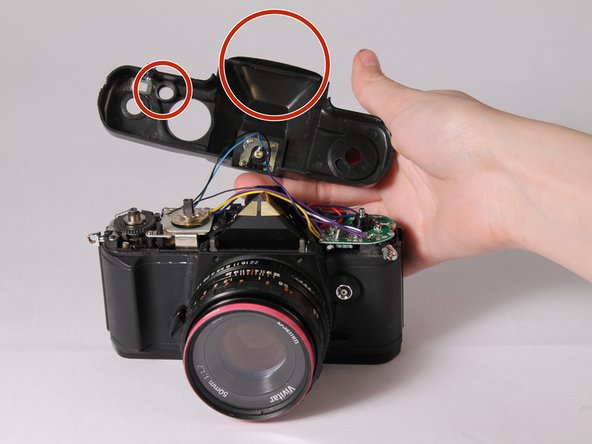
    • Set aside the shutter release button and the viewfinder eyepiece.

    • The shutter release button and the viewfinder eyepiece are loose so they may fall out during removal.

  8. Vivitar v3800n Camera Frame Counter Replacement: crwdns2935265:08crwdnd2935265:01crwdnd2935265:03crwdne2935265:0 Vivitar v3800n Camera Frame Counter Replacement: crwdns2935265:08crwdnd2935265:02crwdnd2935265:03crwdne2935265:0 Vivitar v3800n Camera Frame Counter Replacement: crwdns2935265:08crwdnd2935265:03crwdnd2935265:03crwdne2935265:0
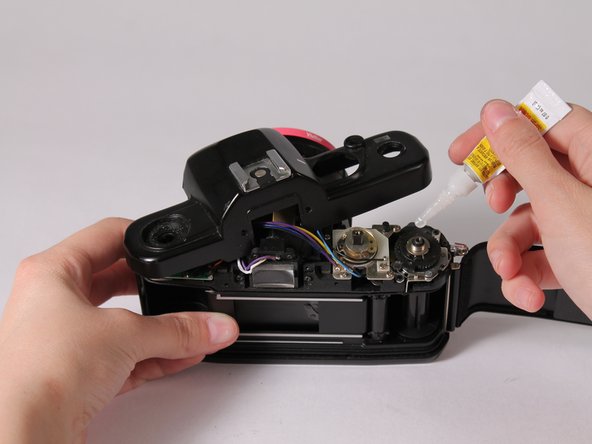
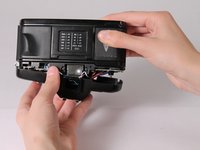
    • Remove the loose frame counter.

    • Apply a small amount of glue to the area and wait approximately 5 minutes for it to dry.

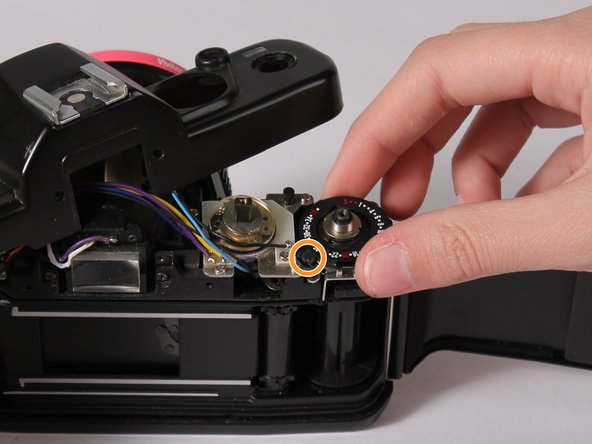
    • Put the frame counter back into place, lining up "26" to the indicated notch.

    • Tip: use a toothpick to apply the glue to ensure you don't glue down any moving parts.

  9. Vivitar v3800n Camera Frame Counter Replacement: crwdns2935265:09crwdnd2935265:01crwdnd2935265:02crwdne2935265:0 Vivitar v3800n Camera Frame Counter Replacement: crwdns2935265:09crwdnd2935265:02crwdnd2935265:02crwdne2935265:0
    • Place the shutter release button pieces into the indicated spot. The larger piece goes in first, then the smaller piece fits into that one.

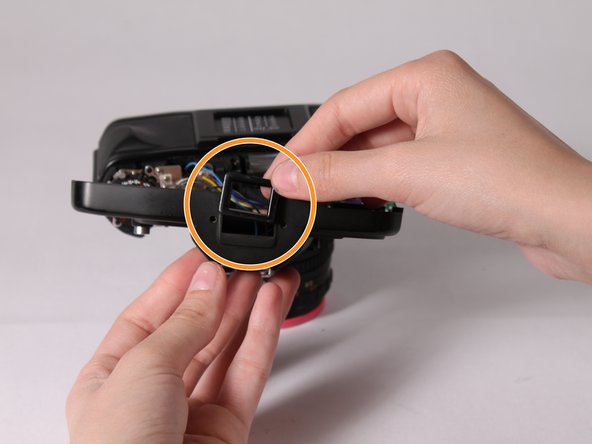
    • Put the view finder back into place by sliding it in as shown.

  10. Vivitar v3800n Camera Frame Counter Replacement: crwdns2935265:010crwdnd2935265:01crwdnd2935265:02crwdne2935265:0 Vivitar v3800n Camera Frame Counter Replacement: crwdns2935265:010crwdnd2935265:02crwdnd2935265:02crwdne2935265:0
    • Turn the camera upside down and place the top back on.

    • Make sure wires do not get crushed between parts.

  11. Vivitar v3800n Camera Frame Counter Replacement: crwdns2935265:011crwdnd2935265:01crwdnd2935265:02crwdne2935265:0 Vivitar v3800n Camera Frame Counter Replacement: crwdns2935265:011crwdnd2935265:02crwdnd2935265:02crwdne2935265:0
    • Screw in two screws on the back of the camera.

    • Screw in the other two screws on the front of the camera.

  12. Vivitar v3800n Camera Frame Counter Replacement: crwdns2935265:012crwdnd2935265:01crwdnd2935265:03crwdne2935265:0 Vivitar v3800n Camera Frame Counter Replacement: crwdns2935265:012crwdnd2935265:02crwdnd2935265:03crwdne2935265:0 Vivitar v3800n Camera Frame Counter Replacement: crwdns2935265:012crwdnd2935265:03crwdnd2935265:03crwdne2935265:0
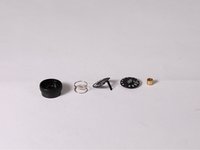
    • Reassemble the 5 pieces of the shutter speed dial.

    • Hold the rest of the dial together with your finger while performing these steps.

    • Place the spring into the dial.

    • Place the lens load indicator on top of the spring.

  13. Vivitar v3800n Camera Frame Counter Replacement: crwdns2935265:013crwdnd2935265:01crwdnd2935265:03crwdne2935265:0 Vivitar v3800n Camera Frame Counter Replacement: crwdns2935265:013crwdnd2935265:02crwdnd2935265:03crwdne2935265:0 Vivitar v3800n Camera Frame Counter Replacement: crwdns2935265:013crwdnd2935265:03crwdnd2935265:03crwdne2935265:0
    • Refer to the first image in Step 12.

    • Place the top of the speed dial onto the lens load indicator.

    • Place the gold piece into the indicated area.

  14. Vivitar v3800n Camera Frame Counter Replacement: crwdns2935265:014crwdnd2935265:01crwdnd2935265:03crwdne2935265:0 Vivitar v3800n Camera Frame Counter Replacement: crwdns2935265:014crwdnd2935265:02crwdnd2935265:03crwdne2935265:0 Vivitar v3800n Camera Frame Counter Replacement: crwdns2935265:014crwdnd2935265:03crwdnd2935265:03crwdne2935265:0
    • Keeping the spring compressed, carefully place the dial on top of the camera that matches the settings you set during step 4.

    • Make sure all the pieces stay together!

    • Tighten the dial by placing a flathead screwdriver into the notch and turning clockwise.

  15. Vivitar v3800n Camera Frame Counter Replacement: crwdns2935265:015crwdnd2935265:01crwdnd2935265:02crwdne2935265:0 Vivitar v3800n Camera Frame Counter Replacement: crwdns2935265:015crwdnd2935265:02crwdnd2935265:02crwdne2935265:0
    • Place the correct washer back underneath the rewind crank and tighten with a flathead screwdriver.

    • Open the back of the camera and place the screwdriver into the notch.

    • With one hand holding the screwdriver, place the rewind crank onto the peg and turn clockwise until tight.

  16. Vivitar v3800n Camera Frame Counter Replacement: crwdns2935265:016crwdnd2935265:01crwdnd2935265:03crwdne2935265:0 Vivitar v3800n Camera Frame Counter Replacement: crwdns2935265:016crwdnd2935265:02crwdnd2935265:03crwdne2935265:0 Vivitar v3800n Camera Frame Counter Replacement: crwdns2935265:016crwdnd2935265:03crwdnd2935265:03crwdne2935265:0
    • Place the washer on the spot underneath the advance lever and tighten with a flathead screwdriver.

    • Place the advance lever on top of the washer and screw it into place using the flathead screwdriver until tight.

    • This is the reverse threaded screw mentioned earlier.

  17. Vivitar v3800n Camera Frame Counter Replacement: crwdns2935265:017crwdnd2935265:01crwdnd2935265:03crwdne2935265:0 Vivitar v3800n Camera Frame Counter Replacement: crwdns2935265:017crwdnd2935265:02crwdnd2935265:03crwdne2935265:0 Vivitar v3800n Camera Frame Counter Replacement: crwdns2935265:017crwdnd2935265:03crwdnd2935265:03crwdne2935265:0
    • Place the plastic cover onto the advance lever and use a Philips screwdriver to place it together.

crwdns2915888:0crwdne2915888:0

You're done! Go take some great photos!

crwdns2935227:0crwdne2935227:0

Olivia

crwdns2935283:004/28/17crwdne2935283:0

125 crwdns2915208:0crwdne2915208:0

crwdns2935295:0crwdne2935295:0

crwdns2915084:0crwdne2915084:0

UC Davis, Team S2-G3, Cole Spring 2017 crwdns2935289:0UC Davis, Team S2-G3, Cole Spring 2017crwdne2935289:0

UCD-COLE-S17S2G3

crwdns2931471:03crwdne2931471:0

crwdns2935303:01crwdne2935303:0

crwdns2944067:00crwdne2944067:0

crwdns2917038:0crwdne2917038:0

crwdns2936625:0crwdne2936625:0:

crwdns2936751:024crwdne2936751:0 0

crwdns2936753:07crwdne2936753:0 9

crwdns2936753:030crwdne2936753:0 44

crwdns2942667:0crwdne2942667:0 1,597