crwdns2933423:0crwdne2933423:0

Vivitar XO 7 Speaker Replacement

crwdns2942213:0crwdne2942213:0

  1. Vivitar XO 7 Speaker Replacement, Back Cover: crwdns2935265:01crwdnd2935265:01crwdnd2935265:01crwdne2935265:0
    • Remove the two 3mm Phillips #00 screws on the bottom of the tablet.

  2. Vivitar XO 7 Speaker Replacement: crwdns2935265:02crwdnd2935265:01crwdnd2935265:01crwdne2935265:0
    • With the plastic opening tools, pry open the back cover.

  3. Vivitar XO 7 Speaker Replacement: crwdns2935265:03crwdnd2935265:01crwdnd2935265:01crwdne2935265:0
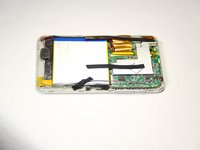
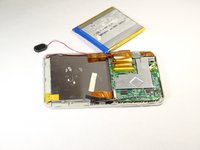
    • Remove the back cover from the tablet.

  4. Vivitar XO 7 Speaker Replacement, Battery: crwdns2935265:04crwdnd2935265:01crwdnd2935265:02crwdne2935265:0 Vivitar XO 7 Speaker Replacement, Battery: crwdns2935265:04crwdnd2935265:02crwdnd2935265:02crwdne2935265:0
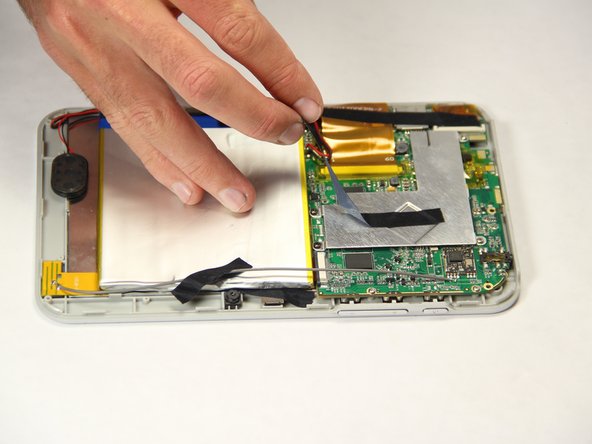
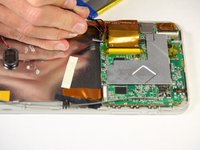
    • Peel off the black pieces of tape from the internal components.

  5. Vivitar XO 7 Speaker Replacement: crwdns2935265:05crwdnd2935265:01crwdnd2935265:02crwdne2935265:0 Vivitar XO 7 Speaker Replacement: crwdns2935265:05crwdnd2935265:02crwdnd2935265:02crwdne2935265:0
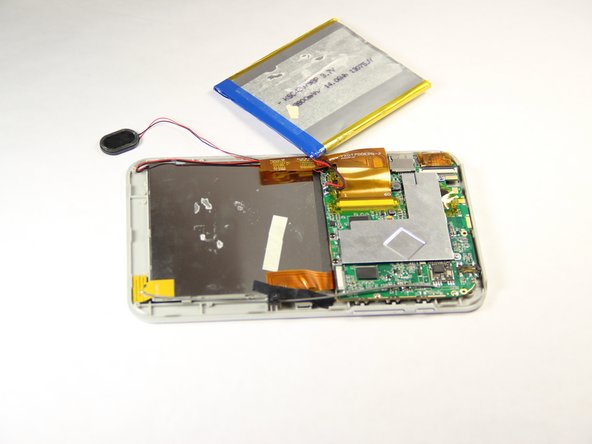
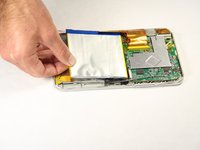
    • Carefully remove the battery from the tablet.
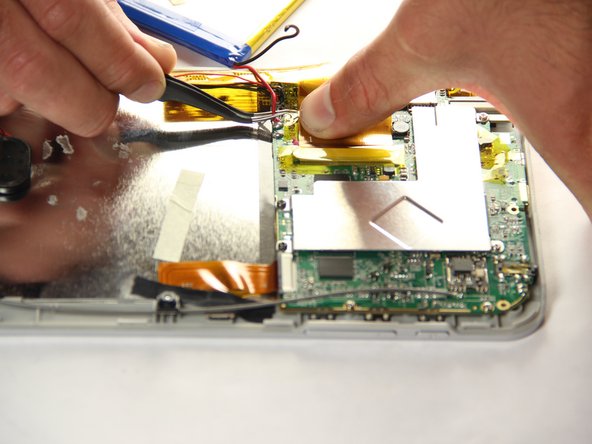
  6. Vivitar XO 7 Speaker Replacement: crwdns2935265:06crwdnd2935265:01crwdnd2935265:02crwdne2935265:0 Vivitar XO 7 Speaker Replacement: crwdns2935265:06crwdnd2935265:02crwdnd2935265:02crwdne2935265:0
    crwdns2935267:0crwdne2935267:0
    Tweezers
    $4.99
    crwdns2942207:0crwdne2942207:0
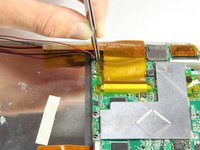
    • With the tweezers, firmly grab the wire at the base and pull to disconnect the battery from the motherboard.

  7. Vivitar XO 7 Speaker Replacement, Speaker: crwdns2935265:07crwdnd2935265:01crwdnd2935265:01crwdne2935265:0
    • Carefully remove the speaker from the metal plate with your hands.
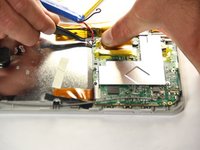
  8. Vivitar XO 7 Speaker Replacement: crwdns2935265:08crwdnd2935265:01crwdnd2935265:02crwdne2935265:0 Vivitar XO 7 Speaker Replacement: crwdns2935265:08crwdnd2935265:02crwdnd2935265:02crwdne2935265:0
    crwdns2935267:0crwdne2935267:0
    Tweezers
    $4.99
    crwdns2942207:0crwdne2942207:0
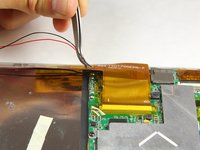
    • With tweezers, firmly grab the wire at the base and pull to disconnect the speaker from the motherboard.

crwdns2915888:0crwdne2915888:0

To reassemble your device, follow these instructions in reverse order.

Barron Dillman

crwdns2935283:001/20/15crwdne2935283:0

227 crwdns2915208:0crwdne2915208:0

crwdns2935297:02crwdne2935297:0

crwdns2915084:0crwdne2915084:0

USF Tampa, Team 11-1, Blackwell Winter 2015 crwdns2935289:0USF Tampa, Team 11-1, Blackwell Winter 2015crwdne2935289:0

USFT-BLACKWELL-W15S11G1

crwdns2931471:04crwdne2931471:0

crwdns2935297:010crwdne2935297:0

crwdns2944067:00crwdne2944067:0

crwdns2917038:0crwdne2917038:0

crwdns2936625:0crwdne2936625:0:

crwdns2936751:024crwdne2936751:0 0

crwdns2936753:07crwdne2936753:0 1

crwdns2936753:030crwdne2936753:0 5

crwdns2942667:0crwdne2942667:0 422