crwdns2915892:0crwdne2915892:0
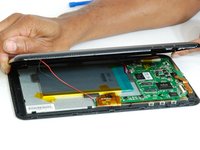
Before starting this guide its important to note that the speaker replacement requires soldering. Don't know how to solder? Don't worry! You can learn how right here.
crwdns2942213:0crwdne2942213:0
-
-
Using the large plastic opening tool, start along a side of the device and apply light pressure in the seam between the top and bottom outer covers.
-
Maneuver the smaller plastic opening tool at the spot of the large opening tool and slowly slide along the edge.
-
-
-
Move tool around each connection, and continue around the device until all connections have been loosened.
-
-
-
Once all connections have been loosened and using a soft surface, place the device onto its screen.
-
-
-
crwdns2935267:0crwdne2935267:0Tweezers$4.99
-
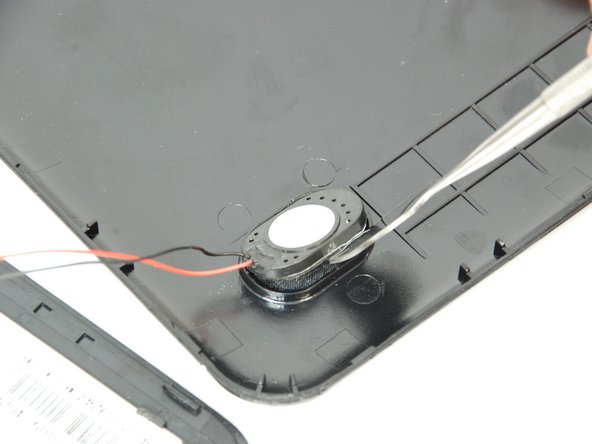
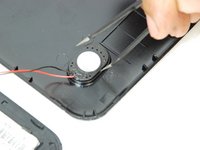
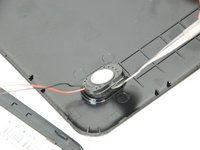
Using ESD safe tweezers and a spudger, gently remove the glued speaker away from the casing.
-
-
-
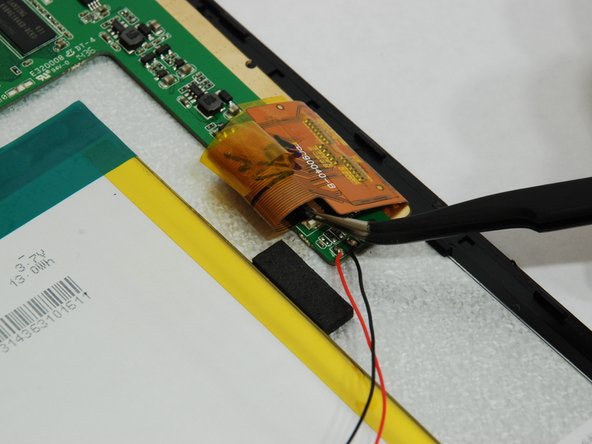
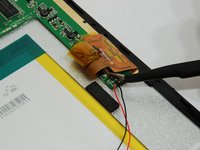
Next locate where the speaker's wires attach to the motherboard.
-
-
-
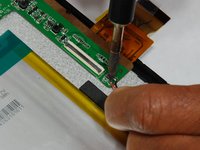
Remove the tape, and using hook tweezers, disconnect the LCD ZIF (zero insertion force) connection.
-
The ZIF connection takes manuvering, but the ribbon should be free and pushed out of the way.
-
-
-
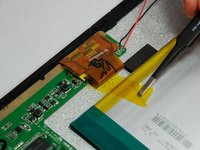
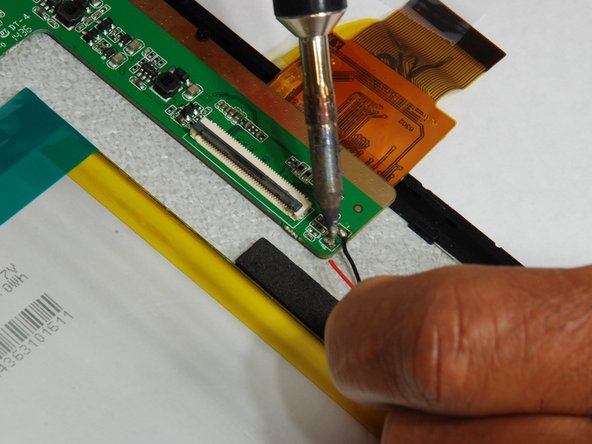
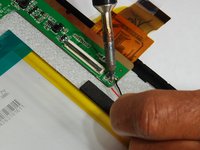
Before disconnecting the speaker, refer to Soldering Tips for proper soldering instructions.
-
Use a soldering iron the remove the speaker wires.
-


To reassemble your device, follow these instructions in reverse order.
To reassemble your device, follow these instructions in reverse order.
crwdns2915084:0crwdne2915084:0

University of Memphis, Team 1-1, Kim SU 2016 crwdns2935289:0University of Memphis, Team 1-1, Kim SU 2016crwdne2935289:0
UM-KIM-SU16S1G1
crwdns2931471:04crwdne2931471:0
crwdns2935297:08crwdne2935297:0