crwdns2915892:0crwdne2915892:0
Use this guide to remove and replace the sensor bar in the scanner bed of the Visioneer OneTouch 7400 USB.
crwdns2942213:0crwdne2942213:0
-
-
On the bottom of the scanner, remove the screw at the top left side.
 crwdns2952109:0crwdne2952109:0
-
-
-
Remove the rubber foot pad opposite the screw hole to expose a second screw hole.
-
Remove the screw beneath the foot-pad.
-
-
-
Rotate the scanner so the screw hole is located on the top left hand side.
-
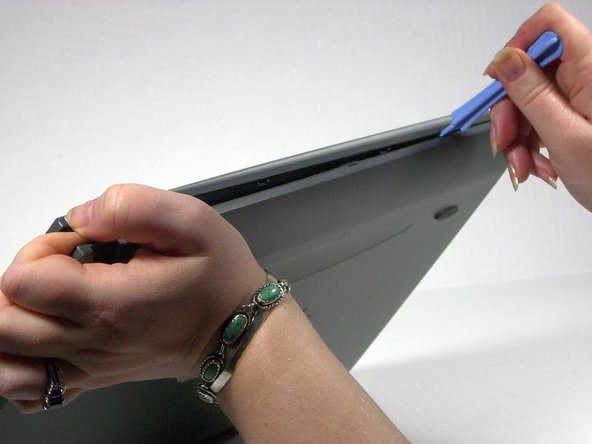
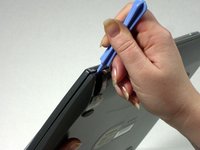
Place the plastic opening tool between the top casement and bottom casement of scanner with the hook facing up.
-
Gently pry the two casements apart beginning above the screw hole and working your way around.
-
-
-
Separate the two casement pieces.
-
-
-
Remove the screw holding the tension spring in place.
-
-
-
Use the plastic opening tool to lift up the tension spring.
-
-
-
-
Remove the belt from the spool.
-
-
-
Loosen the belt enough to turn over the sensor bar.
-
-
-
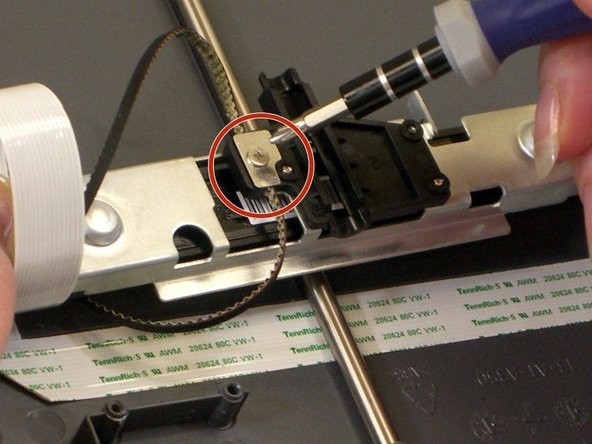
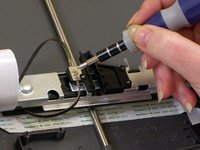
With the sensor bar turned upside down, remove the screw in the middle of the bar.
-
Lift off the metal plate if it does not come away with the screw.
-
-
-
Carefully lift the belt out of the groove in the sensor bar to remove.
-
-
-
With the sensor bar upside down, lift the metal tab near the center.
-
Slide the metal casing on top of the sensor bar to the left to disengage it from the plastic.
-
-
-
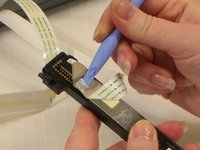
Use the spudger to pry loose the ribbon tab on the inside surface of the casement.
-
-
-
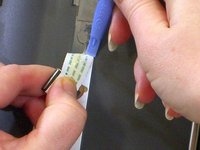
Detach the ribbon from the other end and pull the plastic tab from the ribbon.
-
-
-
Carefully peel the ribbon off of the casing. The ribbon is held with two-sided tape. Use the spudger to help as needed.
-
The ribbon goes under the metal bar. Gently pull the ribbon under the metal bar to remove it.
-
-
-
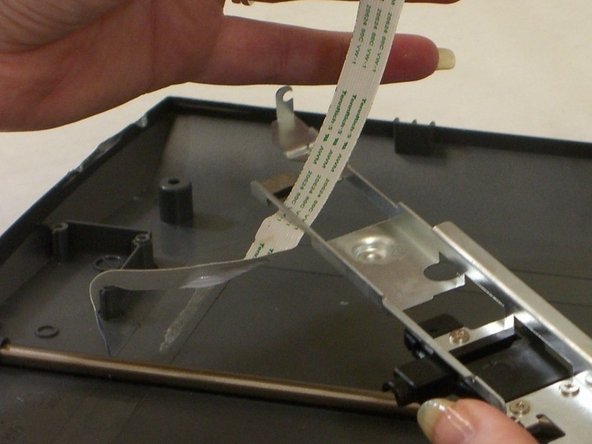
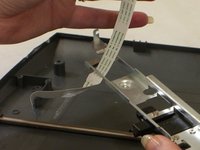
Lift the sensor bar from the scanner bed.
-
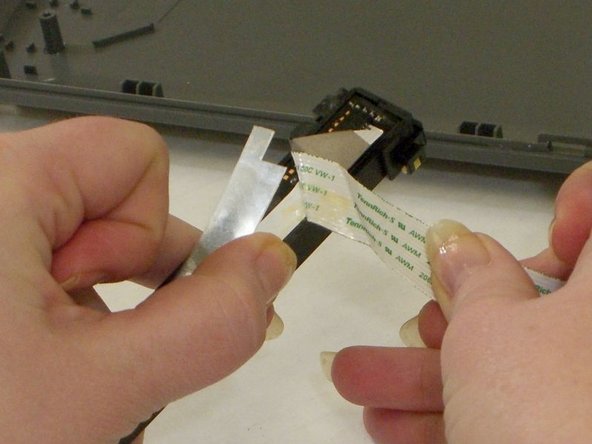
To finish removing the ribbon from the sensor bar, use the spudger to pry away the clear plastic piece securing the ribbon to the bar. Detach the ribbon from the sensor bar by peeling it away from the double-sided tape.
-
-
-
Slowly pull the ribbon end straight out to remove it from the sensor bar.
-


To reassemble your device, follow these instructions in reverse order.
crwdns2935287:0crwdne2935287:0

University of Maine, Team 1-13, Diaz Fall 2013 crwdns2935289:0University of Maine, Team 1-13, Diaz Fall 2013crwdne2935289:0
UMAINE-DIAZ-F13S1G13
crwdns2931471:03crwdne2931471:0
crwdns2935297:017crwdne2935297:0