crwdns2915892:0crwdne2915892:0
If the capacitive buttons on the front of your humidifier are malfunctioning, then the motherboard controlling these buttons may need to be replaced.
crwdns2942213:0crwdne2942213:0
-
-
Orient the device so the nozzle is facing the ceiling.
-
Twist off the primary water holding cap.
 crwdns2952109:0crwdne2952109:0
-
-
-
Place the device upside down so that the tank cap is facing you.
-
Use your hands to twist the tank cap and remove it from the device.
-
-
-
-
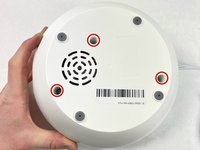
Remove the three screws from the base of the device using a T20 Torx screwdriver.
-
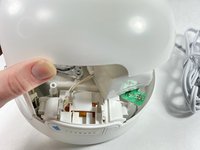
Remove the base of the humidifier to access the components.
-
-
-
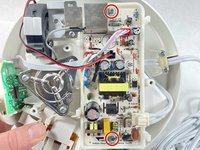
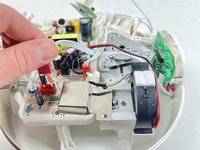
Gently remove the inner shield for the primary board to access the wiring for the humidifier.
-
-
-
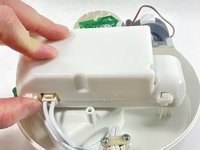
Remove both screws using a Phillips #1 screwdriver.
-
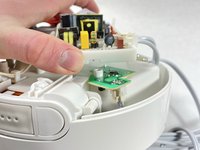
Lift up the central circuit board.
-
-
-
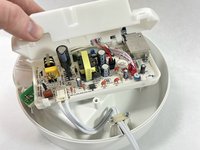
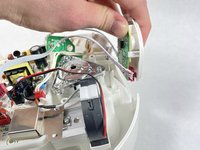
Once the central circuit board is lifted, the smaller one can be taken from its holster.
-
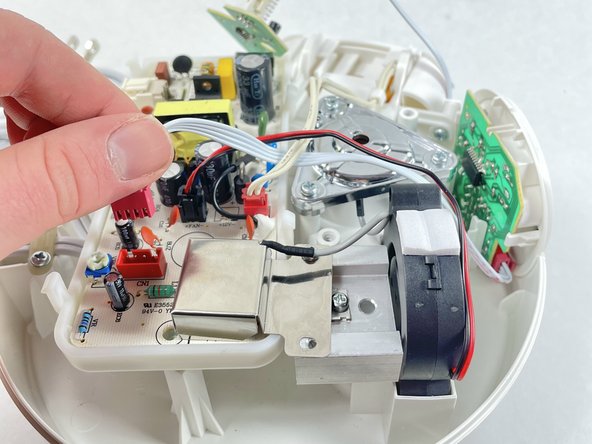
After the smaller board is taken out, the wire connecting from the main board to the touchpad motherboard can now be unclipped.
-
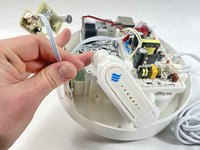
Remove the smaller circuit board and the touchpad motherboard.
-


To reassemble your device, follow these instructions in reverse order.
crwdns2935287:0crwdne2935287:0

UMass Dartmouth, Team 7-5, Ryckebusch Spring 2023 crwdns2935289:0UMass Dartmouth, Team 7-5, Ryckebusch Spring 2023crwdne2935289:0
UMASSD-RYCKEBUSCH-S23S7G5
crwdns2931471:03crwdne2931471:0
crwdns2935297:05crwdne2935297:0