
Vicks FilterFree Plus Fan Replacement

crwdns2959932:0crwdnd2959932:0Logan Pianfetticrwdnd2959932:0crwdnd2959932:0crwdnd2959932:06crwdnd2959932:0crwdne2959932:0
crwdns2959936:0Sun 8, 2024crwdne2959936:0
crwdns2869540:0crwdne2869540:0: 1.8 k
crwdns2959988:0crwdne2959988:0
- crwdns2959990:0crwdne2959990:0
- 1
- crwdns2959992:0crwdne2959992:0
- 16
- crwdns2959994:0crwdne2959994:0
- 83
- crwdns2959996:0crwdne2959996:0
- 1,829
crwdns2955950:0crwdne2955950:0: 0
crwdns2959998:0crwdne2959998:0
crwdns2960000:0crwdne2960000:0crwdns2959984:0crwdne2959984:0: 0 1
crwdns2959956:0crwdne2959956:0
crwdns2959968:01crwdne2959968:0
crwdns2959986:0crwdne2959986:0: 0 1
crwdns2959958:0crwdne2959958:0
crwdns2959976:01crwdne2959976:0
crwdns2915892:0crwdne2915892:0
crwdns2959928:0crwdne2959928:0 ↓Device Name and Model: Vicks FilterFree Plus Fan
Alternate Names and Model Numbers: Vicks Filter Free Plus Cool Mist Ultrasonic Humidifier
Guide Purpose: This guide is designed to assist you in diagnosing and addressing issues related to the fan in Vicks FilterFree Plus Fan. The fan may be the culprit if you're experiencing problems such as unusual noise, overheating, or system instability.
Part Description: The fan is a crucial component responsible for cooling the internal components of your device. A malfunctioning or dirty fan can lead to performance issues and potential damage to other parts.
Device Symptoms: Common symptoms of a faulty fan include abnormal noise during operation, overheating, or unexpected system shutdowns. This guide will help you determine whether the fan is dirty and needs cleaning or if it's malfunctioning and requires replacement.
Important Tips:
- If the fan is dirty, cleaning it may resolve the issue. Ensure the device is powered off before attempting to clean the fan.
- If the fan is clean but still malfunctioning, it may need to be replaced. Follow the steps in this guide for proper replacement procedures.
- Exercise caution when working with internal components. Before beginning, power off the device completely and disconnect it from any external power source.
- When removing the panel, it's important to be cautious as you will be exposed to wires.
crwdns2959930:0crwdne2959930:0
crwdns2943215:0crwdne2943215:0

-
-
-
Orient the device so the nozzle is facing the ceiling.
-
Twist off the primary water holding cap.
 crwdns2952109:0crwdne2952109:0
-
-
-
Place the device upside down so that the tank cap is facing you.
-
Use your hands to twist the tank cap and remove it from the device.
-
-
-
-
-
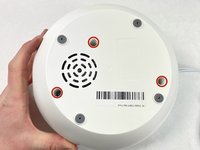
Remove the three screws from the base of the device using a T20 Torx screwdriver.
-
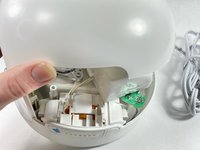
Remove the base of the humidifier to access the components.
-
-
-
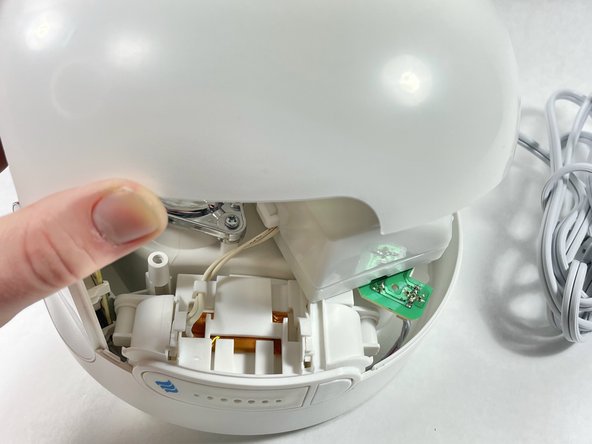
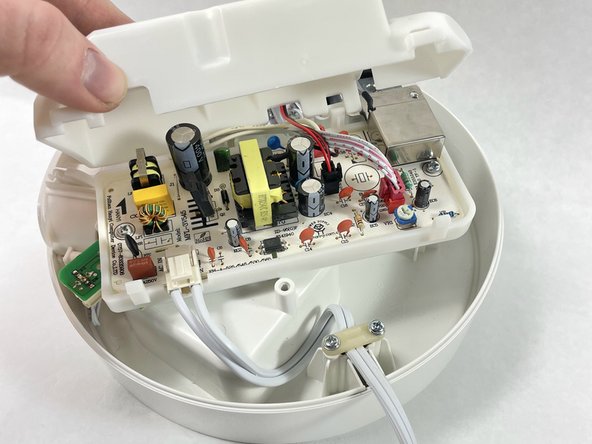
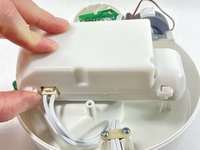
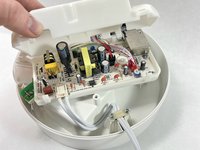
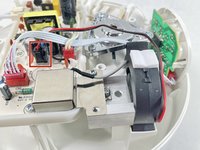
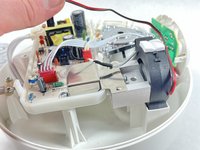
Gently remove the inner shield for the primary board to access the wiring for the humidifier.
-
-
-
-
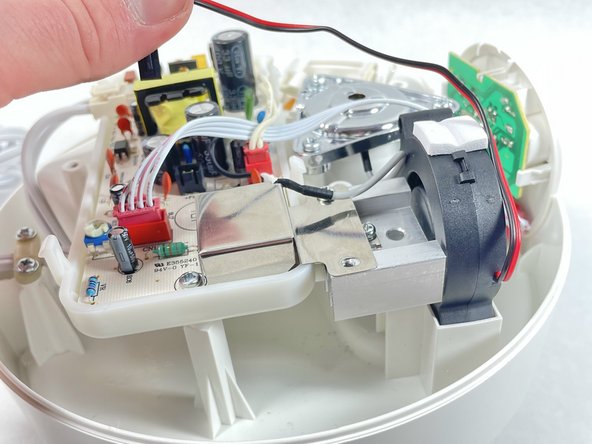
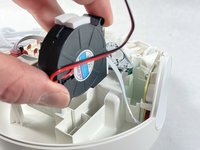
Remove the fan by disconnecting its wire from the board.
-
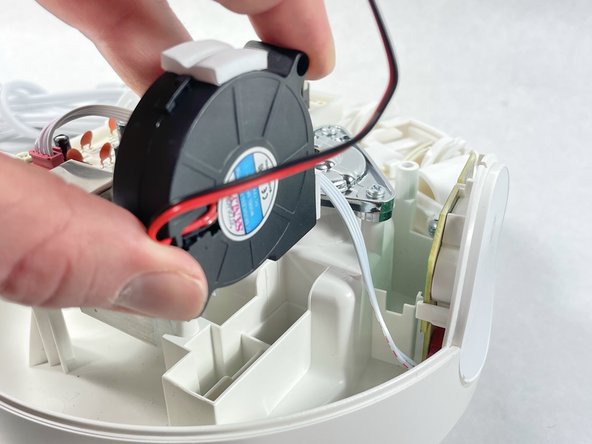
Gently remove the fan from the device.
-
-




To reassemble your device, follow these instructions in reverse order.

crwdns2935287:0crwdne2935287:0

UMass Dartmouth, Team 7-5, Ryckebusch Spring 2023 crwdns2935289:0UMass Dartmouth, Team 7-5, Ryckebusch Spring 2023crwdne2935289:0
UMASSD-RYCKEBUSCH-S23S7G5
crwdns2931471:03crwdne2931471:0
crwdns2935297:060crwdne2935297:0
