crwdns2915892:0crwdne2915892:0
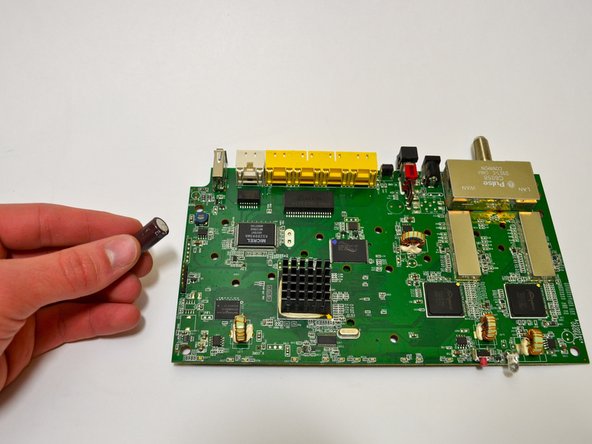
The capacitor is located on the circuit board. You will need to solder in order to replace the capacitor. For help with soldering techniques, click here.
crwdns2942213:0crwdne2942213:0
-
-
Flip the device so that the bottom is facing up.
-
-
-
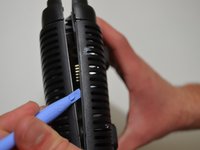
Insert the plastic-opening tool under the silver labeled casing.
-
Carefully pry at different intervals around the silver labeled casing to separate the silver casing from the top and bottom casing.
-
-
-
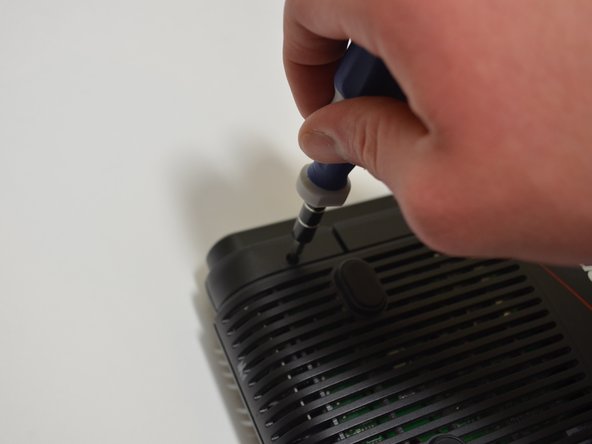
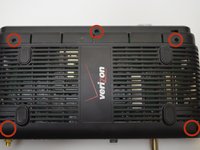
Unscrew the five 10-mm screws on the bottom of the router using a Phillips #0 screwdriver.
-
-
-
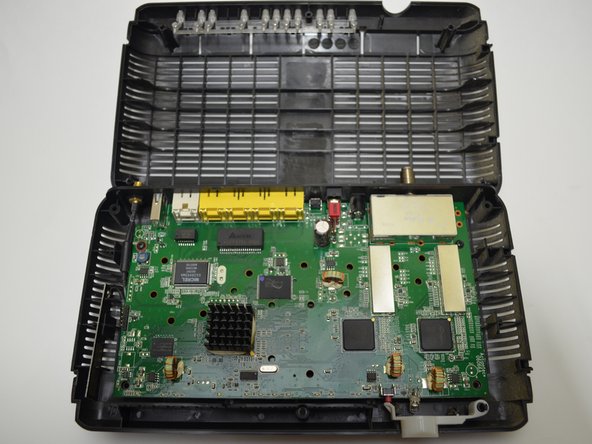
Use a plastic-opening tool and pry the top casing from the bottom casing to expose the circuit board in the bottom half of the device.
-
-
-
-
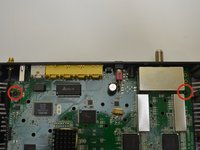
Locate the two 10-mm screws on either side of the circuit board.
-
Unscrew the two 10-mm screws using a Phillips #0 screwdriver.
-
-
-
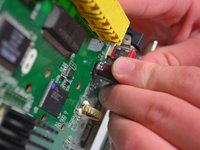
Lift the front of the circuit board up from the bottom casing.
-
-
-
Pull the circuit board towards you until it is separate from the bottom casing.
-
-
-
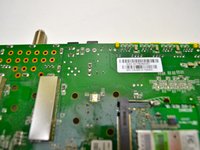
Flip the circuit board over.
-
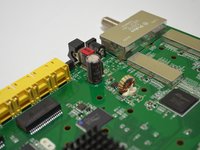
Locate the two prongs on the flip side that are attached to the capacitor on the top side.
-
-
-
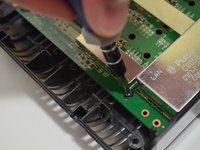
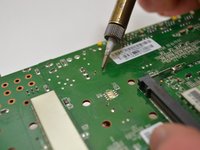
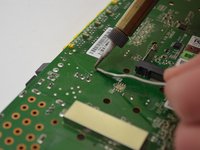
Touch the hot soldering iron to each prong in order to melt the solder around them.
-
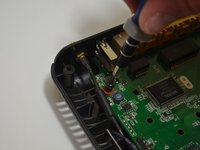
Flip the circuit board and pull out the capacitor from its place while the solder is still hot.
-
-
-
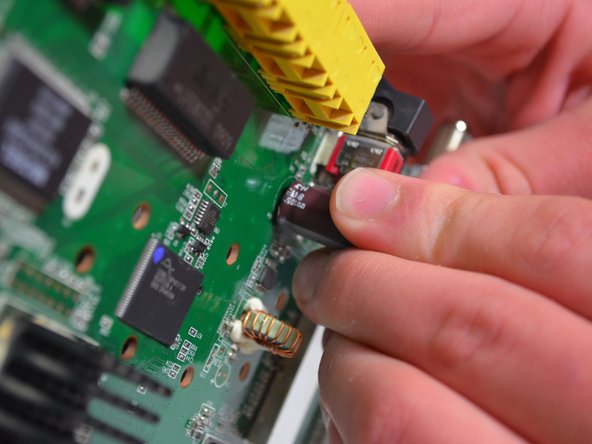
Insert the new capacitor through the circuit board so that the prongs are exposed on the flip side.
-
Heat the prongs up with the soldering iron and touch a soldering wire to the hot prongs to attach the capacitor to the board.
-


To reassemble your device, follow Steps 1-7 in reverse order.
To reassemble your device, follow Steps 1-7 in reverse order.
crwdns2915084:0crwdne2915084:0

University of Kentucky Louisville, Team 1-3, Mathis Fall 2014 crwdns2935289:0University of Kentucky Louisville, Team 1-3, Mathis Fall 2014crwdne2935289:0
LOUISVILLE-MATHIS-F14S1G3
crwdns2931471:03crwdne2931471:0
crwdns2935297:08crwdne2935297:0