crwdns2933423:0crwdne2933423:0

Valiant Automatic Hot Pot Disassembly

crwdns2942213:0crwdne2942213:0

  1. Valiant Automatic Hot Pot Disassembly, Valiant Automatic Hot Pot: crwdns2935265:01crwdnd2935265:01crwdnd2935265:03crwdne2935265:0 Valiant Automatic Hot Pot Disassembly, Valiant Automatic Hot Pot: crwdns2935265:01crwdnd2935265:02crwdnd2935265:03crwdne2935265:0 Valiant Automatic Hot Pot Disassembly, Valiant Automatic Hot Pot: crwdns2935265:01crwdnd2935265:03crwdnd2935265:03crwdne2935265:0
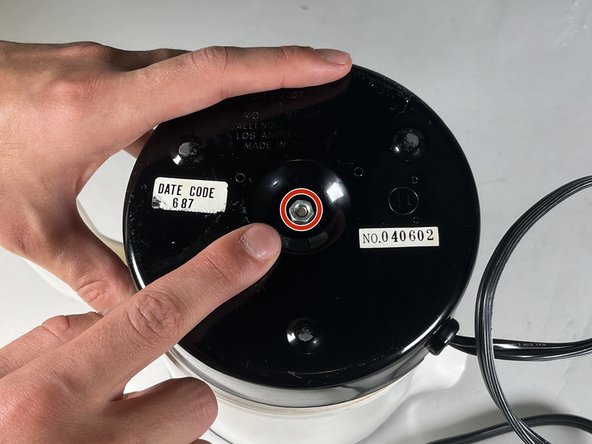
    • Turn the kettle upside down and unscrew the bolt on the bottom.

  2. Valiant Automatic Hot Pot Disassembly: crwdns2935265:02crwdnd2935265:01crwdnd2935265:01crwdne2935265:0
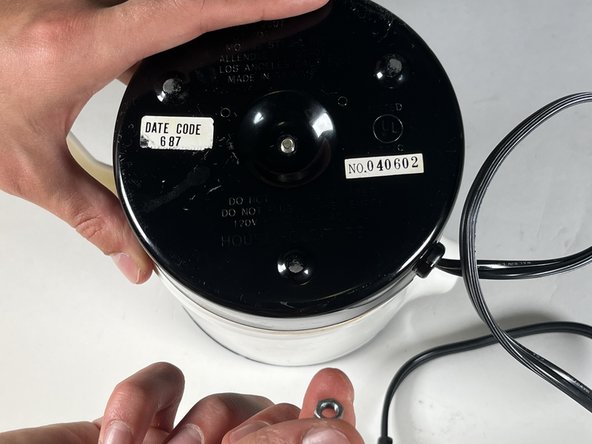
    • Open the plastic base to reveal the wires and heating element.

  3. Valiant Automatic Hot Pot Disassembly: crwdns2935265:03crwdnd2935265:01crwdnd2935265:02crwdne2935265:0 Valiant Automatic Hot Pot Disassembly: crwdns2935265:03crwdnd2935265:02crwdnd2935265:02crwdne2935265:0
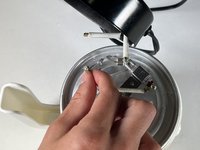
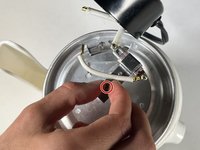
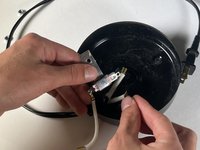
    • Unclip the gold brackets attached to the wires from the heating element.

  4. Valiant Automatic Hot Pot Disassembly: crwdns2935265:04crwdnd2935265:01crwdnd2935265:03crwdne2935265:0 Valiant Automatic Hot Pot Disassembly: crwdns2935265:04crwdnd2935265:02crwdnd2935265:03crwdne2935265:0 Valiant Automatic Hot Pot Disassembly: crwdns2935265:04crwdnd2935265:03crwdnd2935265:03crwdne2935265:0
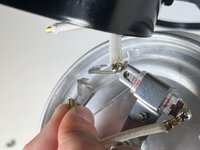
    • Remove the bottom bolt attached to the metal bracket.

    • This should be able to be unscrewed by hand, but if it is stuck, a wrench or pliers may be required.

    • Remove the metal bracket from the screw.

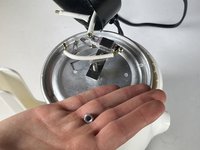
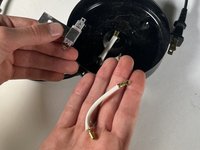
    • Fully remove the black plastic base from the heating element.

  5. Valiant Automatic Hot Pot Disassembly: crwdns2935265:05crwdnd2935265:01crwdnd2935265:03crwdne2935265:0 Valiant Automatic Hot Pot Disassembly: crwdns2935265:05crwdnd2935265:02crwdnd2935265:03crwdne2935265:0 Valiant Automatic Hot Pot Disassembly: crwdns2935265:05crwdnd2935265:03crwdnd2935265:03crwdne2935265:0
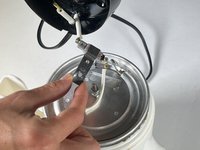
    • Use a Phillips #0 screwdriver to remove the 1 mm screws on each side connecting the metal bracket to the wires.

  6. Valiant Automatic Hot Pot Disassembly: crwdns2935265:06crwdnd2935265:01crwdnd2935265:02crwdne2935265:0 Valiant Automatic Hot Pot Disassembly: crwdns2935265:06crwdnd2935265:02crwdnd2935265:02crwdne2935265:0
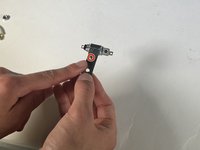
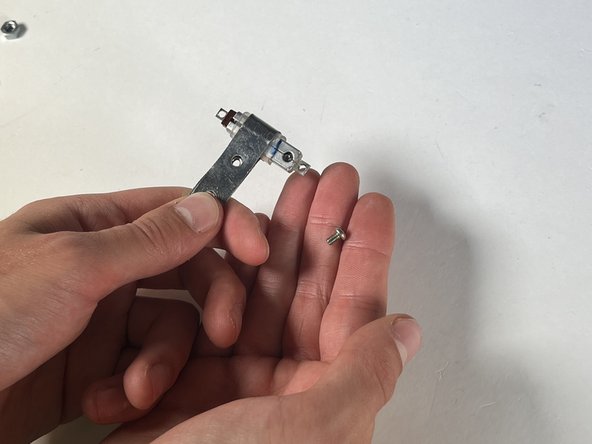
    • Use a Phillips #0 screwdriver to remove the 1 mm screw holding the T bracket together.

  7. Valiant Automatic Hot Pot Disassembly: crwdns2935265:07crwdnd2935265:01crwdnd2935265:02crwdne2935265:0 Valiant Automatic Hot Pot Disassembly: crwdns2935265:07crwdnd2935265:02crwdnd2935265:02crwdne2935265:0
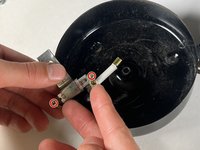
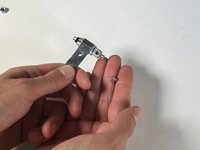
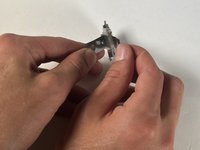
    • Open the bracket and remove the resistor.

  8. Valiant Automatic Hot Pot Disassembly: crwdns2935265:08crwdnd2935265:01crwdnd2935265:01crwdne2935265:0
    • 1 Plastic base with AC plug and insulated wire with gold clip

    • 1 BR210 FC resistor

    • 1 insulated wire with gold clip

    • 1 Metal bracket

    • 2 Bolts

    • 2 Sharp Phillips head screws (attached the wires to the bracket)

    • 1 Flat-bottomed Phillips head screw (held the bracket together)

    • 1 Kettle body with the heating element (metal plate)

  9. Valiant Automatic Hot Pot Disassembly: crwdns2935265:09crwdnd2935265:01crwdnd2935265:01crwdne2935265:0
    • When assembled, the kettle automatically heats when plugged in. The kettle does not stop heating nor does it alert you when the water is boiled.

crwdns2915888:0crwdne2915888:0

To reassemble your device, follow these instructions in reverse order.

crwdns2935227:0crwdne2935227:0

Eli Benatar Faranesh

crwdns2935283:009/10/24crwdne2935283:0

169 crwdns2915208:0crwdne2915208:0

crwdns2935295:0crwdne2935295:0

crwdns2915084:0crwdne2915084:0

Tufts University School of Engineering, Team 1-6, Carlson Fall 2024 crwdns2935289:0Tufts University School of Engineering, Team 1-6, Carlson Fall 2024crwdne2935289:0

TUFTS-CARLSON-F24S1G6

crwdns2931471:02crwdne2931471:0

crwdns2935303:01crwdne2935303:0

crwdns2947412:00crwdne2947412:0

crwdns2917038:0crwdne2917038:0

crwdns2936625:0crwdne2936625:0:

crwdns2936751:024crwdne2936751:0 0

crwdns2936753:07crwdne2936753:0 2

crwdns2936753:030crwdne2936753:0 7

crwdns2942667:0crwdne2942667:0 41