crwdns2933423:0crwdne2933423:0

Upgrading iMac Intel 21.5" EMC 2544 RAM Memory

crwdns2862587:0crwdne2862587:0
crwdns2862588:0crwdne2862588:0

crwdns2942213:0crwdne2942213:0

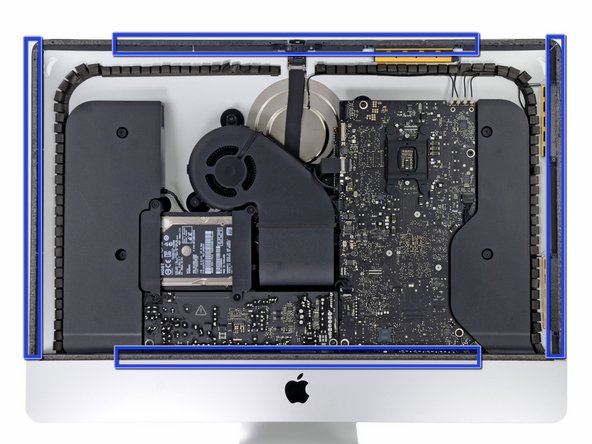
  1. Upgrading iMac Intel 21.5" EMC 2544 RAM Memory, Unglue the screen: crwdns2935265:01crwdnd2935265:01crwdnd2935265:01crwdne2935265:0
    • First you need to remove the glue from the edge of the iMac

    • Use a Guitar Pick around the screen to remove the glue

    • Be careful not to damage the iSight camera

  2. Upgrading iMac Intel 21.5" EMC 2544 RAM Memory, Screen: crwdns2935265:02crwdnd2935265:01crwdnd2935265:02crwdne2935265:0 Upgrading iMac Intel 21.5" EMC 2544 RAM Memory, Screen: crwdns2935265:02crwdnd2935265:02crwdnd2935265:02crwdne2935265:0
    • Once you are sure the adhesive is removed, use two heavy suction cups to lift the screen

    • Unplug these cables:

    • DisplayPort Cable

    • Power Cable

    • Lift the screen from the iMac

  3. Upgrading iMac Intel 21.5" EMC 2544 RAM Memory, Adhesive: crwdns2935265:03crwdnd2935265:01crwdnd2935265:02crwdne2935265:0 Upgrading iMac Intel 21.5" EMC 2544 RAM Memory, Adhesive: crwdns2935265:03crwdnd2935265:02crwdnd2935265:02crwdne2935265:0
    • Remove the gray tape from the iMac and the screen itself

    • When reassembling the iMac, put double sided tape on the screen and the iMac

  4. Upgrading iMac Intel 21.5" EMC 2544 RAM Memory, Hard drive: crwdns2935265:04crwdnd2935265:01crwdnd2935265:02crwdne2935265:0 Upgrading iMac Intel 21.5" EMC 2544 RAM Memory, Hard drive: crwdns2935265:04crwdnd2935265:02crwdnd2935265:02crwdne2935265:0
    • Remove the four Torx T10 screws

    • Unplug the SATA cables and remove the hard drive

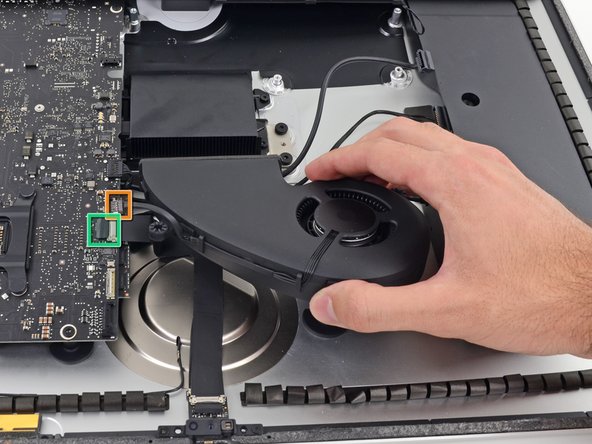
  5. Upgrading iMac Intel 21.5" EMC 2544 RAM Memory, Fan: crwdns2935265:05crwdnd2935265:01crwdnd2935265:02crwdne2935265:0 Upgrading iMac Intel 21.5" EMC 2544 RAM Memory, Fan: crwdns2935265:05crwdnd2935265:02crwdnd2935265:02crwdne2935265:0
    • Remove these 3 Torx T10 screws

    • After you remove the screws, remove these cables

    • Fan Cable

    • Unstick and unplug the camera cable

    • After you remove the fan, remove the hard drive bay removing a single Torx T10 screw

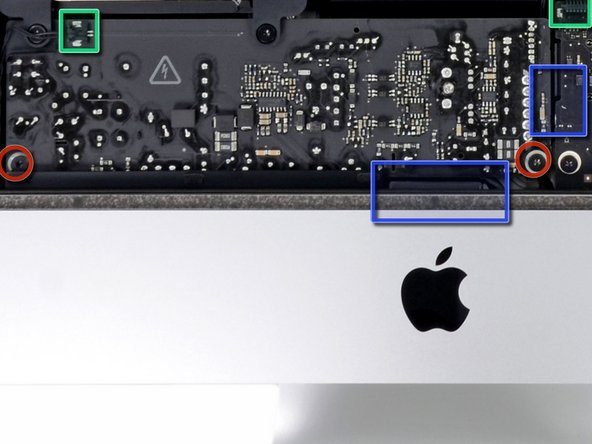
  6. Upgrading iMac Intel 21.5" EMC 2544 RAM Memory, Power board: crwdns2935265:06crwdnd2935265:01crwdnd2935265:03crwdne2935265:0 Upgrading iMac Intel 21.5" EMC 2544 RAM Memory, Power board: crwdns2935265:06crwdnd2935265:02crwdnd2935265:03crwdne2935265:0 Upgrading iMac Intel 21.5" EMC 2544 RAM Memory, Power board: crwdns2935265:06crwdnd2935265:03crwdnd2935265:03crwdne2935265:0
    • Remove these 2 Torx T10 screws

    • Unplug these 2 cables

    • Unplug 2 more cable below the power board by pressing the clip

    • The power board is hard to remove from its place, remove it carefully

  7. Upgrading iMac Intel 21.5" EMC 2544 RAM Memory: crwdns2935265:07crwdnd2935265:01crwdnd2935265:01crwdne2935265:0
    • Remove the cables out of the clip

  8. Upgrading iMac Intel 21.5" EMC 2544 RAM Memory: crwdns2935265:08crwdnd2935265:01crwdnd2935265:02crwdne2935265:0 Upgrading iMac Intel 21.5" EMC 2544 RAM Memory: crwdns2935265:08crwdnd2935265:02crwdnd2935265:02crwdne2935265:0
    • Unplug these 4 antenna connectors

    • When reassembling be sure that the connectors are in the same place

    • After that, remove these two Torx T10 screws

    • Move the speaker and unplug the cable from the logic board

    • Remove these other cables

    • For finish, remove these four Torx T10 screws

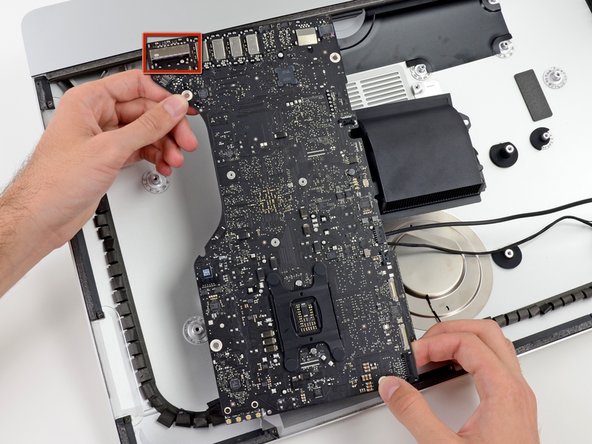
  9. Upgrading iMac Intel 21.5" EMC 2544 RAM Memory, Logic Board: crwdns2935265:09crwdnd2935265:01crwdnd2935265:02crwdne2935265:0 Upgrading iMac Intel 21.5" EMC 2544 RAM Memory, Logic Board: crwdns2935265:09crwdnd2935265:02crwdnd2935265:02crwdne2935265:0
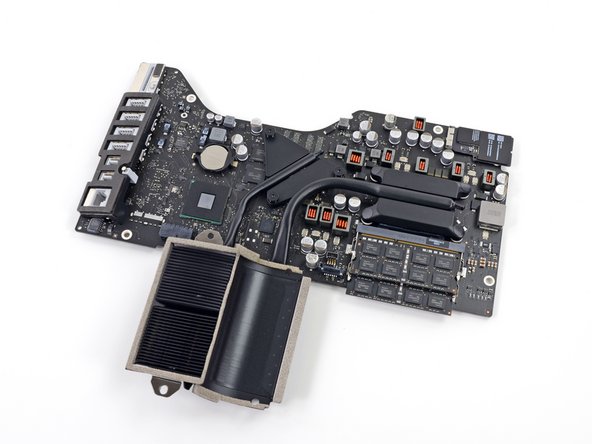
    • Unscrew 3 Torx T8 screws from the heatsink, then remove the logic board from the iMac

    • Be careful not to damage the SD card reader with the screw mount

  10. Upgrading iMac Intel 21.5" EMC 2544 RAM Memory, RAM memory: crwdns2935265:010crwdnd2935265:01crwdnd2935265:02crwdne2935265:0 Upgrading iMac Intel 21.5" EMC 2544 RAM Memory, RAM memory: crwdns2935265:010crwdnd2935265:02crwdnd2935265:02crwdne2935265:0
    • Flip the logic board over and release the tabs from each side of the RAM

crwdns2915888:0crwdne2915888:0

To reassemble your device, follow these instructions in reverse order remembering to re-glue the screen.

crwdns2935229:011crwdne2935229:0

jimenezser

crwdns2935283:008/29/12crwdne2935283:0

3 848 crwdns2915208:0crwdne2915208:0

crwdns2935297:04crwdne2935297:0

crwdns2944067:00crwdne2944067:0

crwdns2917038:0crwdne2917038:0

crwdns2936625:0crwdne2936625:0:

crwdns2936751:024crwdne2936751:0 1

crwdns2936753:07crwdne2936753:0 1

crwdns2936753:030crwdne2936753:0 2

crwdns2942667:0crwdne2942667:0 29,630