crwdns2915892:0crwdne2915892:0
TWO WHEELBARROW
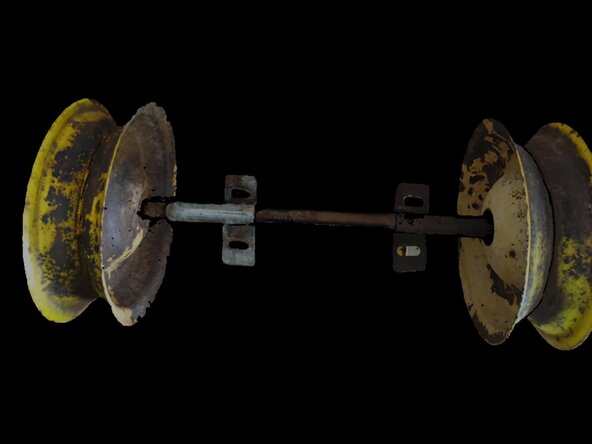
To start this fix I disassembled all the parts to trashed tool. As always I made sure to keep the hardware until the very end. This is in case I had to use it for the finished fixture. The tires were something you would see in the dumpster.
-
-
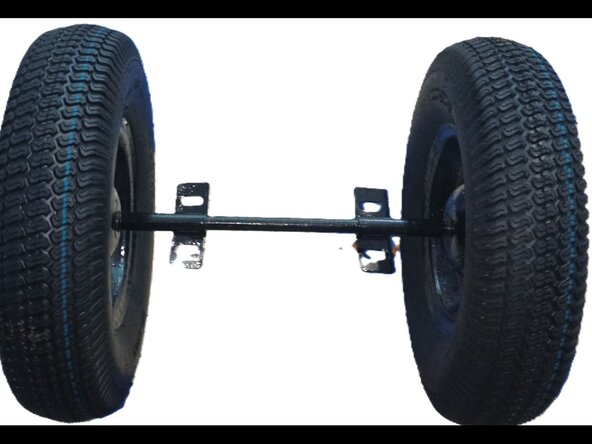
Once the hardware got taken off I clamped the wheel and axel assembly to a vice. The tubes had been punctured. Scrape off the paint and get rid of rust with a metal grinder bit for driver. Prepare the surface for fresh paint by spraying degreaser and get rid of all the liquid with a dryer or wait until it evaporates.
-
-
-
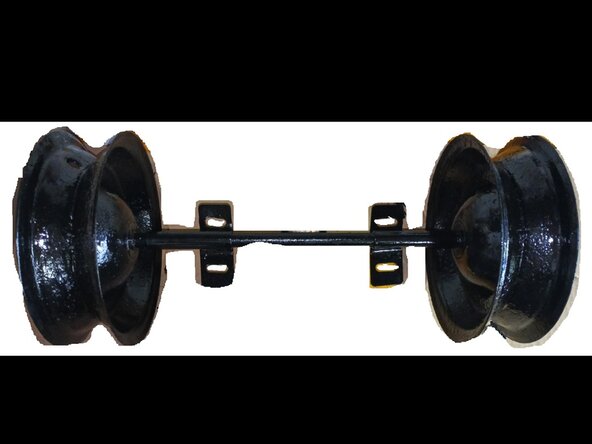
Use a brush or sponge to spread an even coat of rust preventive paint. Per the products description choose how many coats to apply.
-
-
-
-
The hard plastic bucket had some holes and cracks to be rejoined. This product J-B weld original cold-weld formula steel reinforced epoxy is what I chose to use. You should choose another product to use instead because this did not adhere very well. Get a caulk gun and load it with a cylinder of a flexible high strength product.
-
-
-
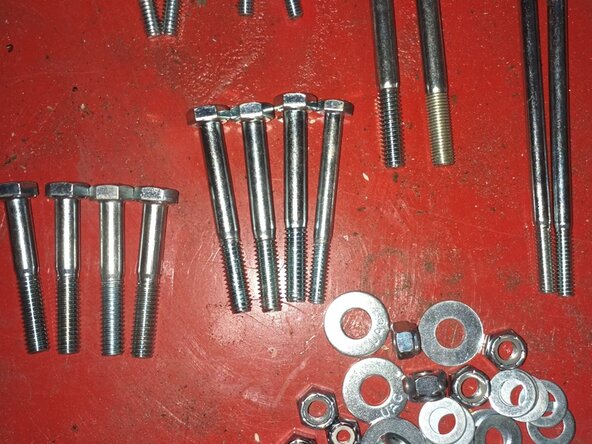
Storing the old hardware proved to be nice reference for what to buy and to be used again. Position the split lock washer sandwiched between a washer and the head of bolt to be most effective. To be strategic have them sparingly directly below bucket on the bolts vertical, these are subject to the most weight baring load.
-
-
-
You have to get the tire and tube on the wheel. I went to local ACE hardware and it was affordable for this. You can of course get them on using a mounting tool if you have it. If you are not doing this step often then just go to the shop because it is wasteful if you puncture. Give the pro some business and be less stressed for the common good.
-
-
-
Should not be able to push the flat washer around on any of the bolts after assembly. Get a socket wrench and bit for driver attachment to make a quick fix. Lastly, make all the connection points tight and it is ready for use.
-


To reassemble your device, follow these instructions in reverse order.
To reassemble your device, follow these instructions in reverse order.