crwdns2915892:0crwdne2915892:0
If your headphone system isn't providing quality sound through each speaker, it may be necessary to replace the speaker as it could be blown or an internal wiring issue. This replacement should take no longer than 30 minutes with the use of screwdriver and plastic pry tool.
crwdns2942213:0crwdne2942213:0
-
-
Remove the ear pad from the earphone by gently pulling the cloth pad outwards from the slot holding the cloth.
-
Work circularly until removed.
-
-
-
Using a Phillips #1 screwdriver, remove the four fastening screws that hold the blue plastic speaker mount in place.
-
Gently pull blue plastic from black housing by hand until separated.
-
-
-
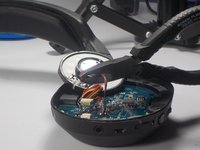
Using metal prying tool, gently slide the tool between the speaker and the blue plastic holder to break up the adhesive.
-
-
-
-
Depending on how much of the adhesive was able to be removed, you should be able to pry up the speaker assembly using plastic pry tool. If unsuccessful, use metal tool by gently working around speaker using small twisting motions until free.
-
-
-
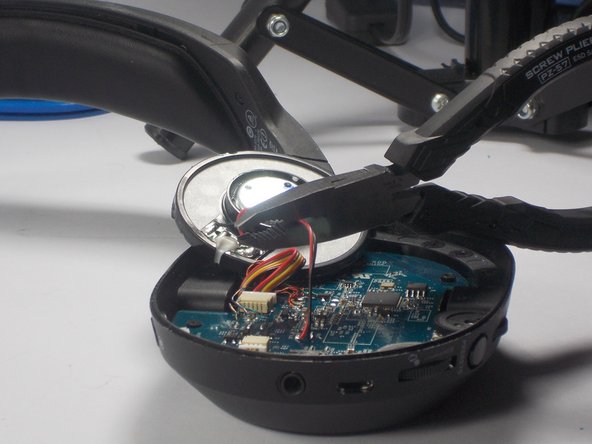
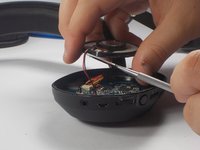
Using wire cutters, cut the red and black wires connecting the speaker to the circuit board. Be careful to leave at least one inch of wire to use reconnect wires to new speaker.
-
-
-
Use wire strippers to strip a portion of the rubber colored coating on the wires about a quarter inch long from both the wires connected to the circuit board and the two red and blacks wires connected to the new speaker.
-
-
-
Twist together the matching pairs of un-shielded copper wire (black on black and red on red) and cover with wire connectors to prevent shorting.
-


To reassemble your device, follow these instructions in reverse order.
crwdns2935221:0crwdne2935221:0
crwdns2935227:0crwdne2935227:0
crwdns2935287:0crwdne2935287:0

UMass Dartmouth, Team 2-3, Shastany Fall 2015 crwdns2935289:0UMass Dartmouth, Team 2-3, Shastany Fall 2015crwdne2935289:0
UMASSD-SHASTANY-F15S2G3
crwdns2931471:03crwdne2931471:0
crwdns2935297:010crwdne2935297:0
crwdns2947410:01crwdne2947410:0
This is the first guide I've found that covers how the speaker is mounted to the plate. Thanks!