crwdns2933423:0crwdne2933423:0

Trio STEALTH-9 Camera Replacement

crwdns2942213:0crwdne2942213:0

  1. Trio STEALTH-9 Camera Replacement, Back Cover: crwdns2935265:01crwdnd2935265:01crwdnd2935265:01crwdne2935265:0
    • Remove the two Phillips #00 screws on the side of the tablet.

  2. Trio STEALTH-9 Camera Replacement: crwdns2935265:02crwdnd2935265:01crwdnd2935265:01crwdne2935265:0
    • Take one of the plastic opening tools and wedge it in the middle of the tablet, starting on the USB Port side.

    • Holding the tool in place, take one of the 6 plastic opening picks and slide it across the opening you made with the opening tool.

  3. Trio STEALTH-9 Camera Replacement: crwdns2935265:03crwdnd2935265:01crwdnd2935265:01crwdne2935265:0
    • Continue going around the tablet sides with the plastic pick, being sure that you are maintaining the openings you made with either your hand or the opening tool.

    • You will notice some popping as you go around with the pick. Don't worry, this is completely normal.

  4. Trio STEALTH-9 Camera Replacement: crwdns2935265:04crwdnd2935265:01crwdnd2935265:01crwdne2935265:0
    • Remove the back cover of the tablet to reveal the internals.

    • To replace, pinch each of the ends together until all four sides are closed.

  5. Trio STEALTH-9 Camera Replacement, Camera: crwdns2935265:05crwdnd2935265:01crwdnd2935265:02crwdne2935265:0 Trio STEALTH-9 Camera Replacement, Camera: crwdns2935265:05crwdnd2935265:02crwdnd2935265:02crwdne2935265:0
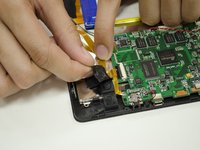
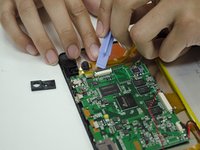
    • Slowly remove the two pieces of electrical tape holding down the Camera ribbon cable.

  6. Trio STEALTH-9 Camera Replacement: crwdns2935265:06crwdnd2935265:01crwdnd2935265:02crwdne2935265:0 Trio STEALTH-9 Camera Replacement: crwdns2935265:06crwdnd2935265:02crwdnd2935265:02crwdne2935265:0
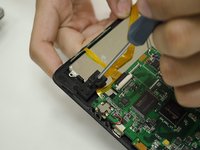
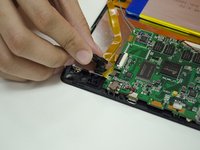
    • Remove the #00 Screw holding down the Camera mount, then remove the Camera mount.

  7. Trio STEALTH-9 Camera Replacement: crwdns2935265:07crwdnd2935265:01crwdnd2935265:02crwdne2935265:0 Trio STEALTH-9 Camera Replacement: crwdns2935265:07crwdnd2935265:02crwdnd2935265:02crwdne2935265:0
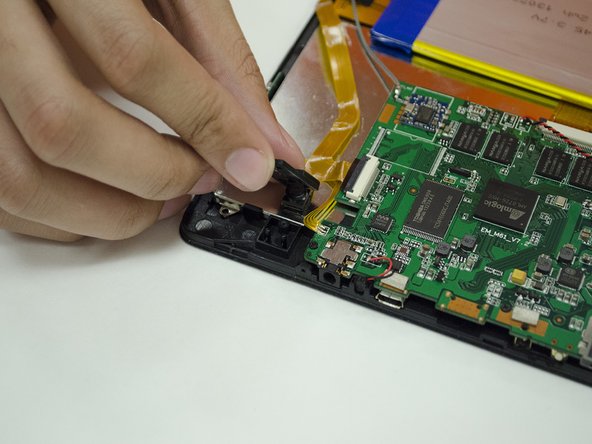
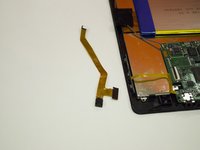
    • Detach the Camera's ribbon cable from the Motherboard using your fingernail or a plastic opening tool.

    • Remove the camera from the frame and replace as needed.

crwdns2915888:0crwdne2915888:0

To reassemble your device, follow these instructions in reverse order.

[deleted]

crwdns2935283:001/29/15crwdne2935283:0

415 crwdns2915208:0crwdne2915208:0

crwdns2935297:03crwdne2935297:0

crwdns2944067:00crwdne2944067:0

crwdns2917038:0crwdne2917038:0

crwdns2936625:0crwdne2936625:0:

crwdns2936751:024crwdne2936751:0 0

crwdns2936753:07crwdne2936753:0 1

crwdns2936753:030crwdne2936753:0 7

crwdns2942667:0crwdne2942667:0 141