crwdns2933423:0crwdne2933423:0
crwdns2947577:0crwdnd2947577:0crwdne2947577:0

Trio AXS 3G Screen Replacement

crwdns2942213:0crwdne2942213:0

    1. Trio AXS 3G Screen Replacement, Back Case: crwdns2935265:01crwdnd2935265:01crwdnd2935265:01crwdne2935265:0
      • On the back of the device there is a white SD card case that shelters the screws that attach the back panel to the tablet.

      • Use your thumbs to slide up and off the small SD card case.

      crwdns2952109:0crwdne2952109:0

      crwdns2917038:0crwdne2917038:0

    2. Trio AXS 3G Screen Replacement: crwdns2935265:02crwdnd2935265:01crwdnd2935265:02crwdne2935265:0 Trio AXS 3G Screen Replacement: crwdns2935265:02crwdnd2935265:02crwdnd2935265:02crwdne2935265:0
      • Using the Phillips Head #000, unscrew the 5 4mm and 3mm screws at the top.

      crwdns2952109:0crwdne2952109:0

      crwdns2917038:0crwdne2917038:0

    3. Trio AXS 3G Screen Replacement: crwdns2935265:03crwdnd2935265:01crwdnd2935265:01crwdne2935265:0
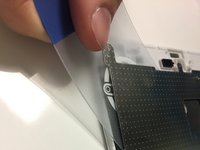
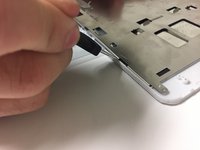
      • Insert a plastic opening tool between the back panel and the front of the tablet, and gently pry it away from the tablet.

      • Do not pry too hard as the screen is fragile and might crack.

      • It is best to start at the bottom of the tablet when prying the back panel off.

      • The volume piece will also dislodge when the back panel is removed.

      crwdns2952109:0crwdne2952109:0

      crwdns2917038:0crwdne2917038:0

    1. Trio AXS 3G Screen Replacement, Screen: crwdns2935265:04crwdnd2935265:01crwdnd2935265:01crwdne2935265:0
      • The motherboard and battery will have to be removed to expose the metal panel underneath.

      crwdns2952109:0crwdne2952109:0

      crwdns2917038:0crwdne2917038:0

    2. Trio AXS 3G Screen Replacement: crwdns2935265:05crwdnd2935265:01crwdnd2935265:01crwdne2935265:0
      crwdns2935267:0crwdne2935267:0
      Plastic Cards
      $2.99
      • Use the plastic card to pry the battery away from the device.

      • The battery is attached to the tablet by glue.

      crwdns2952109:0crwdne2952109:0

      crwdns2917038:0crwdne2917038:0

    3. Trio AXS 3G Screen Replacement: crwdns2935265:06crwdnd2935265:01crwdnd2935265:01crwdne2935265:0
      • Peel off the battery from the device and set aside.

      • The battery is connected to the motherboard by two wires. Be careful not to sever the connection.

      crwdns2952109:0crwdne2952109:0

      crwdns2917038:0crwdne2917038:0

    4. Trio AXS 3G Screen Replacement: crwdns2935265:07crwdnd2935265:01crwdnd2935265:01crwdne2935265:0
      • Using a #000 screwdriver, unscrew the five 4mm and 3 mm screws connecting the top portion of the motherboard to the device.

      crwdns2952109:0crwdne2952109:0

      crwdns2917038:0crwdne2917038:0

    5. Trio AXS 3G Screen Replacement: crwdns2935265:08crwdnd2935265:01crwdnd2935265:01crwdne2935265:0
      • Disconnect the silver tape that attaches the motherboard to the metal panel.

      crwdns2952109:0crwdne2952109:0

      crwdns2917038:0crwdne2917038:0

    6. Trio AXS 3G Screen Replacement: crwdns2935265:09crwdnd2935265:01crwdnd2935265:01crwdne2935265:0
      • Disconnect the ribbon from the bottom portion of the motherboard.

      crwdns2952109:0crwdne2952109:0

      crwdns2917038:0crwdne2917038:0

    7. Trio AXS 3G Screen Replacement: crwdns2935265:010crwdnd2935265:01crwdnd2935265:01crwdne2935265:0
      • Remove the motherboard and set aside.

      crwdns2952109:0crwdne2952109:0

      crwdns2917038:0crwdne2917038:0

    8. Trio AXS 3G Screen Replacement: crwdns2935265:011crwdnd2935265:01crwdnd2935265:01crwdne2935265:0
      • The smaller portion of the motherboard is located at the bottom with the speaker.

      • Using a #000 screwdriver, unscrew the three 3 mm screws that fasten the smaller segment of the motherboard to the tablet.

      crwdns2952109:0crwdne2952109:0

      crwdns2917038:0crwdne2917038:0

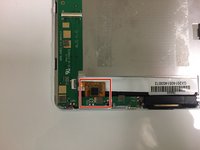
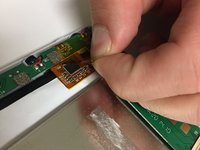
    9. Trio AXS 3G Screen Replacement: crwdns2935265:012crwdnd2935265:01crwdnd2935265:02crwdne2935265:0 Trio AXS 3G Screen Replacement: crwdns2935265:012crwdnd2935265:02crwdnd2935265:02crwdne2935265:0
      • Located towards the bottom, carefully remove the yellow film.

      crwdns2952109:0crwdne2952109:0

      crwdns2917038:0crwdne2917038:0

    10. Trio AXS 3G Screen Replacement: crwdns2935265:013crwdnd2935265:01crwdnd2935265:01crwdne2935265:0
      • Gently disconnect the small ribbon found underneath the film.

      crwdns2952109:0crwdne2952109:0

      crwdns2917038:0crwdne2917038:0

    11. Trio AXS 3G Screen Replacement: crwdns2935265:014crwdnd2935265:01crwdnd2935265:01crwdne2935265:0
      • There is another connection found underneath this portion of the motherboard.

      • Lifting up the motherboard, disconnect the second ribbon found underneath.

      crwdns2952109:0crwdne2952109:0

      crwdns2917038:0crwdne2917038:0

    12. Trio AXS 3G Screen Replacement: crwdns2935265:015crwdnd2935265:01crwdnd2935265:01crwdne2935265:0
      • Unscrew the two 4 mm #000 screws.

      crwdns2952109:0crwdne2952109:0

      crwdns2917038:0crwdne2917038:0

    13. Trio AXS 3G Screen Replacement: crwdns2935265:016crwdnd2935265:01crwdnd2935265:01crwdne2935265:0
      • Remove the speaker and bottom portion of the motherboard.

      crwdns2952109:0crwdne2952109:0

      crwdns2917038:0crwdne2917038:0

    14. Trio AXS 3G Screen Replacement: crwdns2935265:017crwdnd2935265:01crwdnd2935265:01crwdne2935265:0
      • At this stage, almost all inside components should be removed (as shown).

      • Using a screwdriver size #000, remove the four 4 mm screws found at each corner of the metal panel if you haven't gotten them already.

      crwdns2952109:0crwdne2952109:0

      crwdns2917038:0crwdne2917038:0

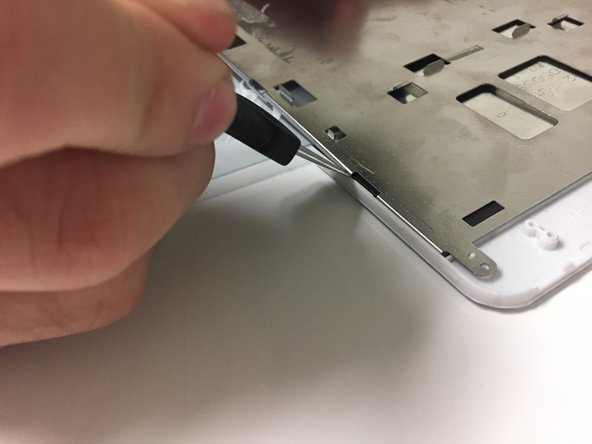
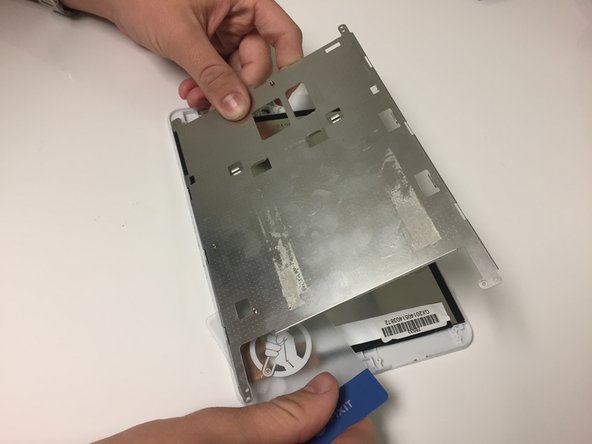
    15. Trio AXS 3G Screen Replacement: crwdns2935265:018crwdnd2935265:01crwdnd2935265:03crwdne2935265:0 Trio AXS 3G Screen Replacement: crwdns2935265:018crwdnd2935265:02crwdnd2935265:03crwdne2935265:0 Trio AXS 3G Screen Replacement: crwdns2935265:018crwdnd2935265:03crwdnd2935265:03crwdne2935265:0
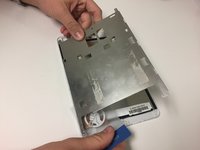
      • Use the plastic card to separate the metal panel from the screen component.

      crwdns2952109:0crwdne2952109:0

      crwdns2917038:0crwdne2917038:0

    16. Trio AXS 3G Screen Replacement: crwdns2935265:019crwdnd2935265:01crwdnd2935265:01crwdne2935265:0
      • Separate memory card from screen.

      crwdns2952109:0crwdne2952109:0

      crwdns2917038:0crwdne2917038:0

    17. Trio AXS 3G Screen Replacement: crwdns2935265:020crwdnd2935265:01crwdnd2935265:02crwdne2935265:0 Trio AXS 3G Screen Replacement: crwdns2935265:020crwdnd2935265:02crwdnd2935265:02crwdne2935265:0
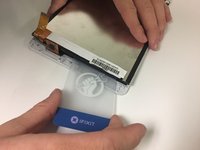
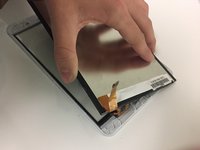
      • Use the plastic card to separate screen component from front panel.

      crwdns2952109:0crwdne2952109:0

      crwdns2917038:0crwdne2917038:0

    18. Trio AXS 3G Screen Replacement: crwdns2935265:021crwdnd2935265:01crwdnd2935265:01crwdne2935265:0
      • Use the plastic card to separate the glass from the front panel.

      • Once the glass is removed, the new glass can be fitted to the front panel.

      crwdns2952109:0crwdne2952109:0

      crwdns2917038:0crwdne2917038:0

crwdns2915888:0crwdne2915888:0

To reassemble your device, follow these instructions in reverse order.

crwdns2935221:0crwdne2935221:0

Michaela Causey

crwdns2935283:009/20/17crwdne2935283:0

328 crwdns2915208:0crwdne2915208:0

crwdns2935297:03crwdne2935297:0

crwdns2935287:0crwdne2935287:0

University of North Texas, Team S7-G6, Thomas Fall 2017 crwdns2935289:0University of North Texas, Team S7-G6, Thomas Fall 2017crwdne2935289:0

UNT-THOMAS-F17S7G6

crwdns2931471:03crwdne2931471:0

crwdns2935297:071crwdne2935297:0

crwdns2947412:00crwdne2947412:0

crwdns2917038:0crwdne2917038:0

crwdns2936625:0crwdne2936625:0:

crwdns2936751:024crwdne2936751:0 0

crwdns2936753:07crwdne2936753:0 3

crwdns2936753:030crwdne2936753:0 19

crwdns2942667:0crwdne2942667:0 1,339