crwdns2933423:0crwdne2933423:0

Triace A310 Disk Brake Replacement

crwdns2942213:0crwdne2942213:0

  1. Triace A310 Disk Brake Replacement, Tire: crwdns2935265:01crwdnd2935265:01crwdnd2935265:01crwdne2935265:0
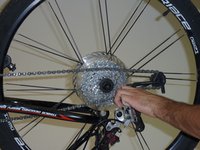
    • Begin loosening the tire by turning the quick release handle.

  2. Triace A310 Disk Brake Replacement: crwdns2935265:02crwdnd2935265:01crwdnd2935265:02crwdne2935265:0 Triace A310 Disk Brake Replacement: crwdns2935265:02crwdnd2935265:02crwdnd2935265:02crwdne2935265:0
    • Gripping the rear derailleur, pull the arm back, away from the front of the bike.

    • Notice how the derailleur becomes almost vertical in the second picture when compared to the first.

  3. Triace A310 Disk Brake Replacement: crwdns2935265:03crwdnd2935265:01crwdnd2935265:02crwdne2935265:0 Triace A310 Disk Brake Replacement: crwdns2935265:03crwdnd2935265:02crwdnd2935265:02crwdne2935265:0
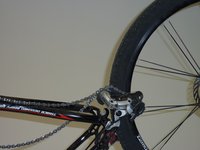
    • There should be enough slack, in the chain, at this point to remove the tire from the bike.

    • Note: You may need to wiggle the tire and chain around in order to create enough slack.

    • Remove the tire from the bike.

  4. Triace A310 Disk Brake Replacement, Disk Brake: crwdns2935265:04crwdnd2935265:01crwdnd2935265:01crwdne2935265:0
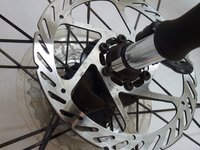
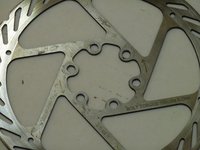
    • Place the tire flat on the ground making sure the disk is facing you.

  5. Triace A310 Disk Brake Replacement: crwdns2935265:05crwdnd2935265:01crwdnd2935265:03crwdne2935265:0 Triace A310 Disk Brake Replacement: crwdns2935265:05crwdnd2935265:02crwdnd2935265:03crwdne2935265:0 Triace A310 Disk Brake Replacement: crwdns2935265:05crwdnd2935265:03crwdnd2935265:03crwdne2935265:0
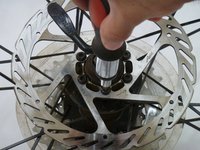
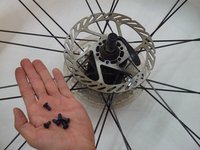
    • Using the modular screw driver with a T25 bit, begin loosening and then removing the six 10mm-long screws.

    • Make sure to keep track of all of the removed pieces.

  6. Triace A310 Disk Brake Replacement: crwdns2935265:06crwdnd2935265:01crwdnd2935265:02crwdne2935265:0 Triace A310 Disk Brake Replacement: crwdns2935265:06crwdnd2935265:02crwdnd2935265:02crwdne2935265:0
    • After all of the screws have been removed, take the disk and pull it away from the tire.

crwdns2915888:0crwdne2915888:0

To reassemble your device, follow these instructions in reverse order.

Daniel

crwdns2935283:001/27/14crwdne2935283:0

222 crwdns2915208:0crwdne2915208:0

crwdns2935297:02crwdne2935297:0

crwdns2915084:0crwdne2915084:0

Cal Poly, Team 1-37, Maness Winter 2014 crwdns2935289:0Cal Poly, Team 1-37, Maness Winter 2014crwdne2935289:0

CPSU-MANESS-W14S1G37

crwdns2931471:04crwdne2931471:0

crwdns2935297:011crwdne2935297:0

crwdns2947412:00crwdne2947412:0

crwdns2917038:0crwdne2917038:0

crwdns2936625:0crwdne2936625:0:

crwdns2936751:024crwdne2936751:0 3

crwdns2936753:07crwdne2936753:0 5

crwdns2936753:030crwdne2936753:0 11

crwdns2942667:0crwdne2942667:0 675