crwdns2915892:0crwdne2915892:0
This guide will help you replace a faulty CD drive in your laptop. It will instruct you to remove the back cover of the laptop in order to access the CD drive. You must then unscrew the drive and replace it with the new drive
crwdns2942213:0crwdne2942213:0
-
-
Close the laptop lid and flip it over so that Toshiba logo is facing down.
-
-
-
Remove the two 6.5 mm Phillips head screws indicated using a Phillips #00 screw driver.
-
-
-
-
Once the screws are removed, slide the battery pack out of the computer.
-
-
crwdns2935267:0crwdne2935267:0Anti-Static Wrist Strap$7.95
-
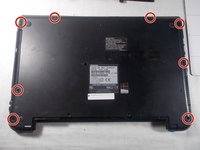
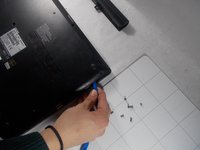
Remove all 6.5 mm Philips head screws on the back cover of the laptop with a Philips #00 screwdriver.
-
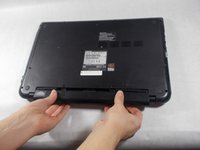
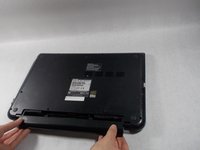
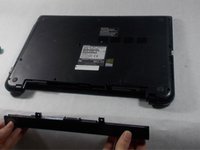
Use the plastic opening tool to remove the back cover from the laptop.
-
-
-
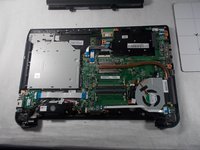
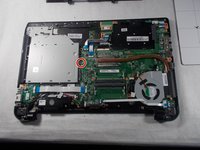
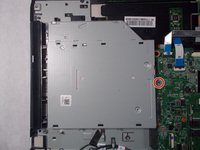
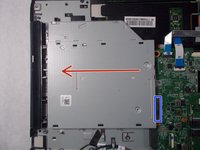
Remove the 3 mm Philips head screw that connects the CD drive to motherboard with a Phillips #00 screwdriver.
-
-
-
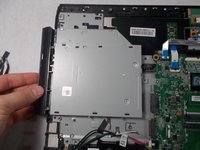
Gently pull the CD drive out, disconnecting it from the motherboard connector marked in blue.
-


To reassemble your device, follow these instructions in reverse order.
To reassemble your device, follow these instructions in reverse order.
crwdns2915084:0crwdne2915084:0

UMass Dartmouth, Team S3-G3, Peak Spring 2018 crwdns2935289:0UMass Dartmouth, Team S3-G3, Peak Spring 2018crwdne2935289:0
UMASSD-PEAK-S18S3G3
crwdns2931471:03crwdne2931471:0
crwdns2935297:08crwdne2935297:0