crwdns2933423:0crwdne2933423:0

Toshiba Satellite E105-S1602 Charging Port Replacement

crwdns2942213:0crwdne2942213:0

  1. Toshiba Satellite E105-S1602 Charging Port Replacement, Battery: crwdns2935265:01crwdnd2935265:01crwdnd2935265:02crwdne2935265:0 Toshiba Satellite E105-S1602 Charging Port Replacement, Battery: crwdns2935265:01crwdnd2935265:02crwdnd2935265:02crwdne2935265:0
    • Slide both of the latches to the outside to release the battery.

  2. Toshiba Satellite E105-S1602 Charging Port Replacement: crwdns2935265:02crwdnd2935265:01crwdnd2935265:02crwdne2935265:0 Toshiba Satellite E105-S1602 Charging Port Replacement: crwdns2935265:02crwdnd2935265:02crwdnd2935265:02crwdne2935265:0
    • Pull the battery out by lifting the battery cover away from the laptop.

  3. Toshiba Satellite E105-S1602 Charging Port Replacement, Keyboard: crwdns2935265:03crwdnd2935265:01crwdnd2935265:03crwdne2935265:0 Toshiba Satellite E105-S1602 Charging Port Replacement, Keyboard: crwdns2935265:03crwdnd2935265:02crwdnd2935265:03crwdne2935265:0 Toshiba Satellite E105-S1602 Charging Port Replacement, Keyboard: crwdns2935265:03crwdnd2935265:03crwdnd2935265:03crwdne2935265:0
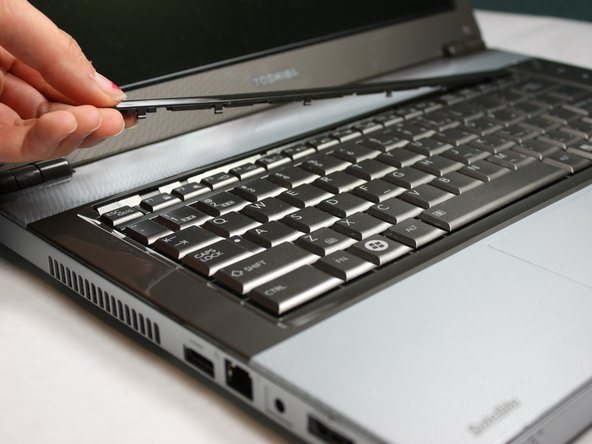
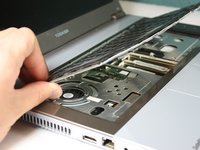
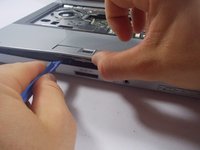
    • Flip the computer over and insert the plastic opening tool under the plastic strip at the top of the keyboard.

    • Pry the top plastic strip from the top of the keyboard.

    • Peel the strip completely away from the keyboard.

  4. Toshiba Satellite E105-S1602 Charging Port Replacement: crwdns2935265:04crwdnd2935265:01crwdnd2935265:02crwdne2935265:0 Toshiba Satellite E105-S1602 Charging Port Replacement: crwdns2935265:04crwdnd2935265:02crwdnd2935265:02crwdne2935265:0
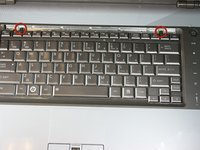
    • Using your Phillips #00, unscrew the two 4.80mm screws at the top of the keyboard.

  5. Toshiba Satellite E105-S1602 Charging Port Replacement: crwdns2935265:05crwdnd2935265:01crwdnd2935265:02crwdne2935265:0 Toshiba Satellite E105-S1602 Charging Port Replacement: crwdns2935265:05crwdnd2935265:02crwdnd2935265:02crwdne2935265:0
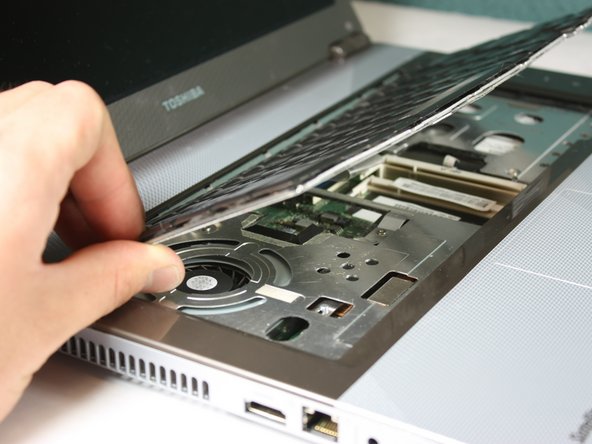
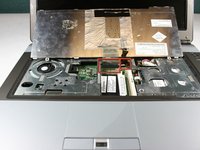
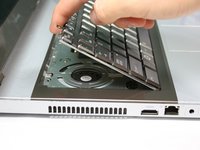
    • When removing the keyboard, be careful not to rip the ribbon cable connecting the keyboard to the computer, to avoid damaging it.

    • Flip the keyboard up from the bottom in order to see the two ribbons connecting it to the motherboard.

  6. Toshiba Satellite E105-S1602 Charging Port Replacement: crwdns2935265:06crwdnd2935265:01crwdnd2935265:01crwdne2935265:0
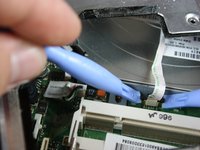
    • Using the plastic opening tools, pop out the ribbon cable from the rest of the computer.

  7. Toshiba Satellite E105-S1602 Charging Port Replacement: crwdns2935265:07crwdnd2935265:01crwdnd2935265:01crwdne2935265:0
    • Using the plastic opening tools, pop out the second ribbon cable from the rest of the computer.

  8. Toshiba Satellite E105-S1602 Charging Port Replacement: crwdns2935265:08crwdnd2935265:01crwdnd2935265:02crwdne2935265:0 Toshiba Satellite E105-S1602 Charging Port Replacement: crwdns2935265:08crwdnd2935265:02crwdnd2935265:02crwdne2935265:0
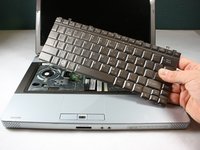
    • Completely remove the keyboard from the laptop by lifting up the part closest to the screen, and then gently pulling out the bottom half.

    • Keep the keyboard safe by storing it on a flat, non-metallic surface until needed.

  9. Toshiba Satellite E105-S1602 Charging Port Replacement, Front Panel: crwdns2935265:09crwdnd2935265:01crwdnd2935265:02crwdne2935265:0 Toshiba Satellite E105-S1602 Charging Port Replacement, Front Panel: crwdns2935265:09crwdnd2935265:02crwdnd2935265:02crwdne2935265:0
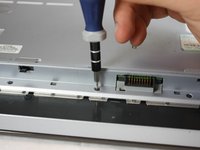
    • Locate the four silver screws on the front panel.

    • Using the Phillips #0, unscrew to remove all four 2.95mm silver screws.

  10. Toshiba Satellite E105-S1602 Charging Port Replacement: crwdns2935265:010crwdnd2935265:01crwdnd2935265:02crwdne2935265:0 Toshiba Satellite E105-S1602 Charging Port Replacement: crwdns2935265:010crwdnd2935265:02crwdnd2935265:02crwdne2935265:0
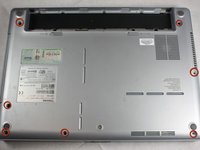
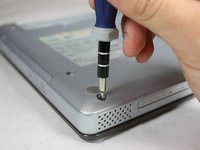
    • Flip the laptop over and locate all seven screws on the bottom of the laptop.

    • Unscrew all seven Philips#00 7.70mm screws.

  11. Toshiba Satellite E105-S1602 Charging Port Replacement: crwdns2935265:011crwdnd2935265:01crwdnd2935265:02crwdne2935265:0 Toshiba Satellite E105-S1602 Charging Port Replacement: crwdns2935265:011crwdnd2935265:02crwdnd2935265:02crwdne2935265:0
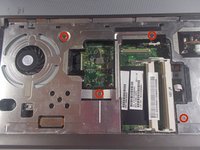
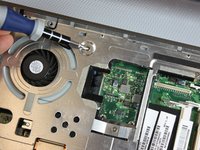
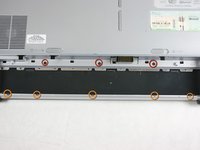
    • Locate and unscrew the three silver Philips #00 2.85mm screws inside the battery compartment.

    • Locate and unscrew the five black Philips #00 3.25mm screws inside the battery compartment.

  12. Toshiba Satellite E105-S1602 Charging Port Replacement: crwdns2935265:012crwdnd2935265:01crwdnd2935265:02crwdne2935265:0 Toshiba Satellite E105-S1602 Charging Port Replacement: crwdns2935265:012crwdnd2935265:02crwdnd2935265:02crwdne2935265:0
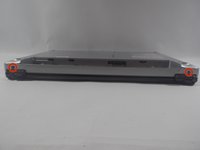
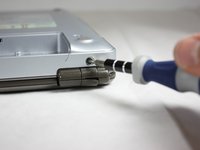
    • Rotate the laptop so the back faces you.

    • Locate the two black Philips #00 7.65 screws, one by each hinge, and remove.

  13. Toshiba Satellite E105-S1602 Charging Port Replacement: crwdns2935265:013crwdnd2935265:01crwdnd2935265:03crwdne2935265:0 Toshiba Satellite E105-S1602 Charging Port Replacement: crwdns2935265:013crwdnd2935265:02crwdnd2935265:03crwdne2935265:0 Toshiba Satellite E105-S1602 Charging Port Replacement: crwdns2935265:013crwdnd2935265:03crwdnd2935265:03crwdne2935265:0
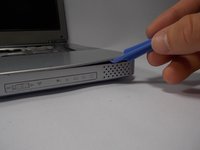
    • Use the plastic opening tool to pry the top panel up from the base of the computer.

    • Slowly work your way around the computer with the plastic removing tool to make it easier to lift the top panel away from the base.

    • Carefully lift the top panel no more than six inches, as there are ribbon cables connecting the two pieces.

    • Disconnect ribbons, and slowly lift the top panel up, away from the base.

  14. Toshiba Satellite E105-S1602 Charging Port Replacement: crwdns2935265:014crwdnd2935265:01crwdnd2935265:02crwdne2935265:0 Toshiba Satellite E105-S1602 Charging Port Replacement: crwdns2935265:014crwdnd2935265:02crwdnd2935265:02crwdne2935265:0
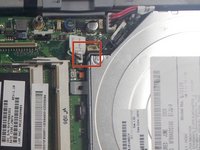
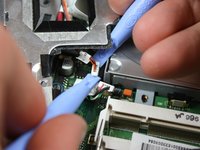
    • Locate the ribbon cable from the motherboard.

    • Using plastic removing tools, pop the ribbon base from the motherboard.

  15. Toshiba Satellite E105-S1602 Charging Port Replacement: crwdns2935265:015crwdnd2935265:01crwdnd2935265:02crwdne2935265:0 Toshiba Satellite E105-S1602 Charging Port Replacement: crwdns2935265:015crwdnd2935265:02crwdnd2935265:02crwdne2935265:0
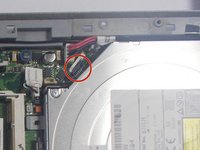
    • Locate the two plugs from the motherboard.

    • Using plastic opening tools, remove each plug from the motherboard.

  16. Toshiba Satellite E105-S1602 Charging Port Replacement: crwdns2935265:016crwdnd2935265:01crwdnd2935265:02crwdne2935265:0 Toshiba Satellite E105-S1602 Charging Port Replacement: crwdns2935265:016crwdnd2935265:02crwdnd2935265:02crwdne2935265:0
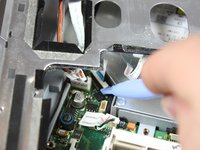
    • Locate the ribbon cable partially hidden under the front panel.

    • Using plastic opening tools, pop out the ribbon cable from the motherboard.

  17. Toshiba Satellite E105-S1602 Charging Port Replacement: crwdns2935265:017crwdnd2935265:01crwdnd2935265:01crwdne2935265:0
    • Make sure that all wires have been disconnected before proceeding to avoid damaging components.

    • Slowly lift the top panel away from the base of the computer.

    • Place the top panel away from the computer and keep in a flat non-metallic surface until needed.

  18. Toshiba Satellite E105-S1602 Charging Port Replacement, Charging Port: crwdns2935265:018crwdnd2935265:01crwdnd2935265:01crwdne2935265:0
    • Locate the charging port on the computer.

  19. Toshiba Satellite E105-S1602 Charging Port Replacement: crwdns2935265:019crwdnd2935265:01crwdnd2935265:02crwdne2935265:0 Toshiba Satellite E105-S1602 Charging Port Replacement: crwdns2935265:019crwdnd2935265:02crwdnd2935265:02crwdne2935265:0
    • Turn the laptop so the side with the charging port is facing you.

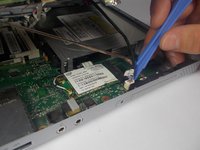
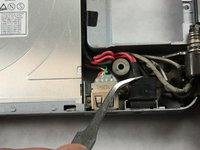
    • Using a tweezer, lift up the charging port to take it out of its retaining slot.

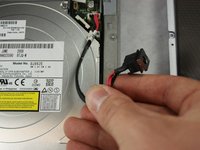
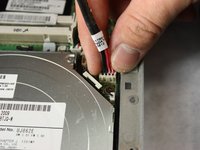
    • Pull the wires out from their nesting place in between the disc drive and the computer body.

  20. Toshiba Satellite E105-S1602 Charging Port Replacement: crwdns2935265:020crwdnd2935265:01crwdnd2935265:02crwdne2935265:0 Toshiba Satellite E105-S1602 Charging Port Replacement: crwdns2935265:020crwdnd2935265:02crwdnd2935265:02crwdne2935265:0
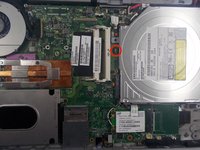
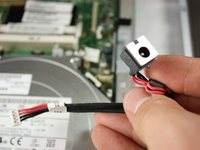
    • Locate the base of the plug on the motherboard.

    • Pull up on the plug to remove the charging port from the motherboard.

crwdns2915888:0crwdne2915888:0

To reassemble your device, follow these instructions in reverse order.

crwdns2935229:02crwdne2935229:0

Ian Washburne

crwdns2935283:001/11/13crwdne2935283:0

59 crwdns2915208:0crwdne2915208:0

crwdns2935297:06crwdne2935297:0

crwdns2915084:0crwdne2915084:0

Cal Poly, Team 17-21, Forte Winter 2013 crwdns2935289:0Cal Poly, Team 17-21, Forte Winter 2013crwdne2935289:0

CPSU-FORTE-W13S17G21

crwdns2931471:05crwdne2931471:0

crwdns2935297:014crwdne2935297:0
crwdns2944067:00crwdne2944067:0

crwdns2917038:0crwdne2917038:0

crwdns2936625:0crwdne2936625:0:

crwdns2936751:024crwdne2936751:0 0

crwdns2936753:07crwdne2936753:0 0

crwdns2936753:030crwdne2936753:0 13

crwdns2942667:0crwdne2942667:0 10,119