crwdns2915892:0crwdne2915892:0
To start this guide make sure you have the appropriate tools and materials. This step is quite simple and easy to follow for the removal of the WiFi card if any damage has occurred to it.
crwdns2942213:0crwdne2942213:0
-
-
Push down on the tablet sides until you feel a click, then pull up.
-
-
-
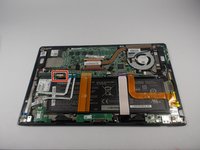
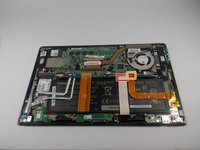
Remove the base of the tablet from the screen using a plastic opening tool.
-
-
crwdns2935267:0crwdne2935267:0Tweezers$4.99
-
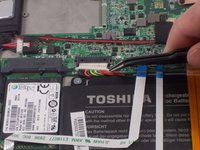
Remove the battery power connector using ESD safe tweezers.
-
-
-
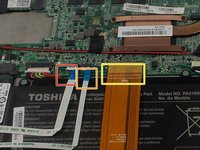
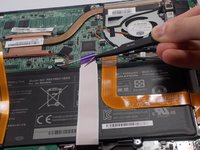
Remove the LED ribbon cable using ESD safe tweezers.
-
Remove the SIM card ribbon cable using ESD safe tweezers.
-
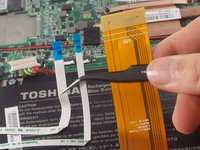
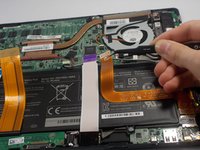
Remove the Docking connector ribbon cable using plastic opening tool.
-
-
-
-
Remove the LCD Display ribbon cable using a plastic opening tool.
-
Remove the I/O ribbon cable using a plastic opening tool.
-
-
-
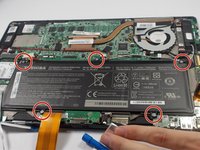
Remove five 3.5mm Phillips J0 screws using a Phillips screw driver.
-
-
-
Remove the battery from its holding position.
-
-
-
Remove the 3mm screw J0 Phillips screw with the Philips screw driver.
-
-
crwdns2935267:0crwdne2935267:0Tweezers$4.99
-
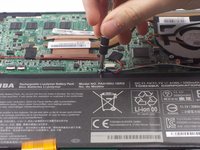
Remove the black and white cables attached using ESD safe tweezers.
-


To reassemble your device, follow these instructions in reverse order.
crwdns2935287:0crwdne2935287:0

UMass Dartmouth, Team 4-3, Catania Spring 2016 crwdns2935289:0UMass Dartmouth, Team 4-3, Catania Spring 2016crwdne2935289:0
UMASSD-CATANIA-S16S4G3
crwdns2931471:03crwdne2931471:0
crwdns2935297:010crwdne2935297:0