crwdns2915892:0crwdne2915892:0
Use this guide to replace a defective or shattered display in a Toshiba Satellite C875-S7304.
The display is a hardware component that presents visual information to you when using a computer. If you start to notice problems with the screen images or the glass screen has become cracked from an accidental drop, the display will need to be replaced.
Review the troubleshooting page before using this guide. Some issues may be resolved through display settings or a software update.
Take precaution when removing the display by disconnecting the laptop from any external power source and powering off your laptop completely before beginning the display replacement.
crwdns2942213:0crwdne2942213:0
-
-
Power off and unplug the charger from your device.
-
Carefully flip your device upside down laying it onto a flat surface with the battery facing you.
-
The two eject switches are located on the right and left side of the battery compartment.
-
-
-
Slide the right switch further towards the right to lock it into place.
-
-
-
Slide the switch to the left. Continue to push the switch because unlike the right switch, it will not lock into place.
-
-
-
Using both hands, continue to push the left switch and grasp onto the center notch located in between the right and left switch.
-
Pull the center notch towards you and you will notice the battery will start to eject.
-
-
-
Lift the battery out carefully using two hands.
-
-
-
-
Carefully flip the device back over so that the 'TOSHIBA' logo faces away from you.
-
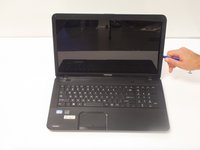
Open the laptop to show the display.
-
-
-
Use the spudger to remove the screw covers and then remove the screws using the Phillips #1.
-
-
-
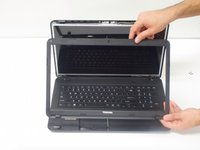
Using the iFixit opening tool, carefully remove the plastic frame from the display.
-
-
-
Remove two screws from each hinge on either side using the Phillips #1 screwdriver.
-
-
-
Rotate the laptop so that the side is facing you.
-
Remove the three screws using the Phillips #1 screwdriver on each side of the display.
-
-
-
Turn the display over to expose the wiring on the other side.
-
-
-
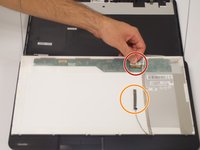
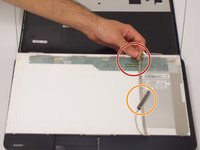
Gently loosen the sliding bracket and remove the cable.
-
If you want to use the same webcam, disconnect it from the back of the display.
-
-
-
With the display now fully disconnected, carefully remove it from the device.
-


To reassemble your device, follow these instructions in reverse order.
To reassemble your device, follow these instructions in reverse order.
crwdns2935221:0crwdne2935221:0
crwdns2935229:03crwdne2935229:0
crwdns2915084:0crwdne2915084:0

University of Alabama, Team S2-G5, Bedsole Fall 2019 crwdns2935289:0University of Alabama, Team S2-G5, Bedsole Fall 2019crwdne2935289:0
UA-BEDSOLE-F19S2G5
crwdns2931471:04crwdne2931471:0
crwdns2935297:015crwdne2935297:0