crwdns2933423:0crwdne2933423:0

Toshiba Satellite C855D-S5303 Fan Replacement

crwdns2942213:0crwdne2942213:0

  1. Toshiba Satellite C855D-S5303 Fan Replacement, Battery: crwdns2935265:01crwdnd2935265:01crwdnd2935265:01crwdne2935265:0
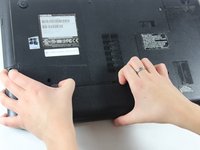
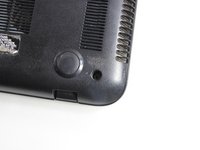
    • Lay your laptop upside down on a flat surface.

    • Power off your laptop and unplug the charger.

    • Make sure you allow the laptop time to cool so that you aren't removing a hot battery.

  2. Toshiba Satellite C855D-S5303 Fan Replacement: crwdns2935265:02crwdnd2935265:01crwdnd2935265:02crwdne2935265:0 Toshiba Satellite C855D-S5303 Fan Replacement: crwdns2935265:02crwdnd2935265:02crwdnd2935265:02crwdne2935265:0
    • Locate the right eject switch, labeled "1".

    • Slide the switch all the way to the right and it should stay in place.

  3. Toshiba Satellite C855D-S5303 Fan Replacement: crwdns2935265:03crwdnd2935265:01crwdnd2935265:01crwdne2935265:0
    • The second eject switch is on the left and it is numbered "2".

    • Slide the switch to the left and remain pushing on it, because unlike switch "1" it will not stay in place on it's own.

  4. Toshiba Satellite C855D-S5303 Fan Replacement: crwdns2935265:04crwdnd2935265:01crwdnd2935265:02crwdne2935265:0 Toshiba Satellite C855D-S5303 Fan Replacement: crwdns2935265:04crwdnd2935265:02crwdnd2935265:02crwdne2935265:0
    • With hand still pushing the left switch, grab onto notch at the center of the two switches.

    • Pull up and towards you. The battery will begin to lift out of the device.

  5. Toshiba Satellite C855D-S5303 Fan Replacement: crwdns2935265:05crwdnd2935265:01crwdnd2935265:01crwdne2935265:0
    • The battery can now be pulled out entirely. You are ready to replace it.

  6. Toshiba Satellite C855D-S5303 Fan Replacement, Hard Drive: crwdns2935265:06crwdnd2935265:01crwdnd2935265:01crwdne2935265:0
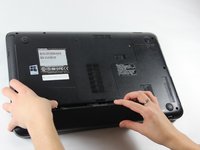
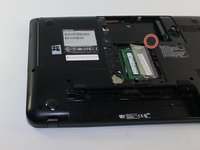
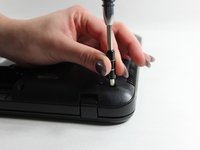
    • Using a small Phillip's head screwdriver, unscrew the single 7 mm screw (5 mm head) on the L-shaped panel on the backside of the laptop.

  7. Toshiba Satellite C855D-S5303 Fan Replacement: crwdns2935265:07crwdnd2935265:01crwdnd2935265:02crwdne2935265:0 Toshiba Satellite C855D-S5303 Fan Replacement: crwdns2935265:07crwdnd2935265:02crwdnd2935265:02crwdne2935265:0
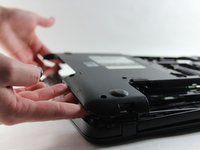
    • Once the screw is removed, pry the panel upwards by gripping the groove pictured.

    • Be careful while removing the panel. Don't apply too much force when lifting as you may crack the plastic.

  8. Toshiba Satellite C855D-S5303 Fan Replacement: crwdns2935265:08crwdnd2935265:01crwdnd2935265:03crwdne2935265:0 Toshiba Satellite C855D-S5303 Fan Replacement: crwdns2935265:08crwdnd2935265:02crwdnd2935265:03crwdne2935265:0 Toshiba Satellite C855D-S5303 Fan Replacement: crwdns2935265:08crwdnd2935265:03crwdnd2935265:03crwdne2935265:0
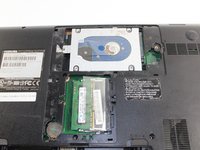
    • Locate the hard drive. It is in a metal casing as pictured.

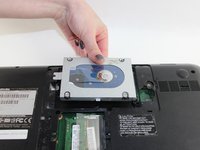
    • To remove, grab the right side of the piece and slide leftwards.

    • Lift up and out.

  9. Toshiba Satellite C855D-S5303 Fan Replacement, Fan: crwdns2935265:09crwdnd2935265:01crwdnd2935265:02crwdne2935265:0 Toshiba Satellite C855D-S5303 Fan Replacement, Fan: crwdns2935265:09crwdnd2935265:02crwdnd2935265:02crwdne2935265:0
    • Now that you have your battery and hard drive removed, it's time to begin unscrewing the back panel.

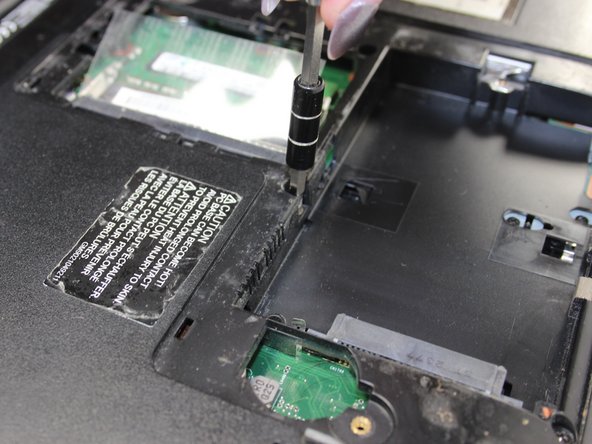
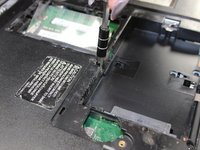
    • Taking a Phillip's head screwdriver, remove the two 7 mm (5 mm head) screws located around the spot where the hard drive once was.

  10. Toshiba Satellite C855D-S5303 Fan Replacement: crwdns2935265:010crwdnd2935265:01crwdnd2935265:02crwdne2935265:0 Toshiba Satellite C855D-S5303 Fan Replacement: crwdns2935265:010crwdnd2935265:02crwdnd2935265:02crwdne2935265:0
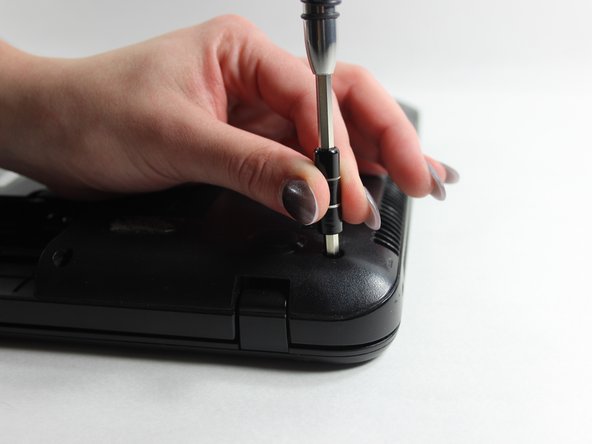
    • There are nine 7 mm (5 mm head) screws located around the perimeter of the laptops back panel. Unscrew them all.

    • Be sure you put all the screws in a safe spot so you do not lose them.

  11. Toshiba Satellite C855D-S5303 Fan Replacement: crwdns2935265:011crwdnd2935265:01crwdnd2935265:03crwdne2935265:0 Toshiba Satellite C855D-S5303 Fan Replacement: crwdns2935265:011crwdnd2935265:02crwdnd2935265:03crwdne2935265:0 Toshiba Satellite C855D-S5303 Fan Replacement: crwdns2935265:011crwdnd2935265:03crwdnd2935265:03crwdne2935265:0
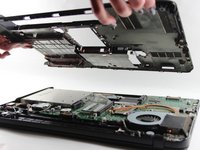
    • Get a grip on one edge of the back panel that is now unscrewed and lift its entirety up and away from the device.

    • Be gentle when lifting the panel. Do not forcefully pull it off.

  12. Toshiba Satellite C855D-S5303 Fan Replacement: crwdns2935265:012crwdnd2935265:01crwdnd2935265:03crwdne2935265:0 Toshiba Satellite C855D-S5303 Fan Replacement: crwdns2935265:012crwdnd2935265:02crwdnd2935265:03crwdne2935265:0 Toshiba Satellite C855D-S5303 Fan Replacement: crwdns2935265:012crwdnd2935265:03crwdnd2935265:03crwdne2935265:0
    • Upon locating your device's fan, look to see if it is dirty or clogged with dust before continuing with the removal process. That may be your only issue.

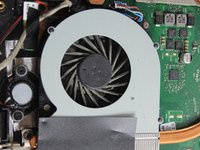
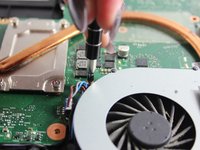
    • To remove the fan, unscrew the two 4 mm (3 mm head) screws that are around the fan.

  13. Toshiba Satellite C855D-S5303 Fan Replacement: crwdns2935265:013crwdnd2935265:01crwdnd2935265:02crwdne2935265:0 Toshiba Satellite C855D-S5303 Fan Replacement: crwdns2935265:013crwdnd2935265:02crwdnd2935265:02crwdne2935265:0
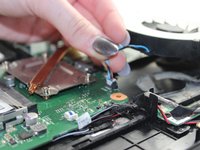
    • Unplug the wire located to the left of the fan by pulling gently upwards.

    • Remember which way you pulled it out. You will want to replace the fan with the colors on the wire in the same orientation.

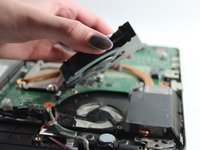
    • Now that the fan is unplugged, you can lift it up and out of the device.

crwdns2915888:0crwdne2915888:0

To reassemble your device, follow these instructions in reverse order.

crwdns2935227:0crwdne2935227:0

Courtney Burns

crwdns2935283:010/20/16crwdne2935283:0

836 crwdns2915208:0crwdne2915208:0

crwdns2935297:05crwdne2935297:0

crwdns2915084:0crwdne2915084:0

UMass Dartmouth, Team 2-5, Isaacson Fall 2016 crwdns2935289:0UMass Dartmouth, Team 2-5, Isaacson Fall 2016crwdne2935289:0

UMASSD-ISAACSON-F16S2G5

crwdns2931471:03crwdne2931471:0

crwdns2935297:010crwdne2935297:0

crwdns2944067:00crwdne2944067:0

crwdns2917038:0crwdne2917038:0

crwdns2936625:0crwdne2936625:0:

crwdns2936751:024crwdne2936751:0 1

crwdns2936753:07crwdne2936753:0 1

crwdns2936753:030crwdne2936753:0 12

crwdns2942667:0crwdne2942667:0 1,464