crwdns2915892:0crwdne2915892:0
Motherboards can get damaged or worn out for a variety of reasons, including physical damage, exposure to water, age, or even bad quality. This guide will show, step by step, how to remove the motherboard from a Toshiba Satellite C855D-S5109 laptop in order to replace it.
Motherboard failure will almost always result in a catastrophic failure of the laptop, so if your laptop completely refuses to turn on and you’ve already checked the battery, replacing the motherboard may restore functionality to your machine.
crwdns2942213:0crwdne2942213:0
-
-
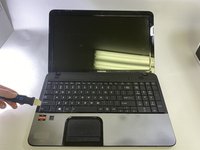
Flip the laptop over so the bottom is facing up.
-
-
-
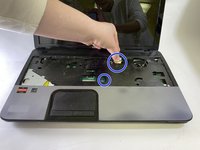
Slide the two lock tabs on the battery to the open position.
-
-
-
While still holding the lock tabs outward, use your hand to grab the top of battery and pull up.
-
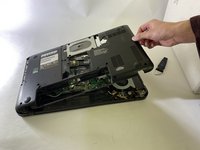
Remove the battery.
-
-
-
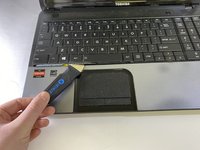
Using a Jimmy, slowly lift the keyboard up and away from the palm-rest. Slowly work around the edges, pushing the clips back, prying the keyboard up with minimal force.
-
-
-
Flip up the locking flap of the ZIF connector holding the keyboard cable on the motherboard.
-
Pull the keyboard ribbon cable out from the connector on the motherboard.
-
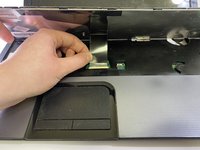
Remove the keyboard from the laptop.
-
-
-
-
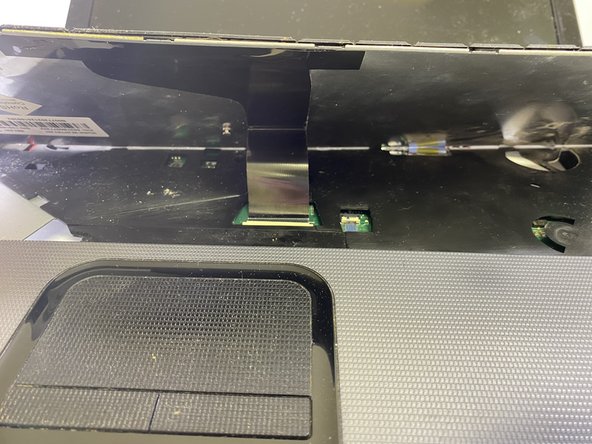
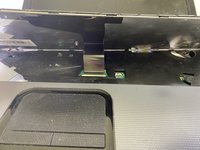
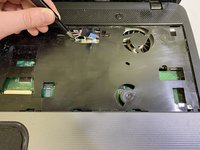
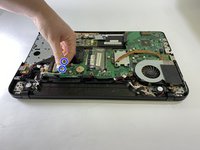
In the area under the keyboard, disconnect the first cable that is located inside of the square near the front right of the laptop.
-
Disconnect the next two cables that are located inside of the square located at the back right of the laptop.
-
-
-
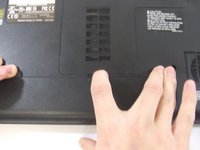
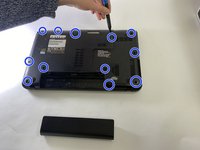
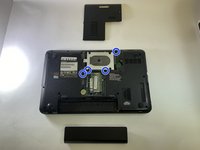
Flip the laptop over and locate all of the underside screws.
-
Remove the ten 6mm Phillips #00 screws around the outside of the bottom panel.
-
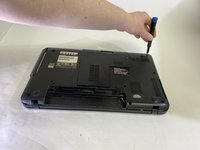
Remove the two 6mm Phillips #00 screws in the panel that cover the hard drive.
-
Remove the panel that covers the hard drive.
-
-
-
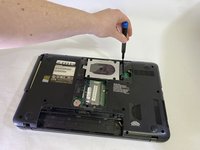
Remove the four 6mm Phillips #00 screws scattered around the hard drive.
-
-
-
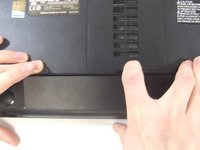
Remove the DVD RW Drive by sliding it out.
-
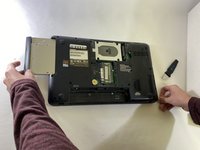
Pull the back panel of the laptop off, exposing the motherboard and other inside components.
-
-
-
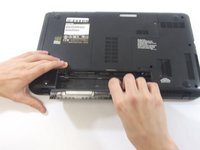
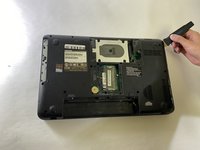
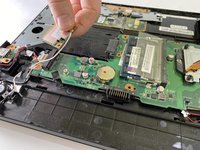
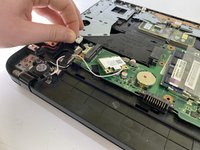
Remove the two screws holding down the wifi card
-
Pull and disconnect the wifi card from the motherboard
-
-
-
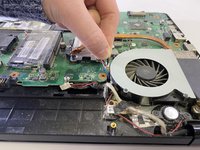
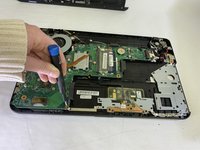
Disconnect the two cables for the DC power socket jack and the side usb board ribbon.
-
-
-
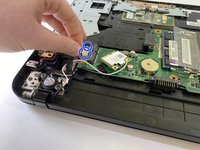
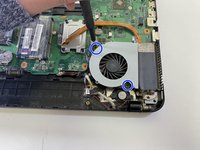
Remove the two 3mm Phillips #00 screws that are holding the cooling fan down.
-
Unplug the wire that is holding the cooling fan to the motherboard.
-
Pull the cooling fan out.
-
-
-
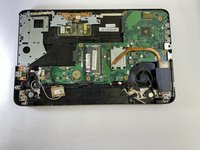
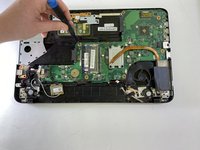
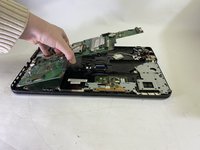
Remove the nine 6mm Phillips #00 screws around the motherboard that are located inside of the yellow circles.
-
Pull the motherboard out of the panel.
-


To reassemble your device, follow these instructions in reverse order.
crwdns2935221:0crwdne2935221:0
crwdns2935227:0crwdne2935227:0

crwdns2935287:0crwdne2935287:0

Casper College, Team 1-3, Lareau Fall 2021 crwdns2935289:0Casper College, Team 1-3, Lareau Fall 2021crwdne2935289:0
CASC-LAREAU-F21S1G3
crwdns2931471:03crwdne2931471:0
crwdns2935297:08crwdne2935297:0