crwdns2933423:0crwdne2933423:0

Toshiba Satellite C655D-S5200 LCD Replacement

crwdns2942213:0crwdne2942213:0

  1. Toshiba Satellite C655D-S5200 LCD Replacement, LCD: crwdns2935265:01crwdnd2935265:01crwdnd2935265:03crwdne2935265:0 Toshiba Satellite C655D-S5200 LCD Replacement, LCD: crwdns2935265:01crwdnd2935265:02crwdnd2935265:03crwdne2935265:0 Toshiba Satellite C655D-S5200 LCD Replacement, LCD: crwdns2935265:01crwdnd2935265:03crwdnd2935265:03crwdne2935265:0
    • Here is the Toshiba Satellite C655D-S5200

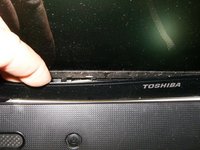
    • Open the laptop with the LCD facing forward. There are four rubber caps, one in each corner

    • Removing the plugs reveal the Phillips screws

  2. Toshiba Satellite C655D-S5200 LCD Replacement: crwdns2935265:02crwdnd2935265:01crwdnd2935265:03crwdne2935265:0 Toshiba Satellite C655D-S5200 LCD Replacement: crwdns2935265:02crwdnd2935265:02crwdnd2935265:03crwdne2935265:0 Toshiba Satellite C655D-S5200 LCD Replacement: crwdns2935265:02crwdnd2935265:03crwdnd2935265:03crwdne2935265:0
    • Remove all four screws, tow on top left and right corner

    • One on the bottom left corner

    • and the bottom right corner.

    • Here are the four M3x5mm screws

  3. Toshiba Satellite C655D-S5200 LCD Replacement: crwdns2935265:03crwdnd2935265:01crwdnd2935265:03crwdne2935265:0 Toshiba Satellite C655D-S5200 LCD Replacement: crwdns2935265:03crwdnd2935265:02crwdnd2935265:03crwdne2935265:0 Toshiba Satellite C655D-S5200 LCD Replacement: crwdns2935265:03crwdnd2935265:03crwdnd2935265:03crwdne2935265:0
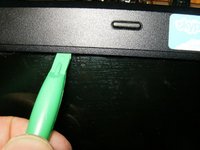
    • Use a plastic opening tool, or similar to pop the bezel of the LCD assembly

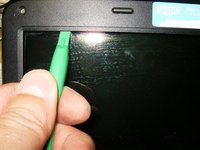
    • Continue to slide the tool all the way across the top

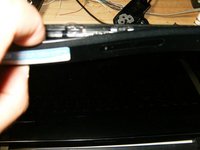
    • Once the bezel has been released from the tabs, it can be further released be applying some gently manual pulling

  4. Toshiba Satellite C655D-S5200 LCD Replacement: crwdns2935265:04crwdnd2935265:01crwdnd2935265:03crwdne2935265:0 Toshiba Satellite C655D-S5200 LCD Replacement: crwdns2935265:04crwdnd2935265:02crwdnd2935265:03crwdne2935265:0 Toshiba Satellite C655D-S5200 LCD Replacement: crwdns2935265:04crwdnd2935265:03crwdnd2935265:03crwdne2935265:0
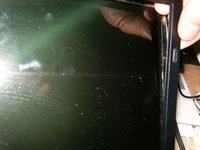
    • Continue to pull gently on the sides

    • and finally on the bottom.

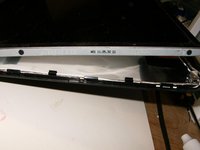
    • With all the tabs released the bezel can now be removed.

  5. Toshiba Satellite C655D-S5200 LCD Replacement: crwdns2935265:05crwdnd2935265:01crwdnd2935265:03crwdne2935265:0 Toshiba Satellite C655D-S5200 LCD Replacement: crwdns2935265:05crwdnd2935265:02crwdnd2935265:03crwdne2935265:0 Toshiba Satellite C655D-S5200 LCD Replacement: crwdns2935265:05crwdnd2935265:03crwdnd2935265:03crwdne2935265:0
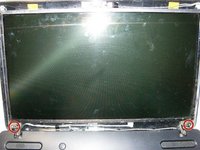
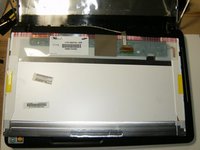
    • Here is the LCD assembly without the bezel

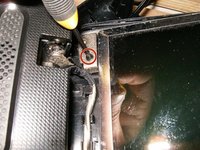
    • Remove the Phillips screw that connects the LCD frame to the back cover. This is the left one

    • Remove the right one as well

  6. Toshiba Satellite C655D-S5200 LCD Replacement: crwdns2935265:06crwdnd2935265:01crwdnd2935265:03crwdne2935265:0 Toshiba Satellite C655D-S5200 LCD Replacement: crwdns2935265:06crwdnd2935265:02crwdnd2935265:03crwdne2935265:0 Toshiba Satellite C655D-S5200 LCD Replacement: crwdns2935265:06crwdnd2935265:03crwdnd2935265:03crwdne2935265:0
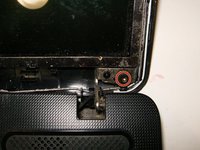
    • The LCD can now be moved forward and away from the rear cover

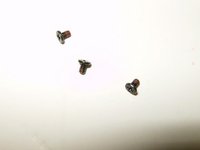
    • There are three screws on either side that hold the panel to the frame. Remove those

    • Here are the three M2x4 screws

  7. Toshiba Satellite C655D-S5200 LCD Replacement: crwdns2935265:07crwdnd2935265:01crwdnd2935265:03crwdne2935265:0 Toshiba Satellite C655D-S5200 LCD Replacement: crwdns2935265:07crwdnd2935265:02crwdnd2935265:03crwdne2935265:0 Toshiba Satellite C655D-S5200 LCD Replacement: crwdns2935265:07crwdnd2935265:03crwdnd2935265:03crwdne2935265:0
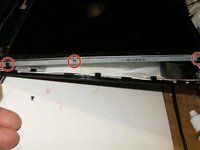
    • Remove the three Phillips screws on the right side as well.

    • with the screws removed the panel can now be moved out of the LCD frame. The LCD is still connected by the display cable.

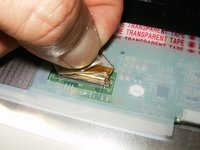
    • The display cable is secured to the connector with some clear adhesive. Remove this frist

  8. Toshiba Satellite C655D-S5200 LCD Replacement: crwdns2935265:08crwdnd2935265:01crwdnd2935265:02crwdne2935265:0 Toshiba Satellite C655D-S5200 LCD Replacement: crwdns2935265:08crwdnd2935265:02crwdnd2935265:02crwdne2935265:0
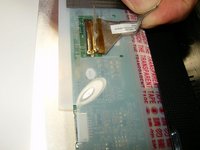
    • Remove the display cable carefully.

    • With the display cable disconnected, the LCD can now be removed and replaced.

crwdns2915888:0crwdne2915888:0

To reassemble your device, follow these instructions in reverse order.

crwdns2935227:0crwdne2935227:0

oldturkey03

crwdns2935283:009/29/10crwdne2935283:0

783,763 crwdns2915208:0crwdne2915208:0

crwdns2935297:0119crwdne2935297:0

crwdns2915084:0crwdne2915084:0

Global Fixers crwdns2935289:0Global Fixerscrwdne2935289:0

Community

crwdns2931471:033crwdne2931471:0

crwdns2935297:0551crwdne2935297:0

crwdns2944067:00crwdne2944067:0

crwdns2917038:0crwdne2917038:0

crwdns2936625:0crwdne2936625:0:

crwdns2936751:024crwdne2936751:0 0

crwdns2936753:07crwdne2936753:0 8

crwdns2936753:030crwdne2936753:0 12

crwdns2942667:0crwdne2942667:0 1,516