crwdns2915892:0crwdne2915892:0
These steps will help guide you to removing the keyboard from your Toshiba Satellite C55-B5302 laptop. This will be more of a time consuming project. Make sure you have all the correct tools.
crwdns2942213:0crwdne2942213:0
-
-
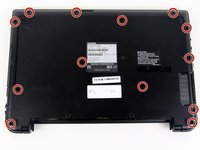
Flip laptop upside down so you can see the screws.
-
-
-
Using the Phillips #0 screwdriver, remove the two 7 mm screws from the back casing.
-
-
-
Pull the battery from the back of the laptop for removal from the laptop.
-
-
-
Remove the remaining 7 mm screws on the back panel of the laptop with a Phillips #0 screwdriver.
-
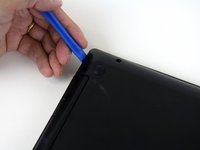
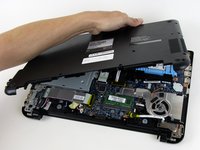
Use the plastic opening tool to pry up a corner of the back panel and continue to pop the back panel off.
-
-
-
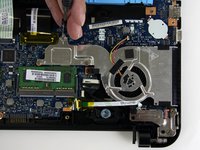
Disconnect the fan wire from the motherboard.
-
-
-
-
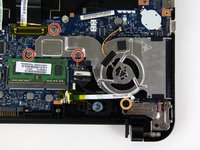
Remove the three 3 mm screws with a Phillips #00 screwdriver.
-
Remove the 5 mm screw with a Phillips #0 screwdriver.
-
-
-
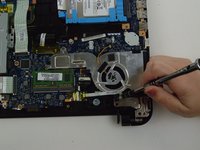
You can now lift the fan out of the laptop.
-
-
-
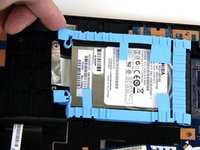
The hard drive is held in place with a soft, blue rubber retainer. The retainer can be disconnected by pulling up on the two tabs at the left side of the hard drive in these images.
-
-
-
Gently pull the hard drive away from the connection to remove it from the laptop.
-
-
-
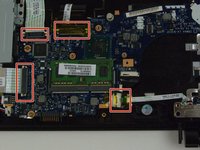
Using a Phillips #00 screwdriver, remove the three 3 mm screws on the board with white arrows pointing to them.
-
-
-
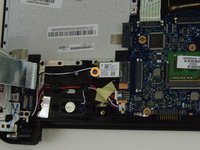
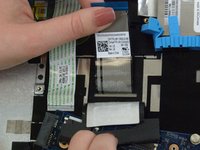
Disconnect the ribbon cables so that you can peel back the keyboard ribbon cable to free it.
-
Remove the 5 mm screw from the chip under the metallic ribbon next to the memory card and disconnect the chip. Use a #0 Phillips screwdriver.
-
-
-
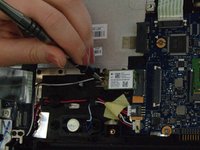
Slide the circuit board toward you so that you can access the keyboard ribbon cable.
-
Separate the keyboard ribbon cable from the plastic it sticks to so that it is free.
-
-
-
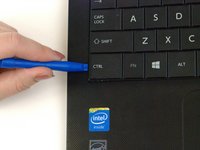
Open the laptop so you can see the keyboard.
-
-
-
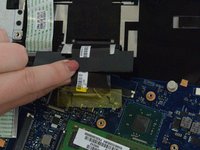
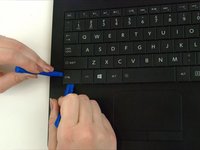
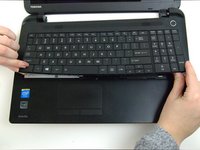
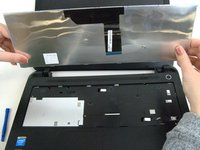
Use one plastic opening tool to slightly pry up the left control key and use another plastic opening tool to push the fasteners out of the way so that the keyboard begins to pop up
-


To reassemble your device, follow these instructions in reverse order.
To reassemble your device, follow these instructions in reverse order.
crwdns2935221:0crwdne2935221:0
crwdns2935229:03crwdne2935229:0
crwdns2915084:0crwdne2915084:0

Linn Benton Community College, Team S1-G6, Karnes Fall 2018 crwdns2935289:0Linn Benton Community College, Team S1-G6, Karnes Fall 2018crwdne2935289:0
LBCC-KARNES-F18S1G6
crwdns2931471:04crwdne2931471:0
crwdns2935297:011crwdne2935297:0