crwdns2915892:0crwdne2915892:0
This guide will walk you through the process of replacing the charging port jack. Replacing the charging jack port is important as it allows the computer to regain a state where it could be utilized again.
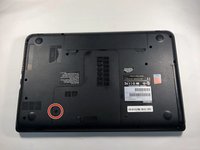
To do so, one must remove the back cover. The back cover is attached by not only screws, but also plastic clips.
crwdns2942213:0crwdne2942213:0
-
-
Press down with your fingers while also applying a sliding motion on the latch buttons near the battery on the underside of your laptop.
-
-
-
Lift the battery upward with your fingers out of the battery compartment.
-
-
-
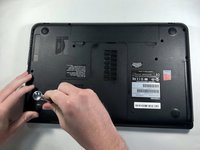
Place laptop with the bottom of it facing up.
-
Remove the single 6mm Phillips #1 screw keeping the laptop panels in place.
-
-
-
Remove the 4mm Phillips #1 screw on the side of the now exposed area.
-
-
-
-
Remove the disc drive from the device.
-
-
-
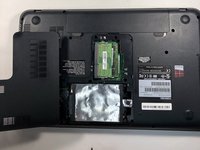
Place the laptop with the bottom facing up.
-
Remove the single 6mm Phillips #1 screw keeping the laptop panels in place.
-
-
-
Using the Phillips #1 screwdriver, remove the 8mm screw that is holding the hard drive in place.
-
-
-
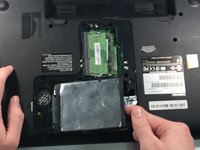
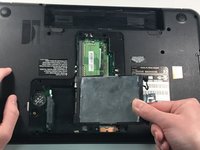
Use your finger to lift the hard drive up.
-
Pull out the hard drive to the right.
-
-
-
Unscrew all 15 screws that attach the back cover to the laptop.
-
Carefully pry the back cover off the laptop using the prying tools, starting from the hard drive side.
-
-
-
Locate the charging jack. Then carefully pull straight up.
-
Unplug the connector by pulling it towards the charging port side of the case, then carefully guide the wires away from the case.
-


To reassemble your device, follow these instructions in reverse order.
To reassemble your device, follow these instructions in reverse order.
crwdns2935221:0crwdne2935221:0
crwdns2935227:0crwdne2935227:0
crwdns2915084:0crwdne2915084:0

IUPUI, Team S8-G8, Wilson Fall 2018 crwdns2935289:0IUPUI, Team S8-G8, Wilson Fall 2018crwdne2935289:0
IUPUI-WILSON-F18S8G8
crwdns2931471:04crwdne2931471:0
crwdns2935297:06crwdne2935297:0
crwdns2947410:01crwdne2947410:0
Hi. Correction on Step 9. Aside from the 15 black screws, I had to unscrew one silver screw. It sits right under the HDD.
Everything else was perfectly described.