crwdns2915892:0crwdne2915892:0
This guide details how to replace the optical drive in your laptop. You will need a pry tool and Phillips screwdriver to complete the prerequisite steps (removing the back of the device) to access the optical drive, remove it, and replace it with a new one.
crwdns2942213:0crwdne2942213:0
-
-
Click button 1 to the unlocked position.
-
-
-
Push and hold button 2 to the left.
-
As you push button 2 to the left position, simultaneously lift up the battery pack.
-
-
-
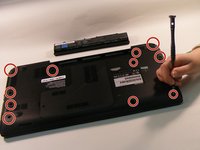
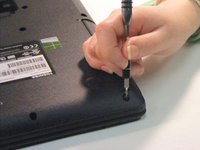
Using the Phillips #1 screwdriver, remove the eleven 2.5mm screws.
-
-
-
-
Remove the one 2.5mm Phillips #1 middle plate screw.
-
-
-
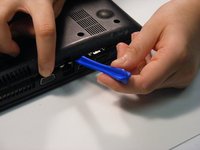
Lift up the middle vent panel.
-
Set the panel to the side.
-
-
-
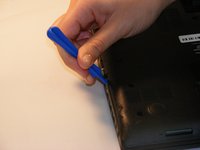
Using the plastic opening tool, remove the outer panel and set to the side.
-
-
-
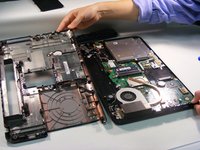
Locate the opticaldrive and find where it is slotted into the motherboard.
-
-
-
Gently lift up the optical drive at a slight angle, and pull it towards you to remove it.
-


To reassemble your device, follow these instructions in reverse order.
crwdns2935287:0crwdne2935287:0

University of Alabama, Team S3-G11, Bedsole Spring 2018 crwdns2935289:0University of Alabama, Team S3-G11, Bedsole Spring 2018crwdne2935289:0
UA-BEDSOLE-S18S3G11
crwdns2931471:03crwdne2931471:0
crwdns2935297:018crwdne2935297:0
crwdns2947410:01crwdne2947410:0
This is an awful guide - it does not tell you that there are another 6 or more screws under the keyboard - this is bad.