crwdns2915892:0crwdne2915892:0
The Toshiba Satellite A105-S4074 relies on its internal fan located over the main processor to keep cool; if there are issues with your system's fan, the laptop may overheat and shut down. Should replacement be required, these easy to follow instructions will guide you through the process.
crwdns2942213:0crwdne2942213:0
-
-
Turn the laptop upside down with the battery facing you.
-
-
-
Slide both the left and right battery release tabs outwards away from center of the laptop.
-
While still holding the left release tab, slide the battery towards you using your right hand.
-
Fully remove the battery from the laptop.
-
-
-
Turn the laptop back over so it is right-side up, with the cover facing up.
-
Open the laptop all the way so that the screen is horizontal with the body.
-
-
-
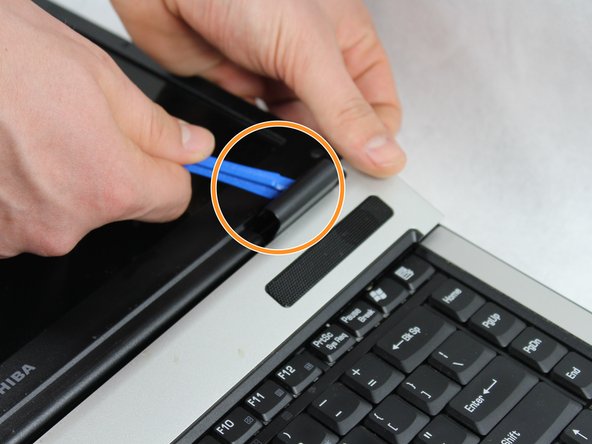
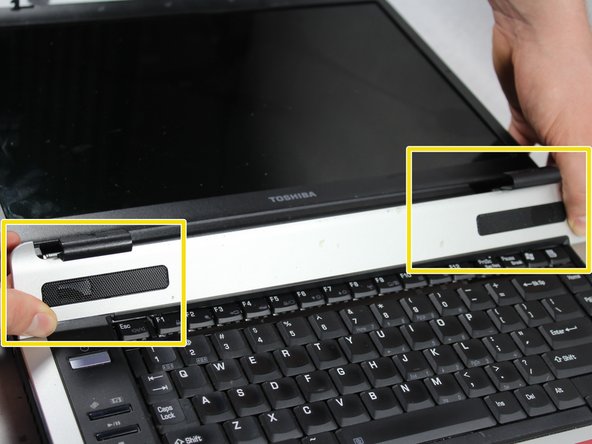
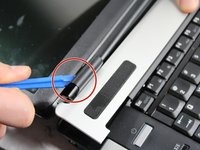
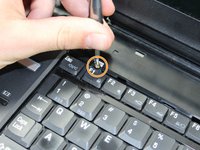
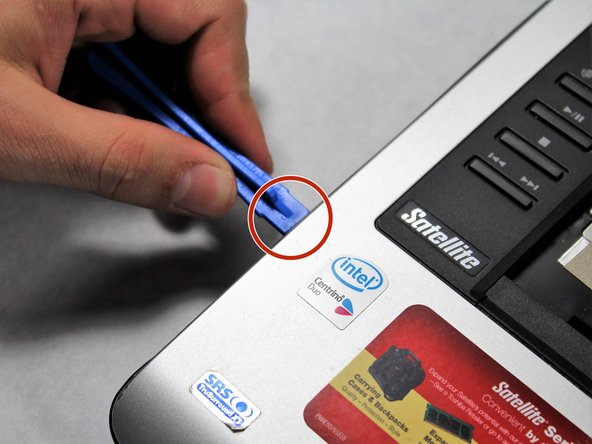
Using the iFixit plastic opening tool, pop up the left tab along the top of the panel that is connected to the hinge for the widescreen display.
-
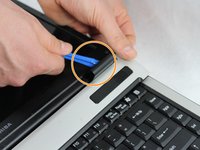
Using the plastic opening tool, pop up the right tab along the top of the panel that is connected to the hinge for the widescreen display.
-
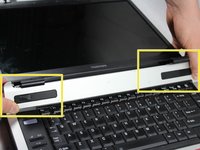
Pry up and remove the cover panel that is located above the keyboard.
-
-
-
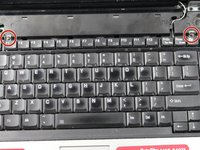
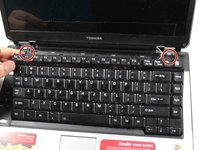
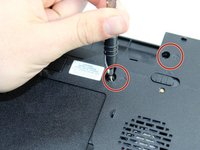
Position laptop so that both screws connecting the keyboard to the laptop are visible.
-
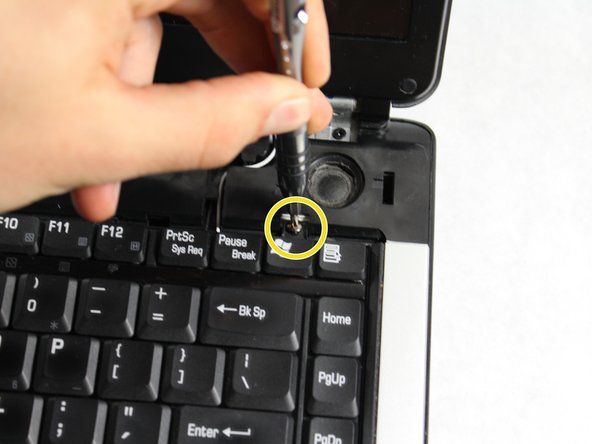
Unscrew the left 3.0 mm screw that is holding the keyboard onto the laptop using the Phillips #0 screwdriver.
-
Unscrew the right 3.0 mm screw that is holding the keyboard onto the laptop using the Phillips #0 screwdriver.
-
-
-
-
Gently lift the keyboard from either side where the screws were located.
-
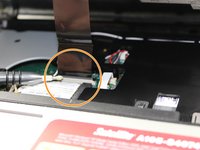
Locate where the ribbon cable connects to the motherboard, and gently open clamp.
-
Pull out the ribbon cable connecting the keyboard to the laptop.
-
-
-
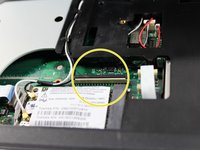
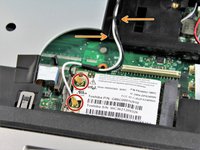
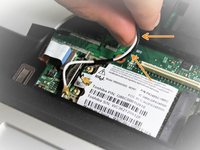
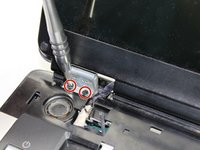
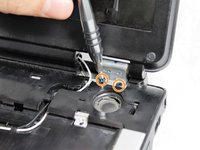
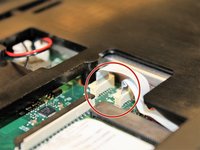
Carefully detach the black and white antenna cables connecting the widescreen display to the Intel® Pro/Wireless 3945ABG card on the motherboard by lifting the brass connectors with your fingers.
-
Remove the black and white antenna cables from the channel guides in the bottom half of the laptop.
-
-
-
Unscrew the two 4.0 mm screws from the left hinge located at the base of the widescreen display using the Phillips #1 screwdriver.
-
Unscrew the two 4.0 mm screws from the right hinge located at the base of the widescreen display using the Phillips #1 screwdriver.
-
Gently disconnect the black video cable that connects the screen to the motherboard.
-
-
-
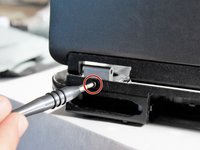
Turn the computer around so the screen faces away from you, and unscrew the 5.0 mm screws on the left back hinge using the Phillips #1 screwdriver.
-
Turn the computer around so the screen faces away from you, and unscrew the 5.0 mm screws on the right back hinge using the Phillips #1 screwdriver.
-
Remove the display and set it aside.
-
-
-
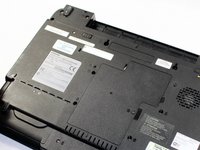
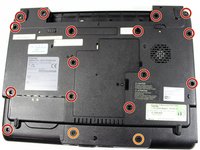
Turn the laptop over with battery slot facing away from you.
-
Remove the fifteen 6.0 mm (B6) screws from bottom of laptop using the Phillips #1 screwdriver.
-
Remove the two 5.0 mm (F4) screws from the bottom of the laptop using the Phillips #1 screwdriver.
-
-
-
Turn the laptop back over right-side up with the touchpad facing you.
-
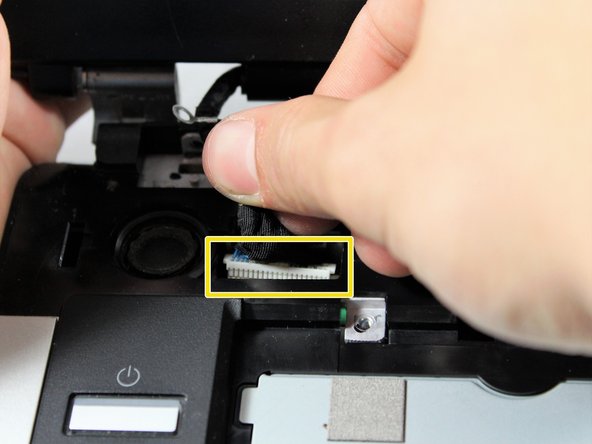
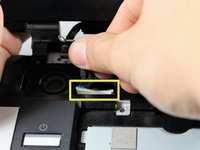
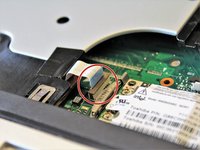
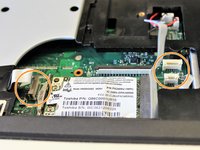
Locate the three ribbon cables that are connected to the motherboard.
-
Gently open the clamps, and remove the cables.
-
-
-
Using the plastic opening tool, gently pry up on the upper casing of the laptop separating it from the lower casing.
-
Slowly work the tool around the sides of the case until the two pieces are completely separated from each other.
-
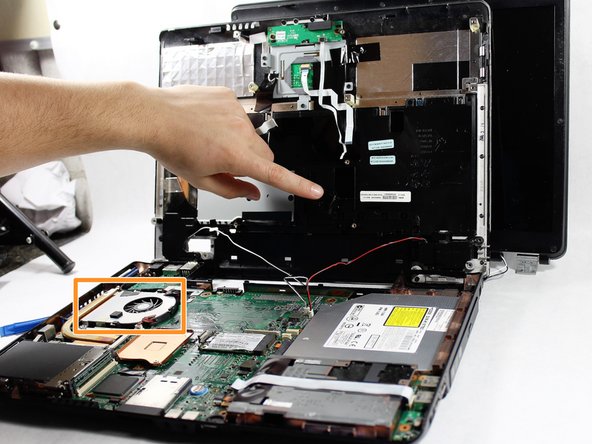
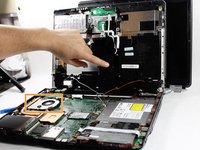
Remove the upper casing from the bottom casing using your hands.
-
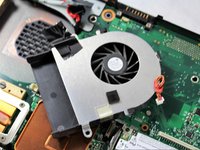
With the laptop separated, you should be able to see the CPU fan.
-
-
-
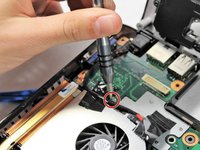
Remove the two 3.0 mm screws on each side of the fan using the Phillips #0 screwdriver.
-
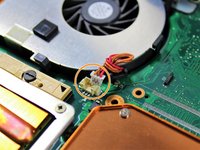
Gently remove the fan's power supply by pulling up on the small white connector (with orange and red wires).
-
Slowly lift up and slide out the fan from the CPU (heat sink) and back of the laptop.
-


To reassemble your device after replacing the fan, follow these instructions in reverse order.
To reassemble your device after replacing the fan, follow these instructions in reverse order.
crwdns2935221:0crwdne2935221:0
crwdns2935229:03crwdne2935229:0
crwdns2915084:0crwdne2915084:0

UMass Dartmouth, Team S2-G1, Isaacson Spring 2017 crwdns2935289:0UMass Dartmouth, Team S2-G1, Isaacson Spring 2017crwdne2935289:0
UMASSD-ISAACSON-S17S2G1
crwdns2931471:04crwdne2931471:0
crwdns2935297:015crwdne2935297:0