crwdns2933423:0crwdne2933423:0

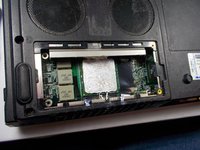
Toshiba Satellite 2435-S255 Heat Sink Replacement

crwdns2942213:0crwdne2942213:0

  1. Toshiba Satellite 2435-S255 Heat Sink Replacement, Removing the Latch: crwdns2935265:01crwdnd2935265:01crwdnd2935265:02crwdne2935265:0 Toshiba Satellite 2435-S255 Heat Sink Replacement, Removing the Latch: crwdns2935265:01crwdnd2935265:02crwdnd2935265:02crwdne2935265:0
    • The latch on this is tricky. Fortunately, it’s the only thing you have to deal with.

    • First, slide the latch until you hit resistance. At this point, you have two options.

    • You can either keep pushing the latch until the battery pops out. . .

    • or you can start prying the battery out while pushing the latch (as shown in the second picture above).

  2. Toshiba Satellite 2435-S255 Heat Sink Replacement, Remove the Battery: crwdns2935265:02crwdnd2935265:01crwdnd2935265:01crwdne2935265:0
    • Just lift the battery up and out, making sure to lift from the end near the latch.

    • Now the battery is out! To put it back, just insert it back in from the same angle you took it out on.

  3. Toshiba Satellite 2435-S255 Heat Sink Replacement, Unscrew and Remove the Cover: crwdns2935265:03crwdnd2935265:01crwdnd2935265:01crwdne2935265:0
    • Using a T6 screwdriver, unscrew the two indicated 4mm screws to remove the panel.

    • After that, simply lift and pull out the cover panel.

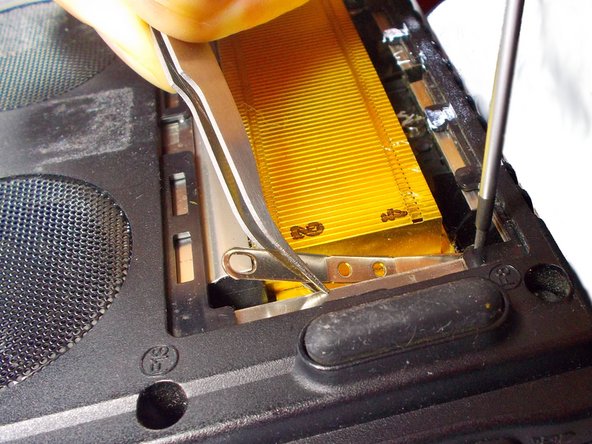
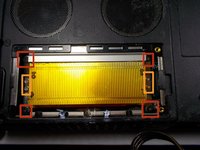
  4. Toshiba Satellite 2435-S255 Heat Sink Replacement, Remove the Heat Sink Brackets: crwdns2935265:04crwdnd2935265:01crwdnd2935265:02crwdne2935265:0 Toshiba Satellite 2435-S255 Heat Sink Replacement, Remove the Heat Sink Brackets: crwdns2935265:04crwdnd2935265:02crwdnd2935265:02crwdne2935265:0
    crwdns2935267:0crwdne2935267:0
    Tweezers
    $4.99
    crwdns2942207:0crwdne2942207:0
    • This step can be kind of tricky. Using a PH00 screwdriver, remove the eight indicated screws. The screws in the four corners are 5mm while the four screws on the left and right sides are 3mm.

    • It doesn’t matter which order you unscrew them when removing the heat sink.

    • If you’re removing one of the top or bottom (red) ones for that side last, make sure to use a pair of tweezers to hold the other end so that the bracket doesn’t drop into the laptop.

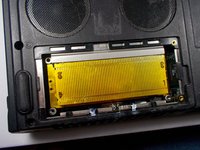
  5. Toshiba Satellite 2435-S255 Heat Sink Replacement, Pull Out the Heat Sink: crwdns2935265:05crwdnd2935265:01crwdnd2935265:02crwdne2935265:0 Toshiba Satellite 2435-S255 Heat Sink Replacement, Pull Out the Heat Sink: crwdns2935265:05crwdnd2935265:02crwdnd2935265:02crwdne2935265:0
    • To remove the heat sink, pull it away from the fan and up.

    • You’ll probably need to wiggle it around a bit, but it should come out easily.

    • Be careful, however; there will be thermal paste in the middle of the bottom, where it connected to the CPU. If you’re putting in a new heat sink, I recommend cleaning off the CPU and applying a new layer of thermal paste.

    • Done! The heat sink is out. Check the conclusion for a little information on putting it back in.

crwdns2915888:0crwdne2915888:0

When re-installing the heat sink, start with one of the top/bottom screws for the bracket, then do the middle two, and then the last top/bottom one. For the last screw, push down on that end of the bracket so the screwholes line up. Otherwise, follow these instructions in reverse order.

Jonathan Lancey

crwdns2935283:010/22/14crwdne2935283:0

1 crwdns2915208:0crwdne2915208:0

crwdns2935297:03crwdne2935297:0

crwdns2915084:0crwdne2915084:0

UMass Dartmouth, Team 1-5, Shastany Fall 2014 crwdns2935289:0UMass Dartmouth, Team 1-5, Shastany Fall 2014crwdne2935289:0

UMASSD-SHASTANY-F14S1G5

crwdns2931471:03crwdne2931471:0

crwdns2935297:09crwdne2935297:0

crwdns2944067:00crwdne2944067:0

crwdns2917038:0crwdne2917038:0

crwdns2936625:0crwdne2936625:0:

crwdns2936751:024crwdne2936751:0 2

crwdns2936753:07crwdne2936753:0 3

crwdns2936753:030crwdne2936753:0 14

crwdns2942667:0crwdne2942667:0 419