crwdns2915892:0crwdne2915892:0
A touchpad is extremely important in the use of laptops. The touchpad can often cause the cursor to not move in the right direction, or not at all. When these are continual problems, the best solution is to replace the faulty touchpad with a new one.
crwdns2942213:0crwdne2942213:0
-
-
Remove all external devices from the Toshiba Chromebook 2.
-
-
-
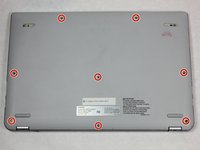
Close the Toshiba Chromebook 2 and turn it over so that the bottom of the laptop is facing upwards toward you with the lettering on the bottom facing right side up.
-
-
-
Remove the 8 visible Phillips 8.25 mm screws using the Phillips #0 screwdriver.
-
-
-
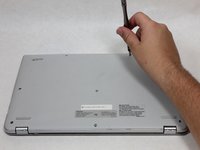
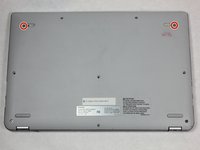
Remove 2 hidden Phillips 8.25 mm screws located underneath the rubber grips at the back (opposite the hinges) with the Phillips #0 screwdriver.
-
-
-
Remove the back panel by pulling up on 2 adjacent corners.
-
-
-
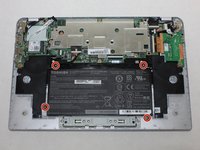
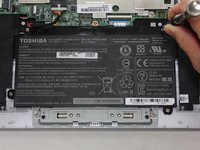
Remove the 4 Phillips 2 mm screws holding the battery in place with the Phillips #0 screwdriver.
-
-
-
-
Press down on the white clip and softly pull the wires out of the port to disconnect battery from the motherboard.
-
-
-
Remove the battery by gently pulling up on the bottom corners.
-
-
-
Remove the 2 3.3 mm screws holding the left and right speakers with the Phillips #0 screwdriver.
-
-
-
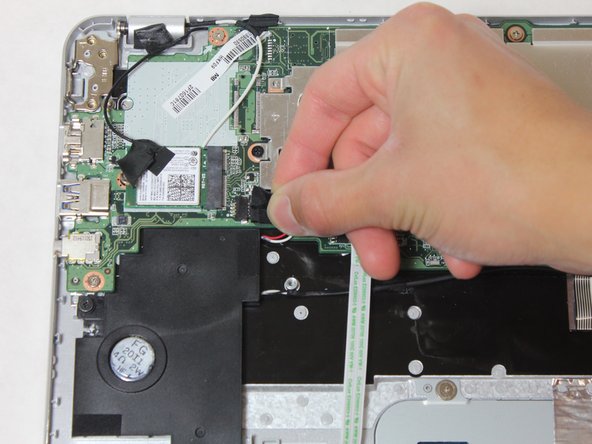
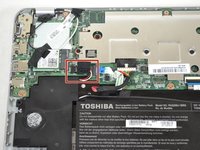
Pull the red and white wires out of the socket above the left speaker to disconnect the speakers from the motherboard.
-
-
-
Remove the speakers by lifting upwards.
-
-
-
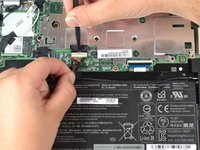
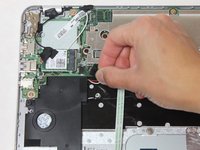
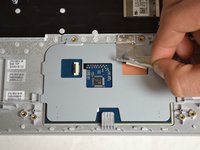
Detach the ribbon cable connected to the motherboard by gently pulling near the top fold.
-
-
-
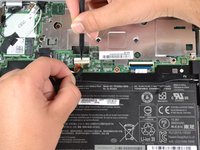
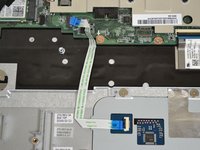
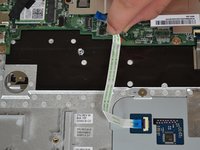
Detach the ribbon cable connected to the touch pad by gently pulling near the bottom fold.
-
-
-
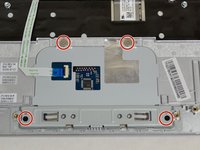
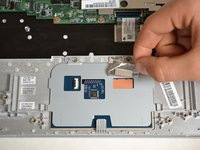
Remove all four 3.70mm screws around the edges of the touchpad using a Phillips #0 screwdriver.
-
-
-
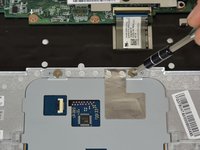
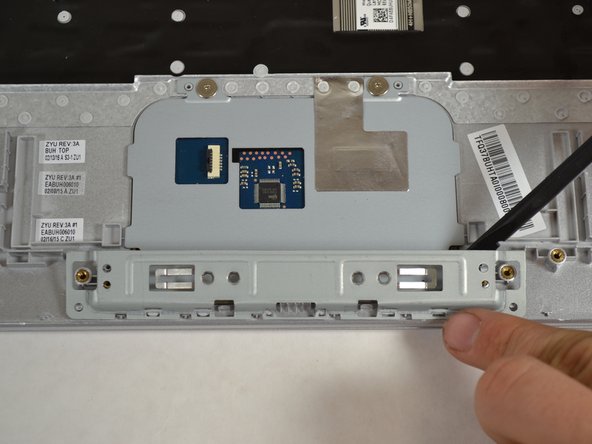
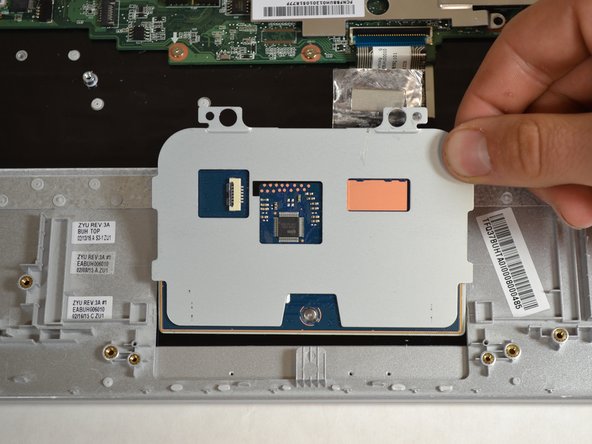
Use the spudger to push up on the metal cover below the touch pad until it reaches 90 degrees then pull up to detach.
-
-
-
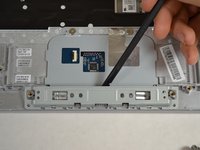
Peel back the aluminum foil piece on the top right corner of the touchpad.
-
-
-
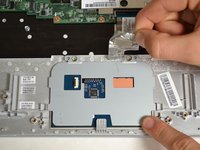
Push down on the bottom right corner and slowly lift up in the upper right hand corner until the touch pad comes out.
-


To reassemble your device, follow these instructions in reverse order.
To reassemble your device, follow these instructions in reverse order.
crwdns2935221:0crwdne2935221:0
crwdns2935229:04crwdne2935229:0
crwdns2915084:0crwdne2915084:0

Cal Poly, Team 10-4, Livingston Fall 2016 crwdns2935289:0Cal Poly, Team 10-4, Livingston Fall 2016crwdne2935289:0
CPSU-LIVINGSTON-F16S10G4
crwdns2931471:04crwdne2931471:0
crwdns2935297:011crwdne2935297:0
crwdns2947412:02crwdne2947412:0
Thanks for this guide! Worked perfectly.
This is great! I was able to save our school the cost of a replacement computer!